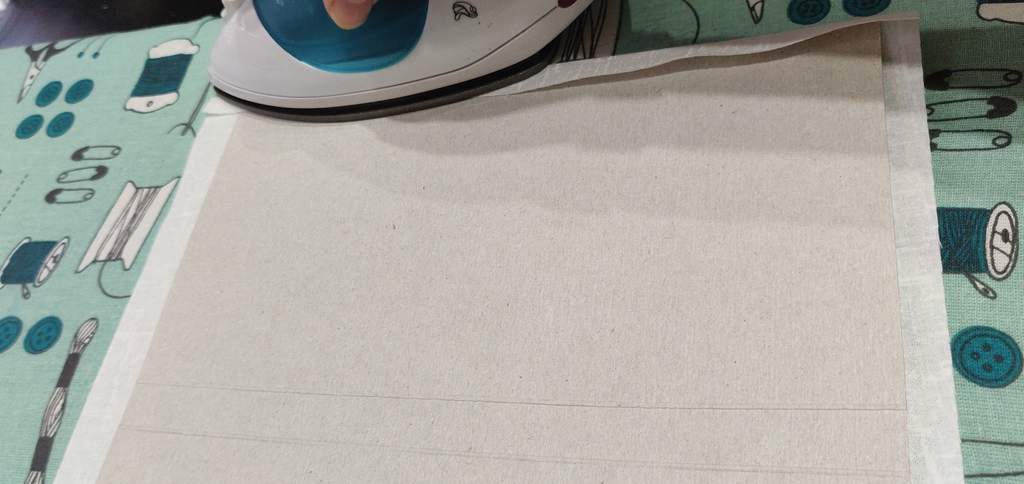
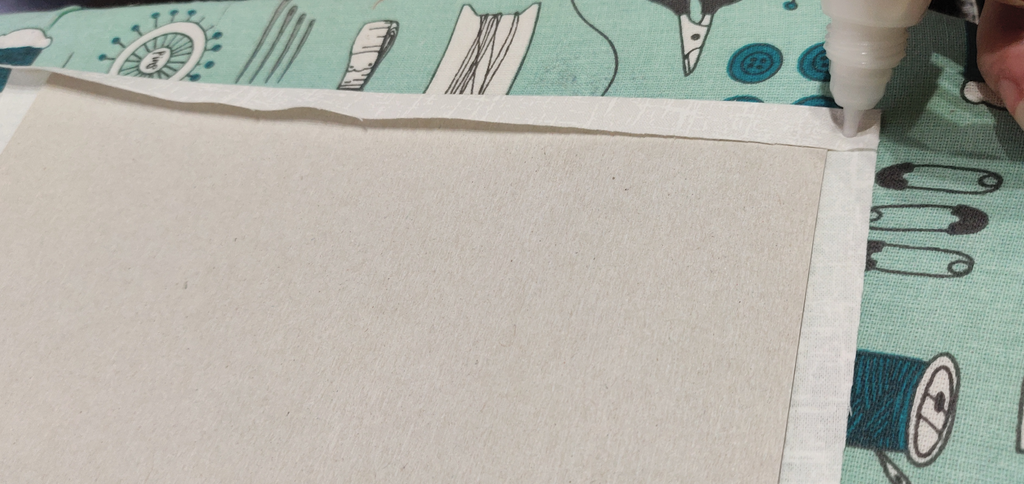
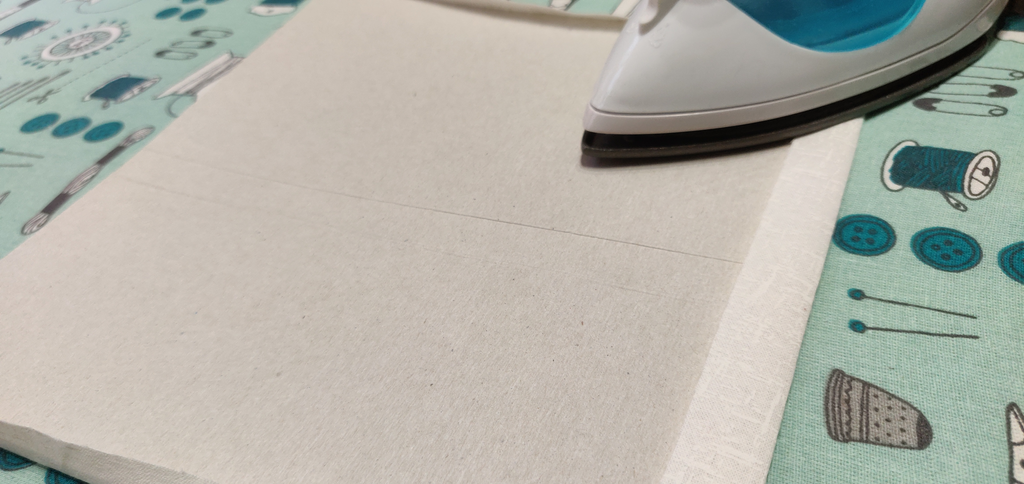
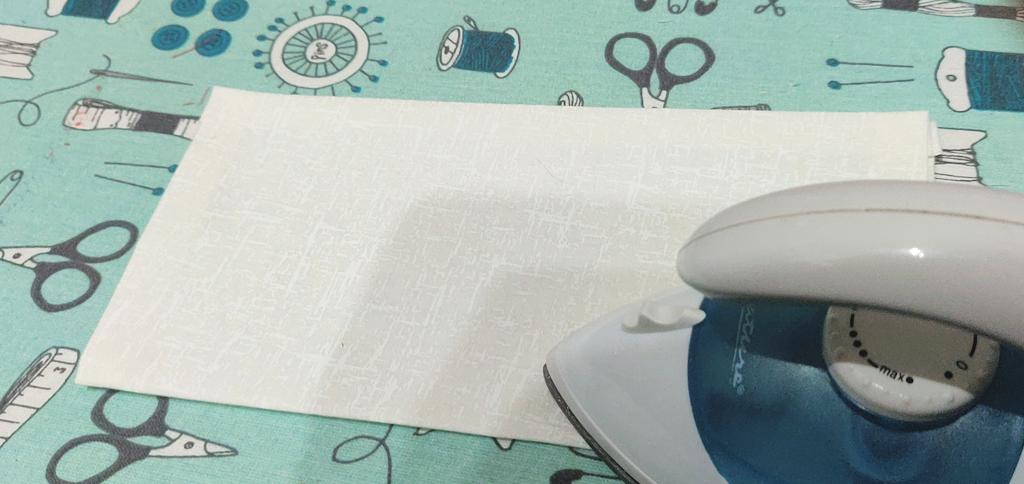
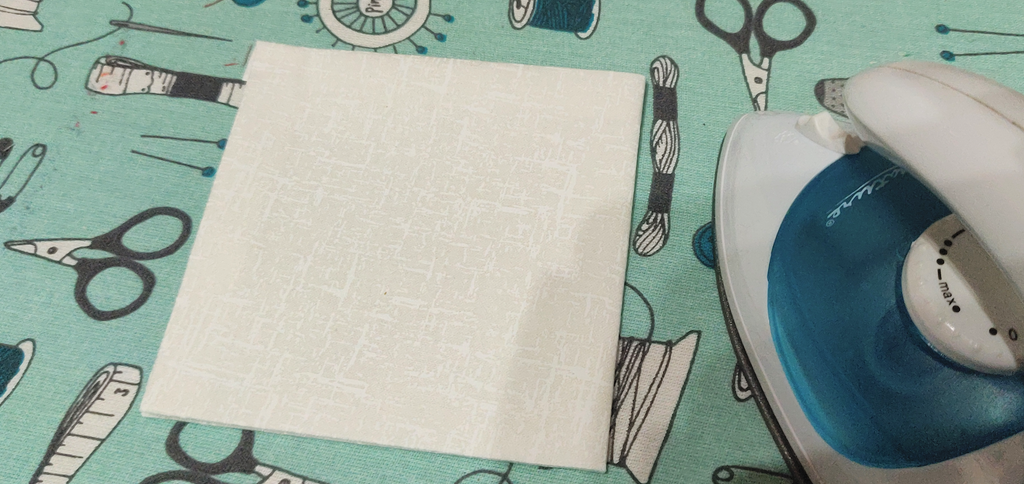
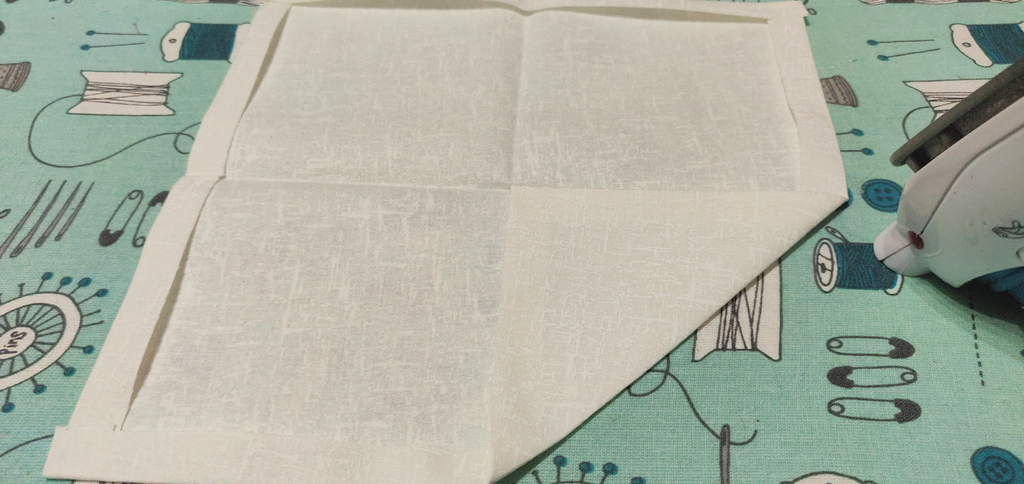
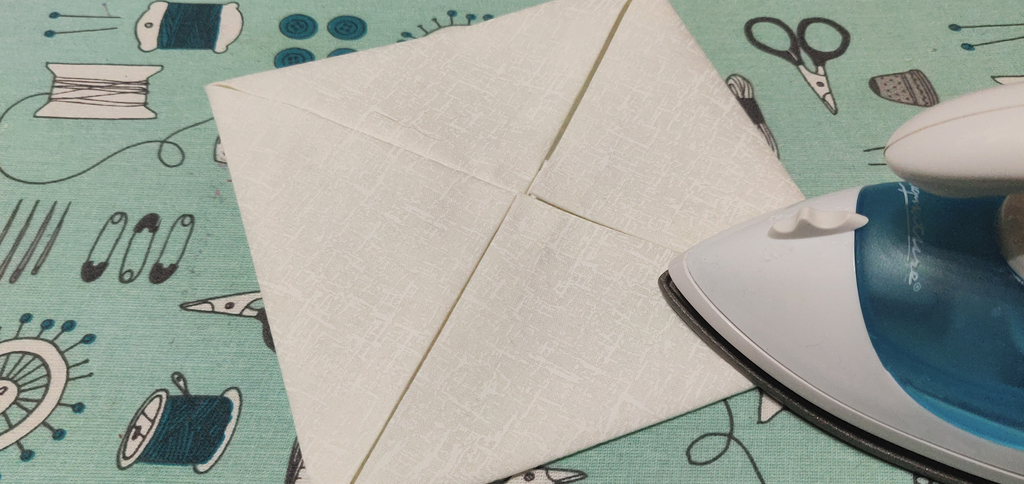
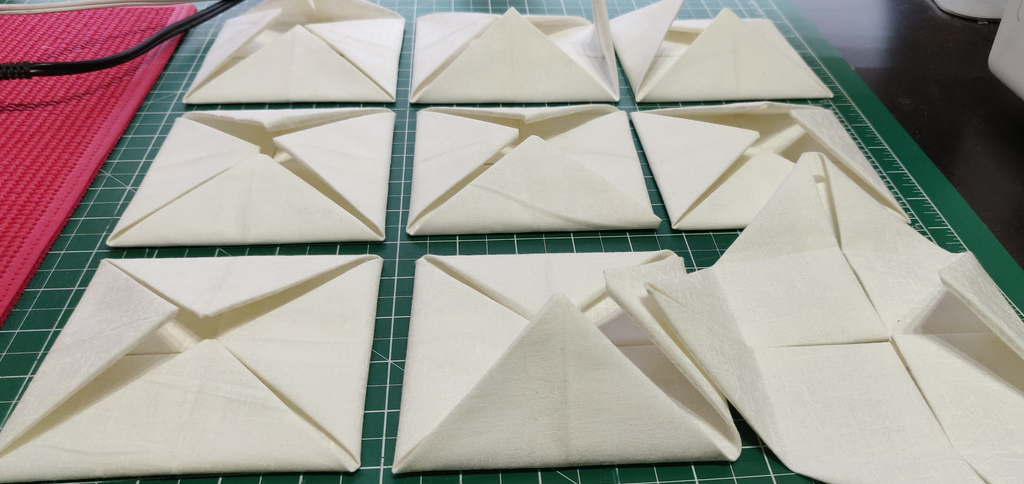
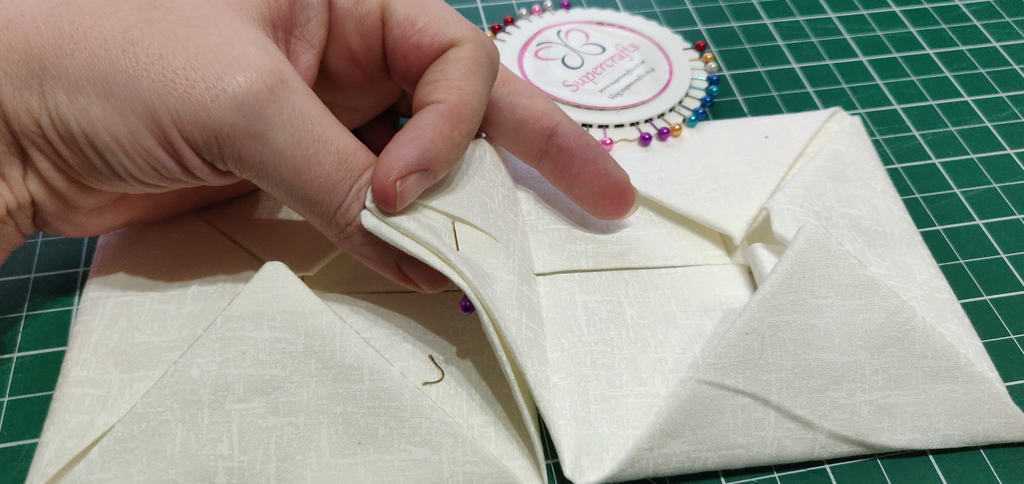
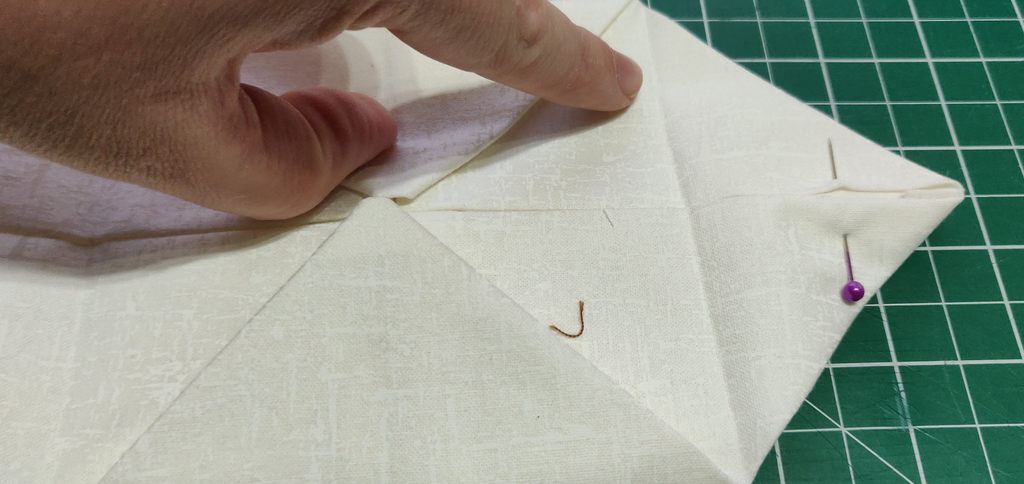
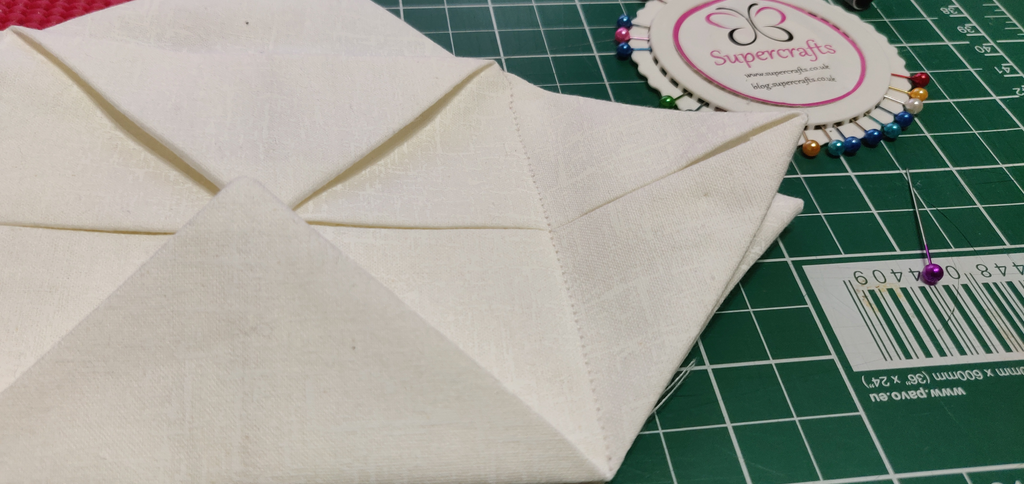
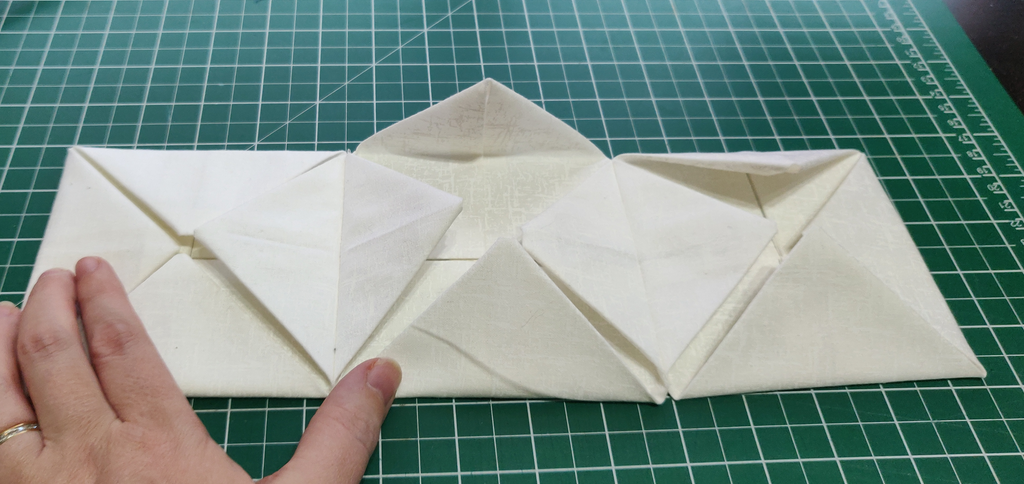
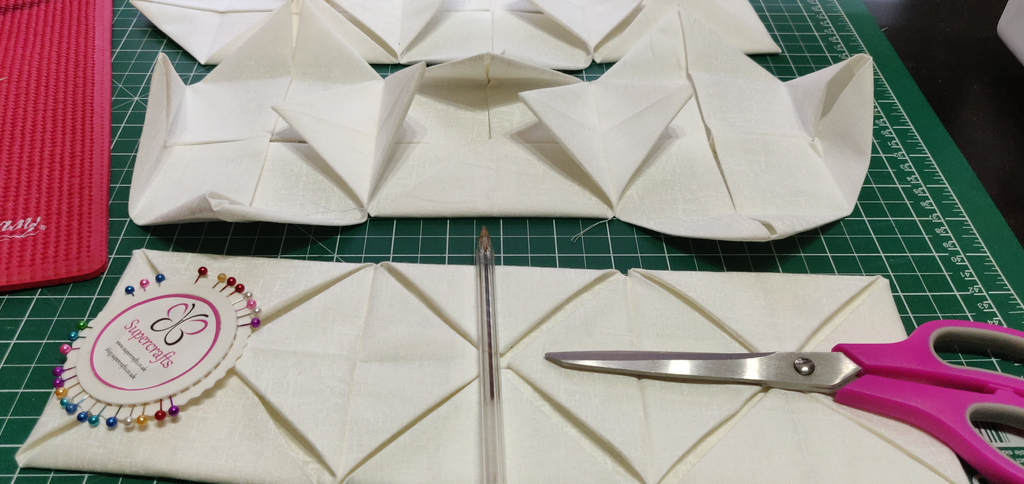
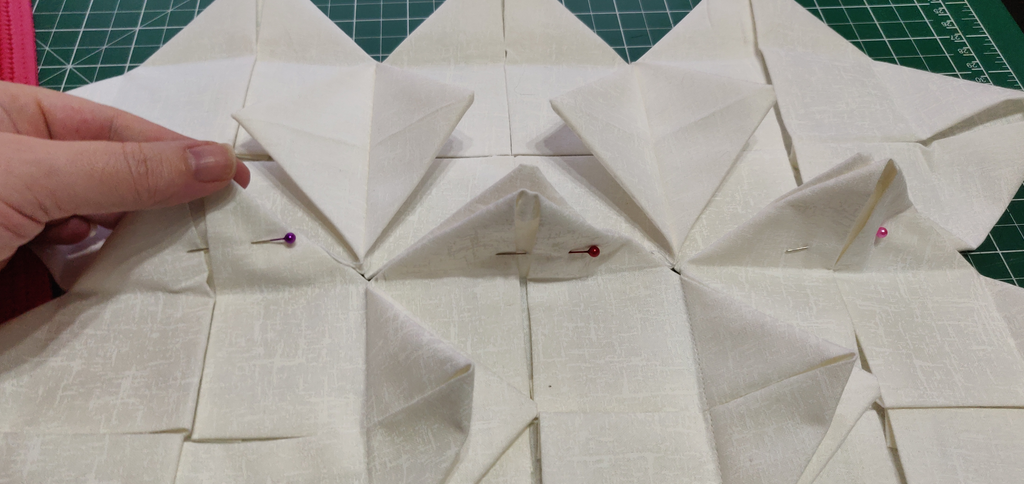
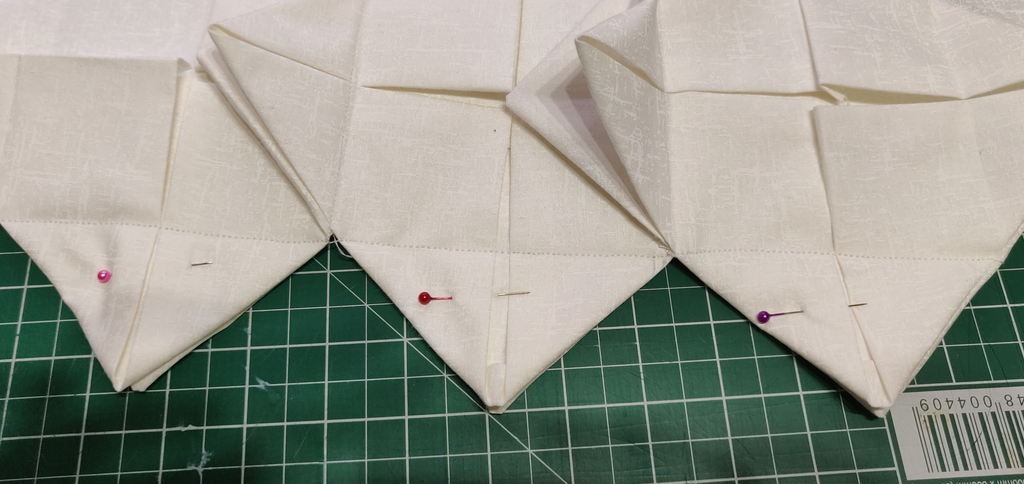
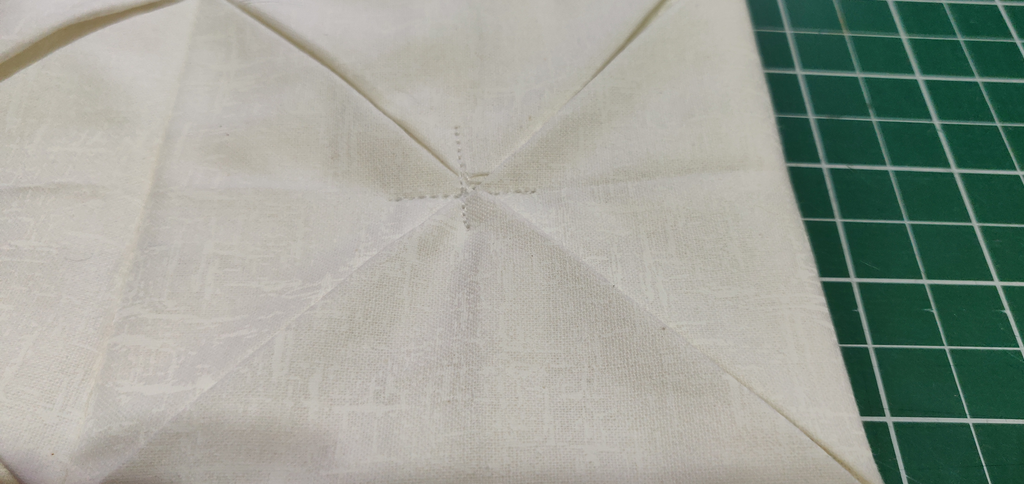
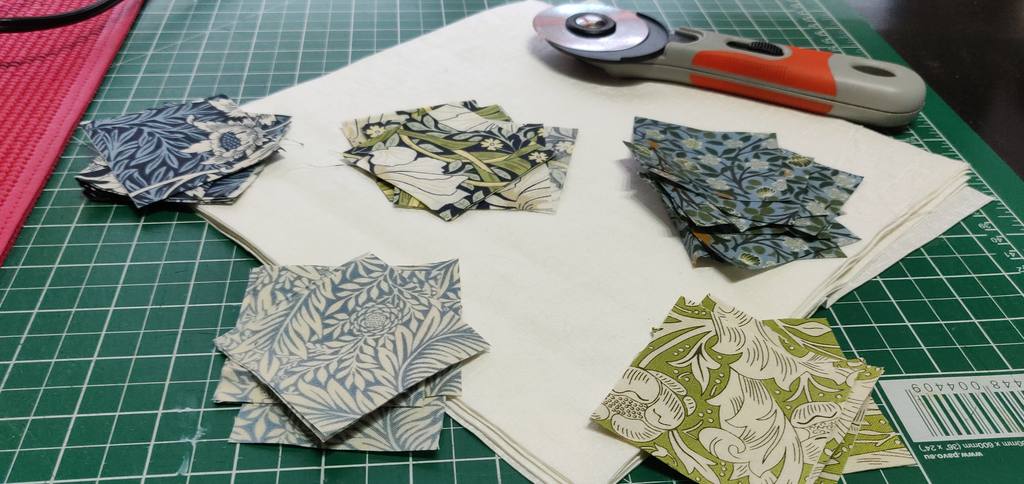
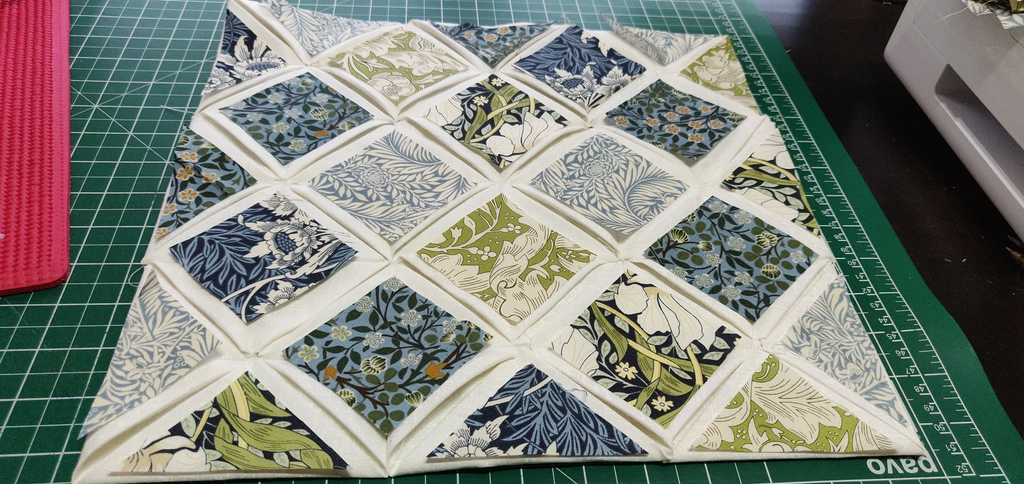
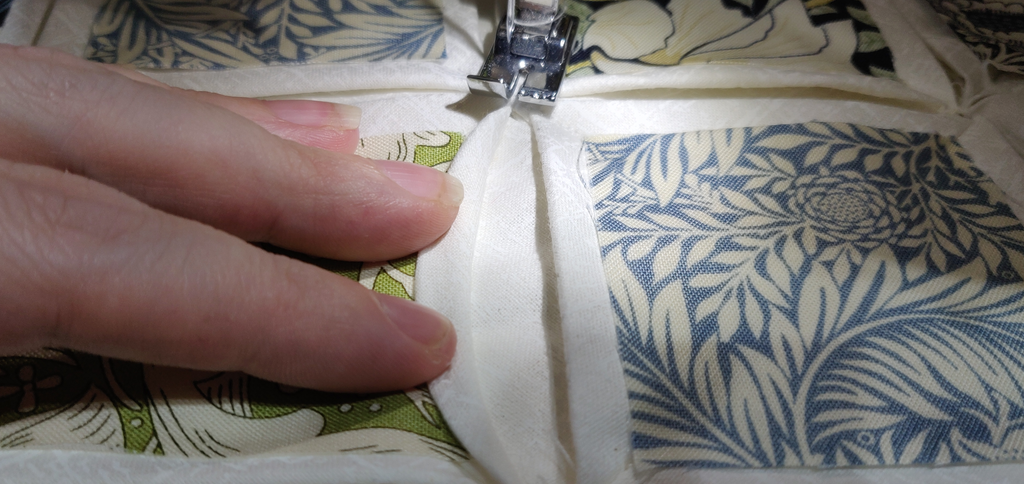
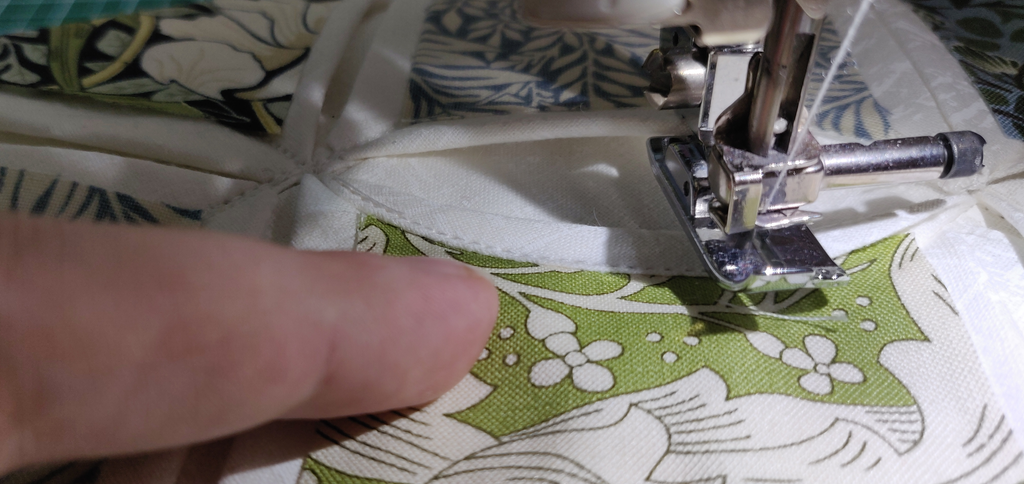
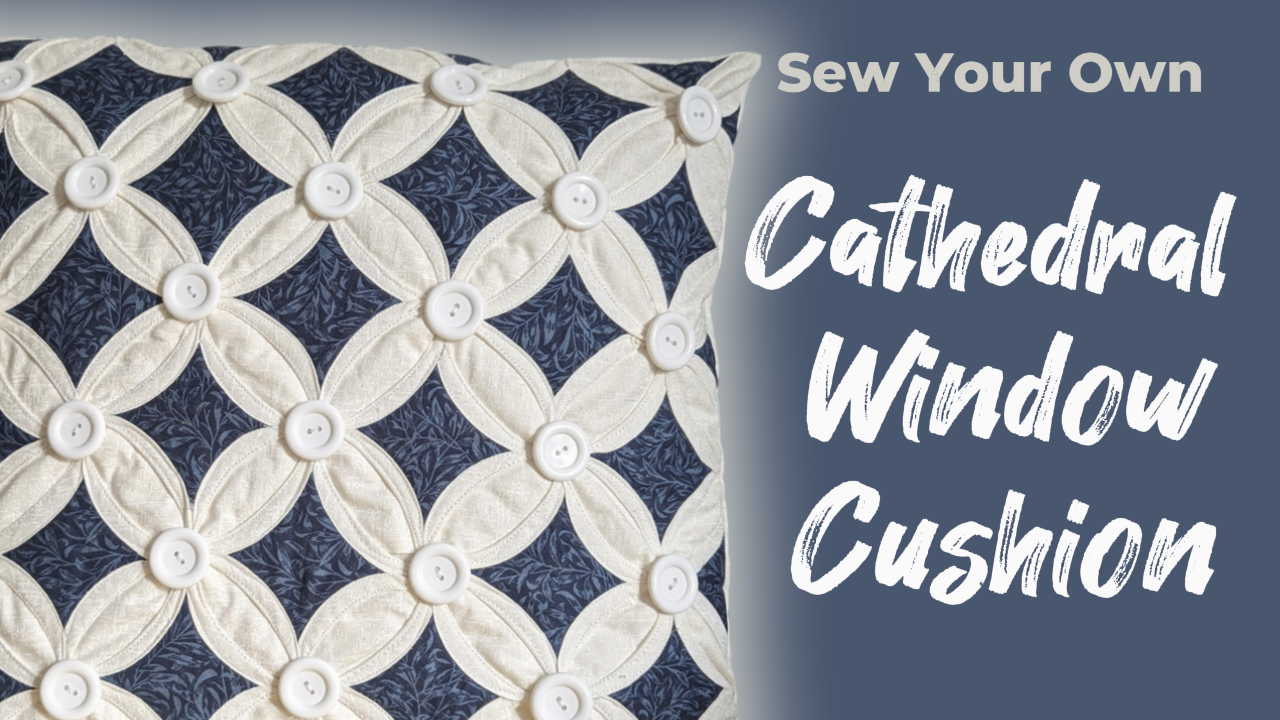
Place card in the centre of the main fabric. If you don’t have card, fold over each edge by half an inch and press it. The card just helps you to get things finished more accurately. Fold over the left and right edge to match the size of the template and press in place. Pop a dab of glue on each corner. Fold the top and bottom up and press. All your edges should now be pressed in by half an inch. Remove your card template and fold the fabric in half. Press. Fold in half again. Press Fold each corner into the centre and press. Again, fold each corner into the centre and press. Repeat this a further 8 times. You should be left with a total of 9 blocks. Place two of your squares side by side. Lift the connected triangles pin together. Sew in the crease to join the two together. Repeat to add your third square. Repeat this process so that you end up with three rows. Now lay two rows together as shown. Line up the joins in each square and pin in place. Sew all the way across in the crease. Then repeat to attach the bottom row of blocks. Now find the centre of each square where the triangles are loose and can be lifted. Sew a line of stitches 1/4 inch from the centre and across to 1/4 inch past the centre. Straight stitch is fine. Repeat in the opposite direction. As you can see, the machine got away from me! But don’t worry, if you go a bit too far it really won’t matter as you won’t see these stitches. If you haven’t already, go ahead and cut your 2.5 inch squares. For the sides and top and bottom, simply cut your 2.5 inch squares in half. Lay out your 2.5 inch squares to see the order in which you want them to appear. Once you’re happy with the layout, dab a little glue on the back of each square and place it back on the fabric. The glue will hold them all in place so we can sew. All the points on the square should point at the points in the fabric you’re placing it on. Now comes the magic. Fold back one of the flaps. It will automatically want to curve. Sew as close to the inner edge as you dare. Note that the image has my sewing machine foot at an odd angle! This was just so I could get around the back of the fabric to show you the stitch line.
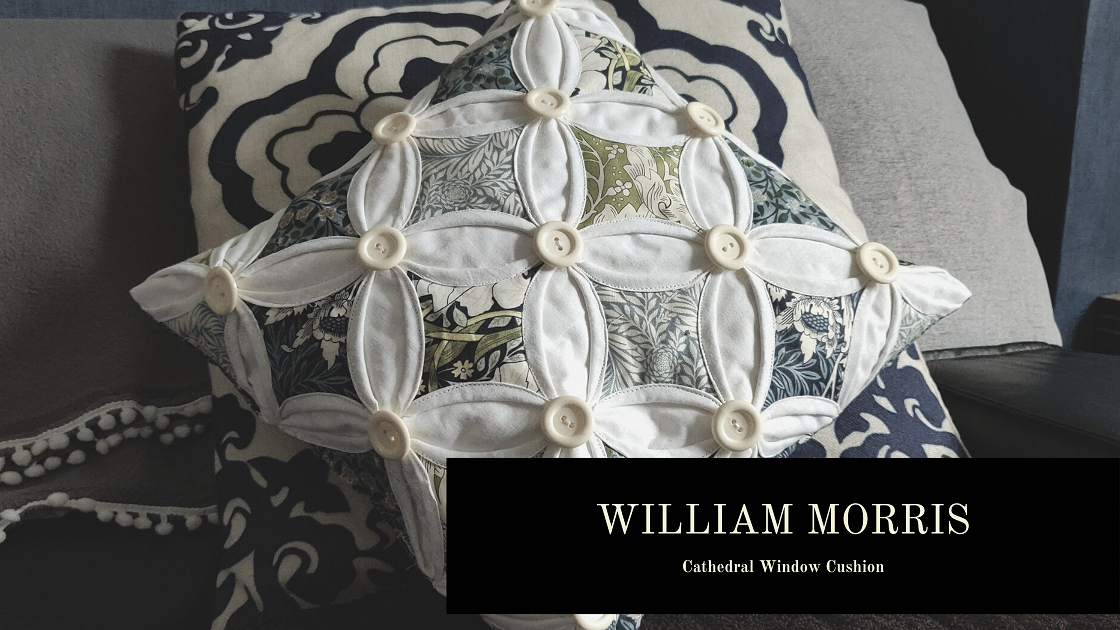
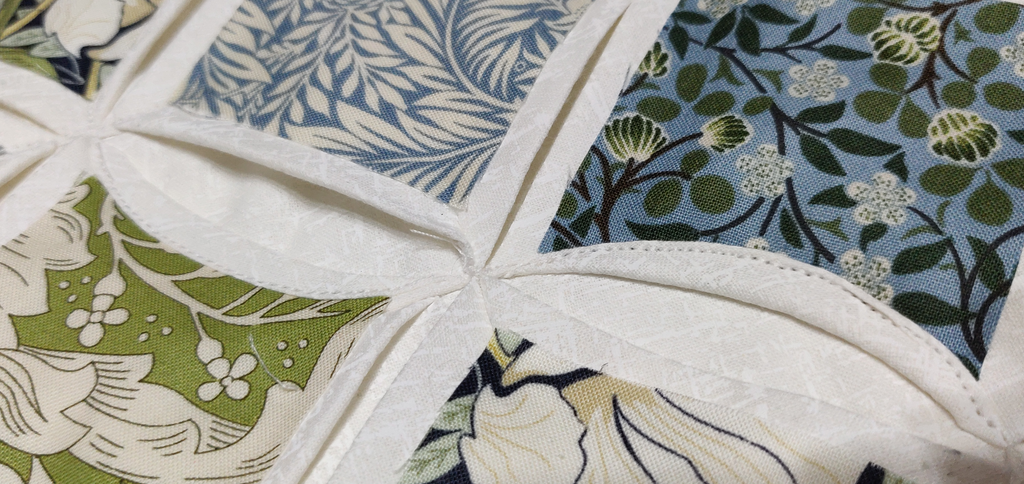
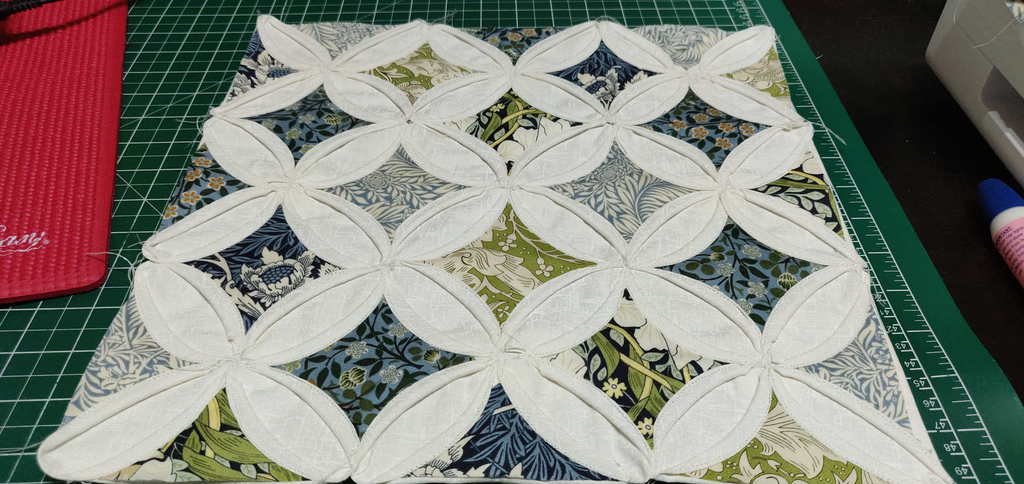
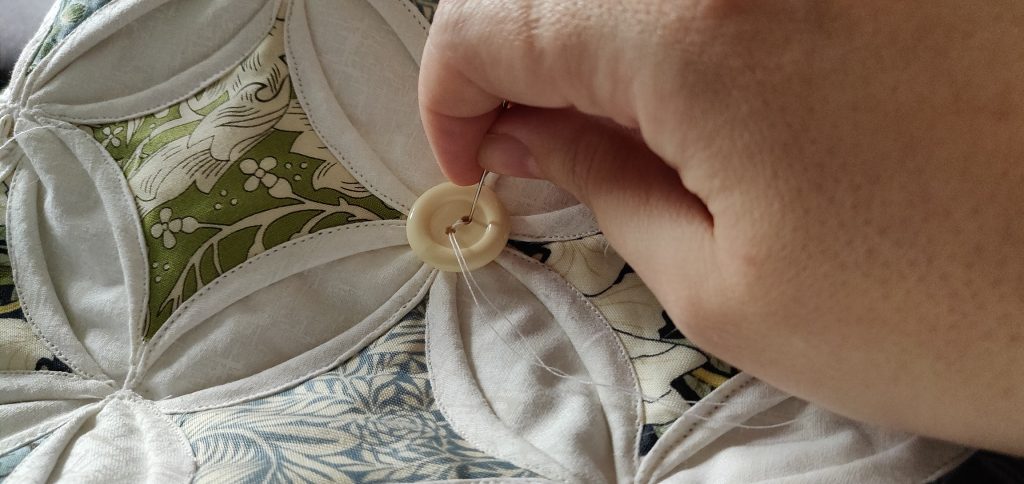
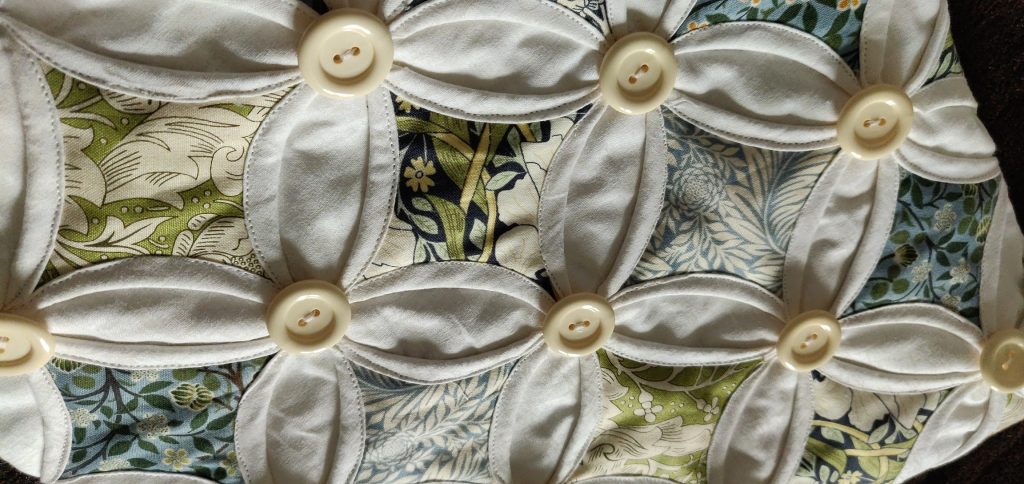
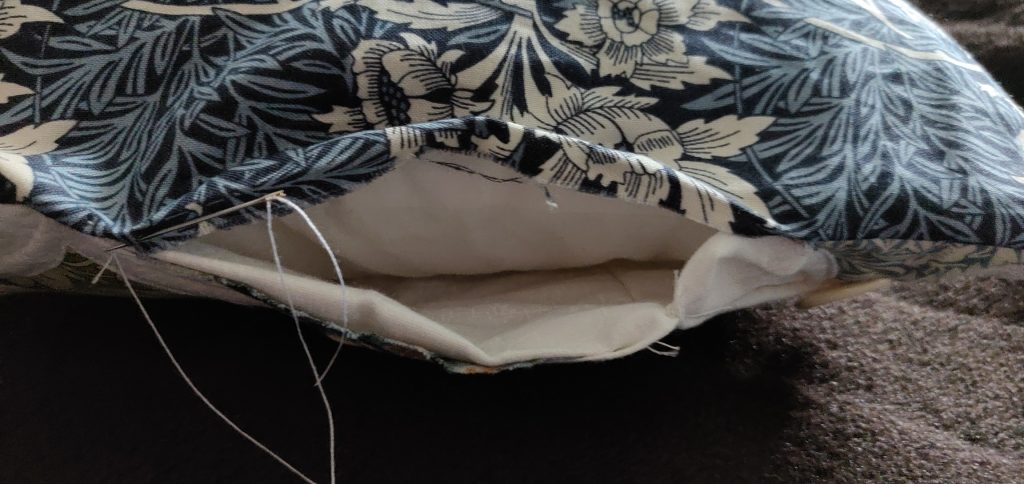
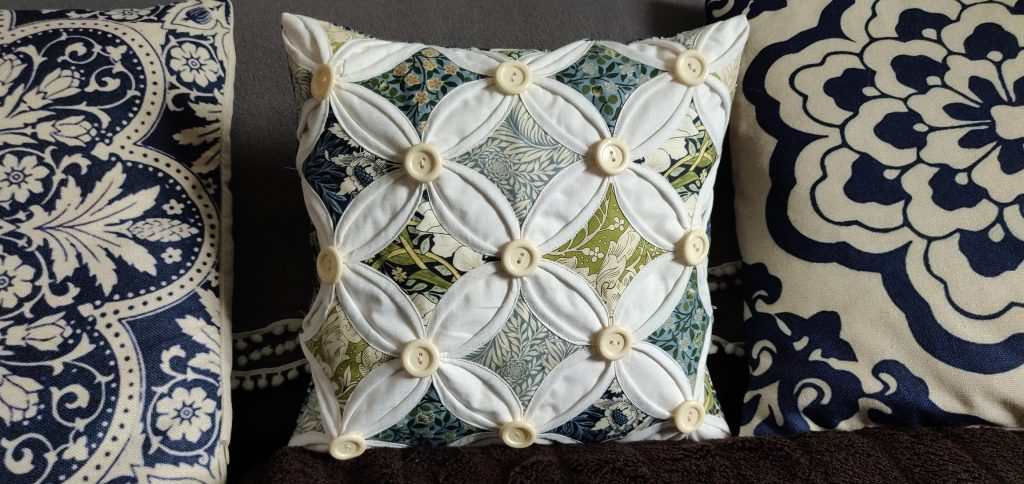
You can either complete one square at a time (if you do, fold over adjacent sides and then do the other two) or you can do what I did… As you approach the next square, fold over the next section and stitch along. You’ll go in a wavy pattern all the way to the other end of the row. Repeat on all rows until all the windows are finished. Sew a button at each intersection.Now cut a piece of backing fabric measuring 13.5 x 13.5 inches. Lay it right sides together with your front panel and sew a 1/4 inch seam all the way aroung, leaving a 5 inch opening on one side for turning and stuffing.Clip all four corners to reduce bulk and turn right side out.Stuff the insert (or stuffing) into the case.Slip stitch the opening closed.And voila! Stunning William Morris Cathedral Window cushion complete!
2 thoughts on “William Morris Cathedral Window Cushion”
It says,
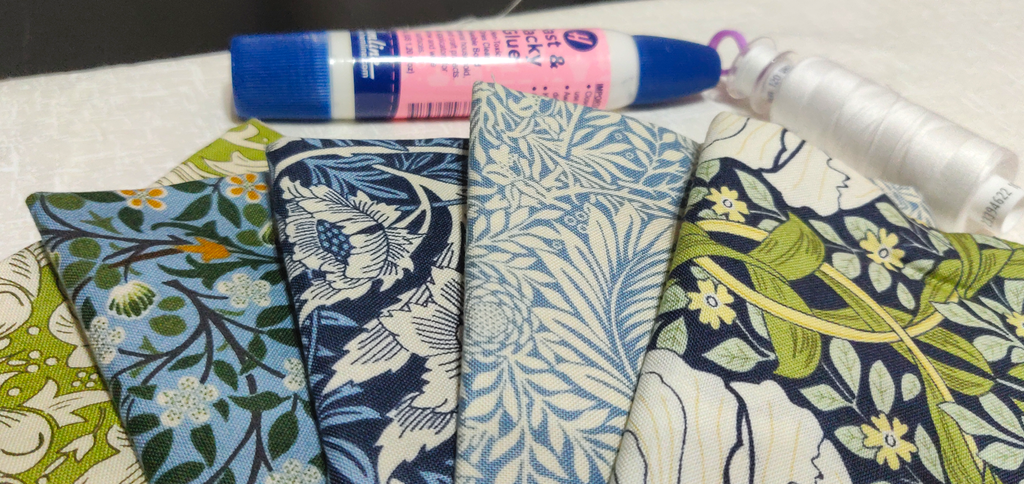
10 inch square of main fabric (I used Textured Blender)
Is this 9 x 10″ squares? What’s the total fabric required for the 9 main fabric blocks?
Sorry! I didn’t spot that I had just added one to the list. I’ve amended this now and to answer the other question, you will need just over 1m if the fabric you’re using is a standard 44″ wide. If it’s wider, you will get away with half a metre.


It says,
10 inch square of main fabric (I used Textured Blender)
Is this 9 x 10″ squares? What’s the total fabric required for the 9 main fabric blocks?
Sorry! I didn’t spot that I had just added one to the list. I’ve amended this now and to answer the other question, you will need just over 1m if the fabric you’re using is a standard 44″ wide. If it’s wider, you will get away with half a metre.