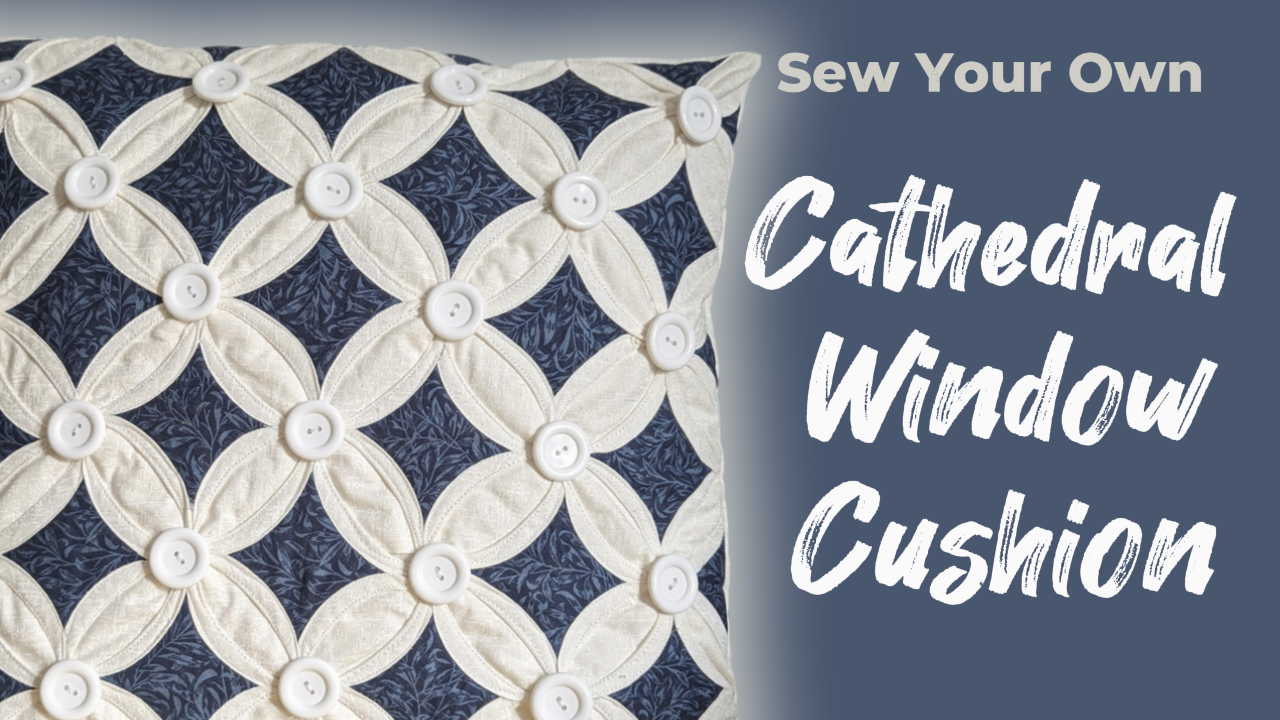
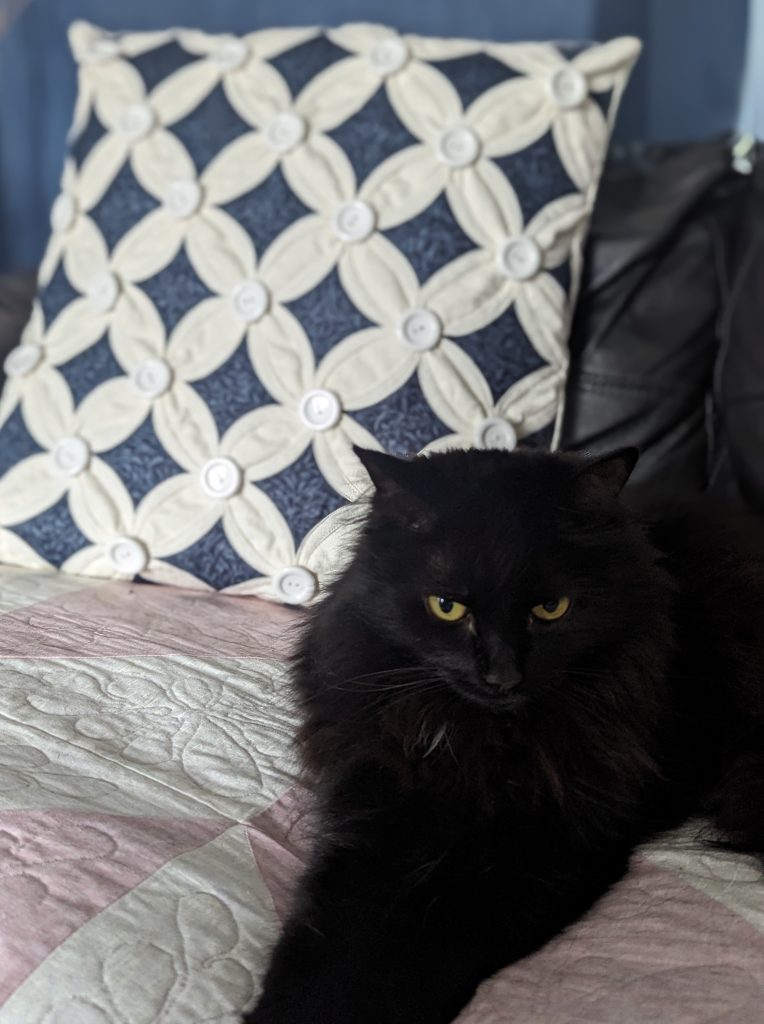
Hi guys. This week we’re going to be making a stunning cathedral window cushion cover. I made a 12 inch one several years ago using an older William Morris range of fabrics and it was perfect! Here’s a pic…
Because of the way this is put together, is uses up a fair bit of fabric. However, most of this is the backing fabric, so doesn’t need to be an expensive print! Save your best fabrics for the middle of each window and try to stick to one colour for the background fabric… your nice fabrics will stand out a treat. I’m using textured blender fabric for the backing and background, which is a wonderful quality cotton without the huge expense! I’ll add a link in the description for it. I use textured blender whenever I can because it’s inexpensive while still being great quality.
For this you’re going to need a 9×9 inch piece of card. An old cereal box would work fine. I’m using the back of a cats advent calendar for mine. You’ll need 16 squares of fabric measuring 10×10 inches. This is where the textured blender comes in.
You’ll also need a small 2.5×2.5” piece of fabric for each window. In this case you’ll need 32 pieces.
Don’t cut your backing fabric until you have the front completed. But it should work out around 18×18 inches so would require two pieces cut at 18 x 15” to allow the envelope back to sit properly.
You’ll also need 25 buttons to go on each point.
With all the fabrics ironed and ready to use, place your first backing piece right side down and put the cardboard in the centre.
Using the cardboard as a guide, fold over the left and right edges by half an inch and press. If you don’t have a piece of card, measure in on all sides by half an inch instead.
With two already done, dab a little glue in the other corners and fold those over too, again press.
All the edges should now be pressed inward. Remove the card template and fold the fabric in half so your turned in fabric is inside. Press
Fold in half and press again.
Now open that up and fold in each corner to the centre point.
Press each of these.
Repeat this until all your background fabric pieces are pressed in the same way.
You should end up with 16 identical pieces.
Take two and place them side by side.
Lift the two inner triangles and pin them together.
Fold the two back to back so you can see the pressed seam.

Sew down that line to join the two together.
Repeat this until you have a row of four.
Sorry – A lot of repeating in this one! You’ll need to create four rows of 4.
Now take two rows, and, as you did before, place them together – joining up the four triangles.
Pin those, and stitch down that crease line.
Repeat to add the other rows until all your pieces are together.
Now fold the triangles back down on their respective squares, and at this point you need to sew a smallish cross through the four of them to stop them lifting. Don’t worry, these won’t be visible on the finished cushion. I just went roughly ¼” over each point. Top to bottom, then side to side.
If you haven’t already, go ahead and cut your centre squares. You need 32 for this size cushion. They need to be 2.5×2.5”.
Lay out the centre blocks on the panel you created and play around a little to find the most pleasing layout.
Either take a photograph so you know what piece needs to go in what window, or do as I did and just pop in a pin through them all. You’ll probably need to unpin each one as you work on it so you can be sure it’s aligned properly. But doing it this way means you won’t accidentally put the wrong piece in the wrong window. The other option is to use a dab of glue to keep them in place.
Here we go with the magic part! Fold over one of the flaps. It will automatically want to curve. Sew as close as possible to the inner edge as you dare.
As you approach the next square, fold over the next section and stitch along that. Doing this will allow you to get from one side of the cushion front to the other in a sort of wavy pattern. Once you get to the end, start again… and continue until all those flaps are rolled over and stitched in place.
This part is optional, but I think it looks better. Where you’ve sewn close tot hat inner edge on the curved fabric, I like to go down the opposite side too. It finishes it off nicely. So, same method, just the other side.
Right no is the point I should have added the buttons. I forgot, which isn’t a huge issue, it just means they’re more a of a pain to add later. I would suggest you add them now at each join point.
But let’s continue with things the way I did them.
With the front panel all finished, we need to turn this into an actual cushion cover.
Cut two pieces of backing fabric at 18 x 15 inches. Fold over half an inch of ONE side of each of those pieces. On the longest edge… and top stitch down both.
Place your front panel right side facing upward.
Place each of the two backing pieces with the hemmed section in the middle on either side of the panel. They should overlap in the middle.
Pin all around.
Now sew using a ¼” seam allowance all the way around. When you get to the overlaps in the centre, backstitch them a few times to secure them because these are the pieces that will be most pulled on when putting a cushion insert in or pulling it out.
Damn! Broke the needle! I’ll go off and replace this and come back…
Sorted, so we’re back to sewing around the cushion cover.
Clip the corners.
Turn the cover right way out, pushing the corners out as best you can.
Now obviously if you’ve already added your buttons, you can pop in your cushion insert and be finished. I however haven’t, so have that little chore to complete. Here’s one…
I think a bit of Netflix is in order while I add the rest of them!
Finally, that took a little while! Now pop in your insert and there we have it! I absolutely love this method, and this fabric!
What do you think? Let me know in the comments! Until next time, happy sewing!