Foundation paper piecing can be somewhat daunting… until you get it! And once you do, you’ll fall in love with it’s simplicity and how it can easily allow you to create stunning quilt blocks that are identical. This tutorial will use a simple block to demonstrate just how easy it can be.
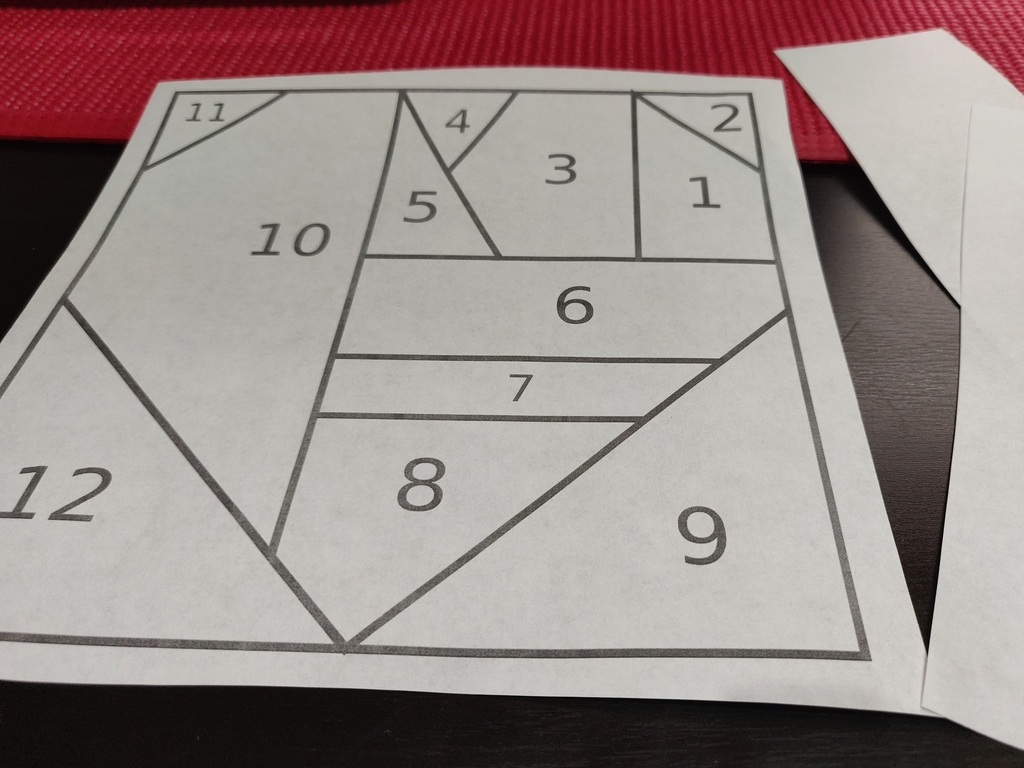
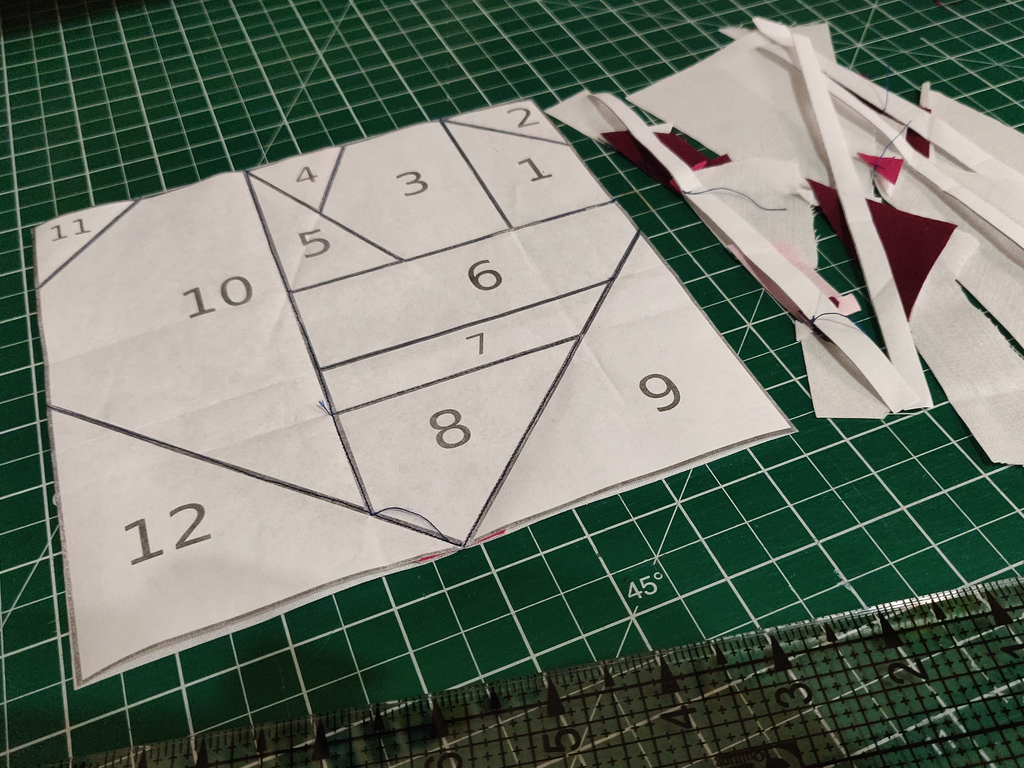
You’ll need to download and print off the template above. It’s been designed to fit on one piece of A4 paper so that you’re not having to join sections, just for the sake of keeping this simple.
Scissors (your fabric set and a set you use for paper!!)
Iron and ironing board
Sewing machine
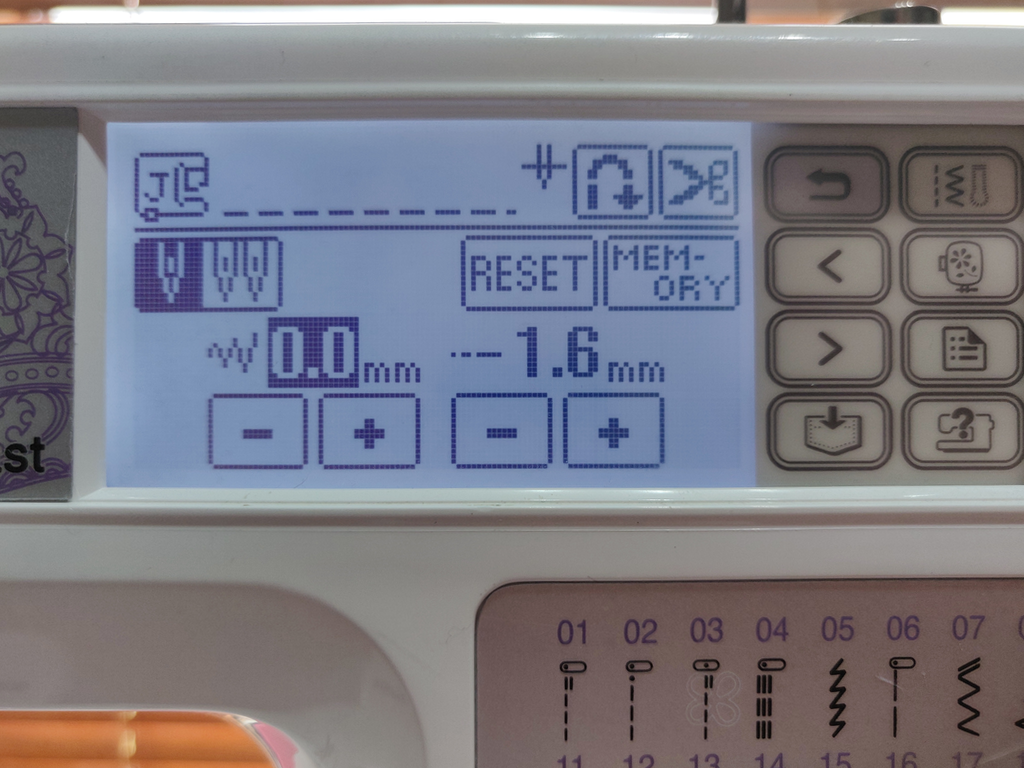
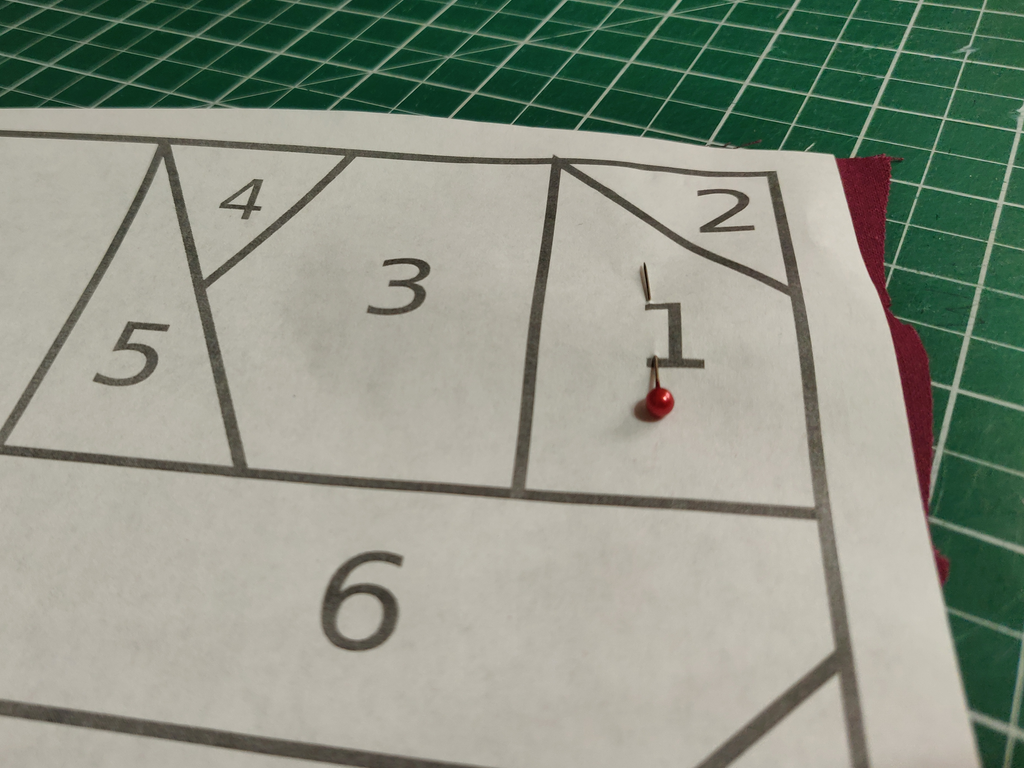
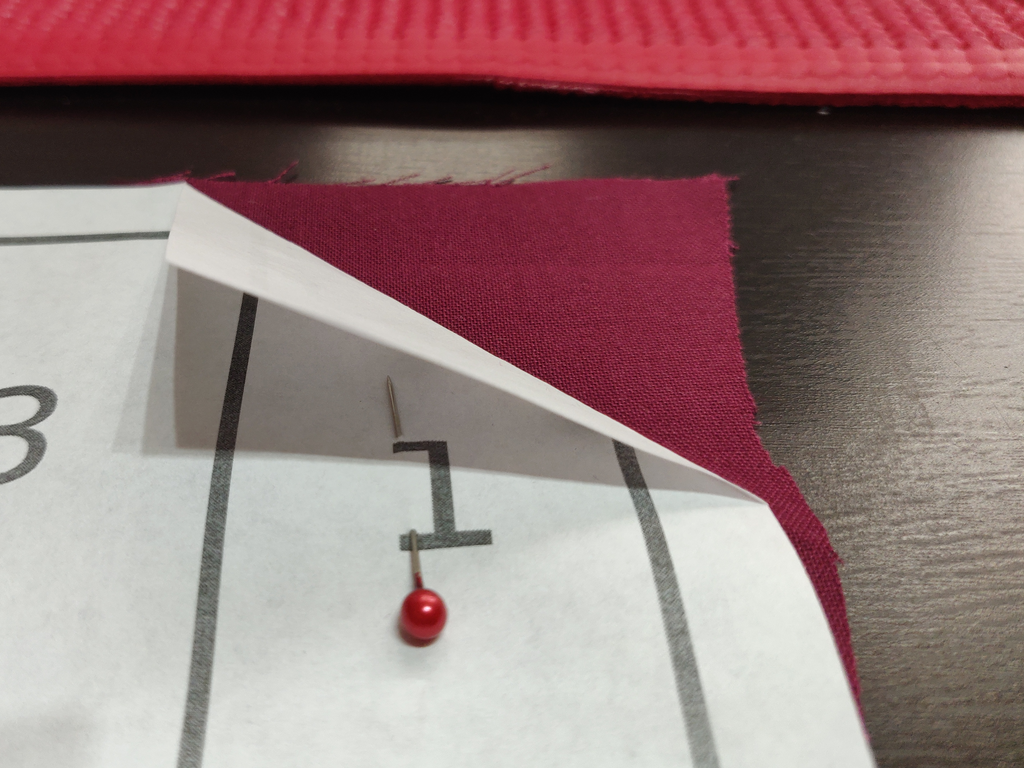
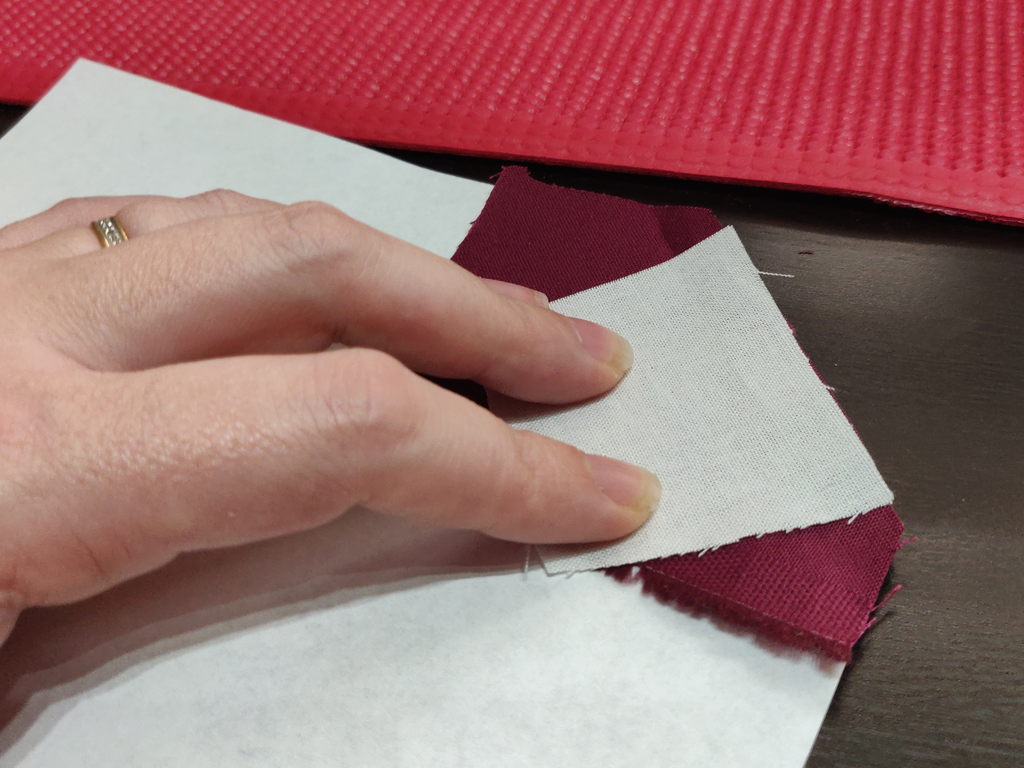
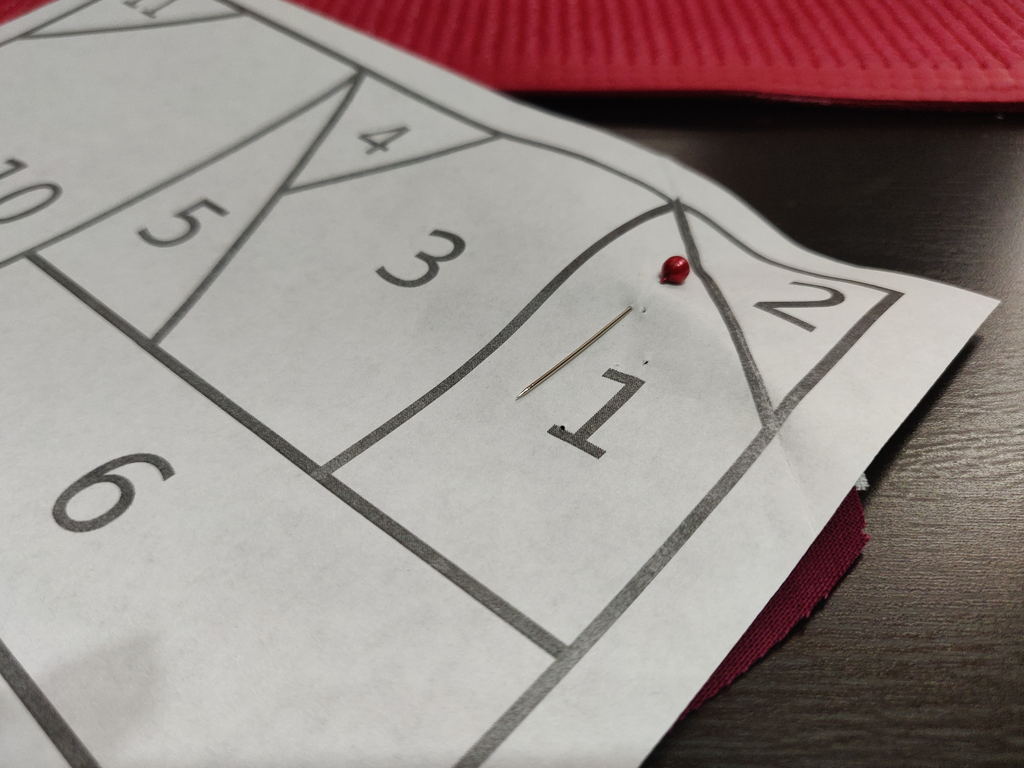
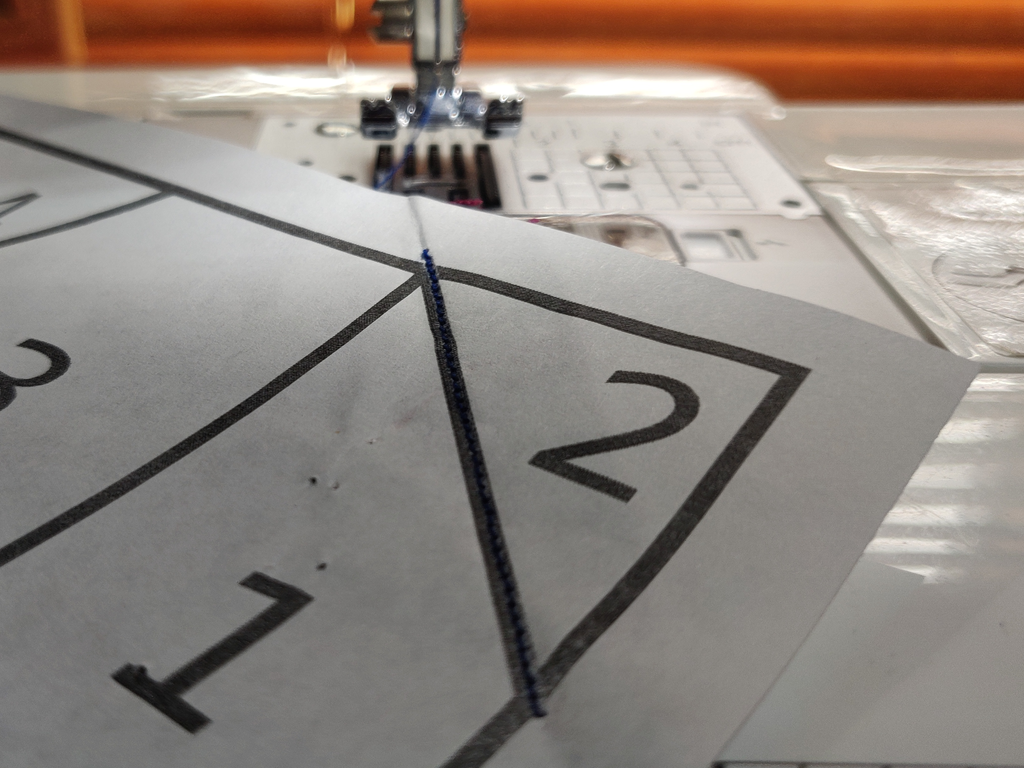
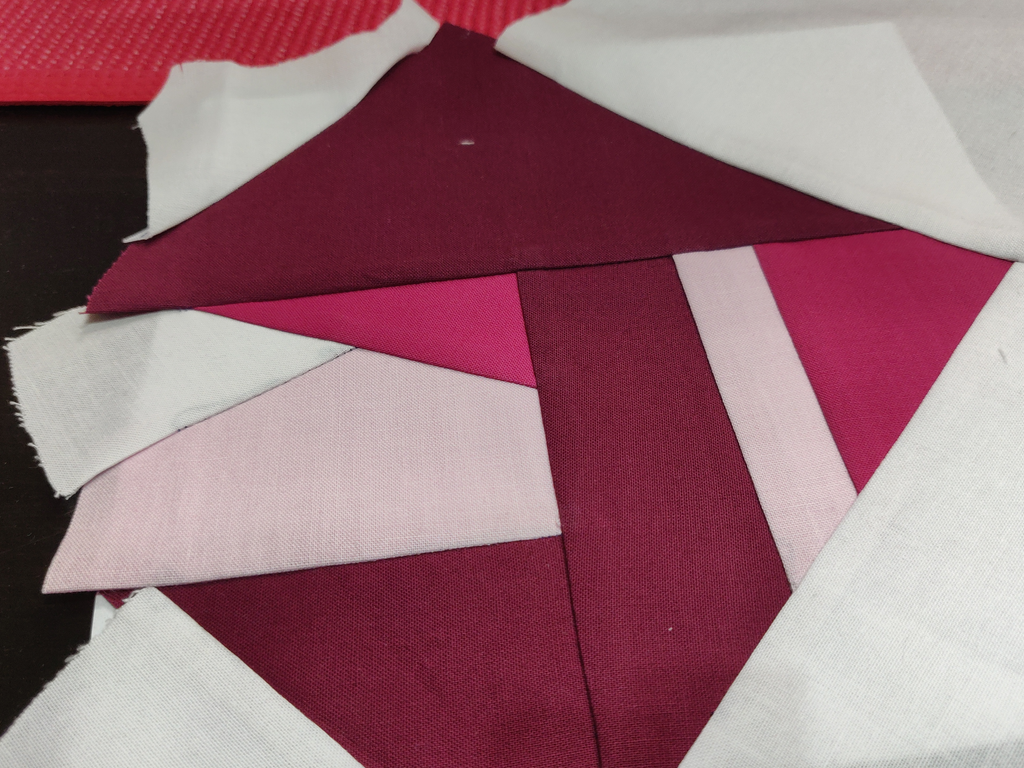
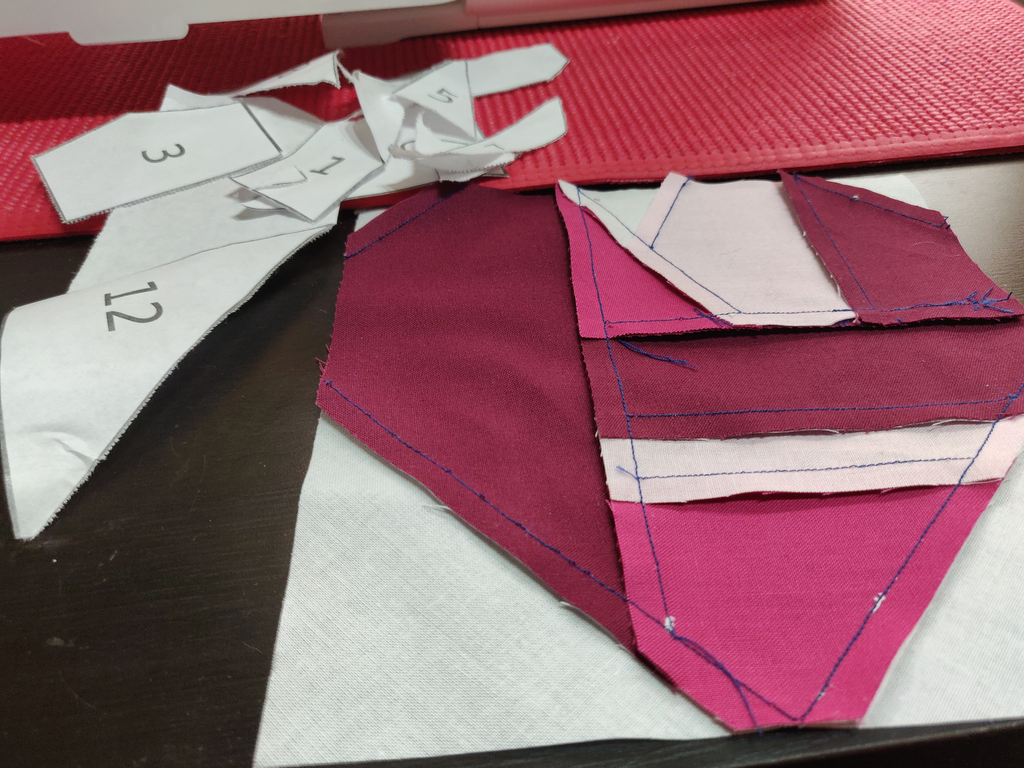
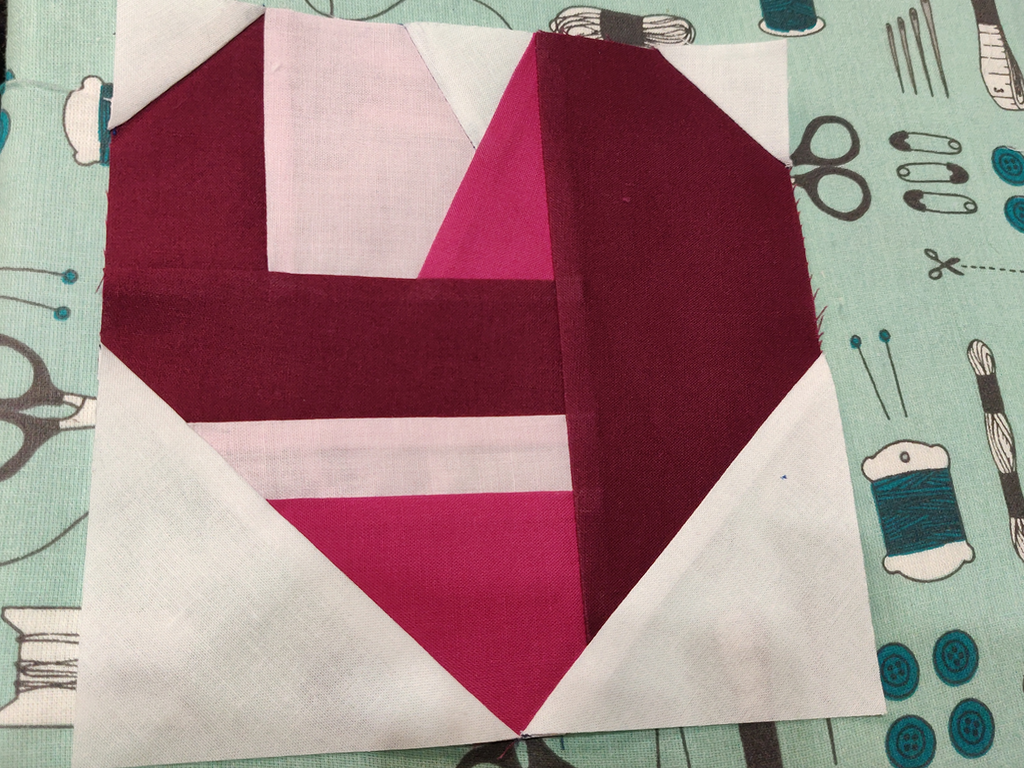
Foundation paper pieced patterns are stitch through the paper and your fabric. In order to remove the paper template at the end, the stitches will need to be strong (and small!!) So go ahead and set your machine to a low stitch length (mine is set to 1.6). Cut the template down to remove the excess paper outside the main outer line. Doesn’t need to be cut right on the line, in fact it will help later if there is a little overhang. Now, starting with the area labelled “1”, Hold a piece of fabric over it to make sure it’s large enough. It will need to be ever so slightly larger than the numbered area on all sides. Lay the fabric right side down and pin the pattern to the top. Carefully fold the template where area 1 joins to area 2. At this point, lining up fabric 2 will be easier if you trim that excess fabric down to 1/4 inch. Place fabric number 2 against this folded edge, right sides together with fabric 1. Overhang your fold by 1/4 inch, which is easy if you’ve already trimmed fabric one to this measurement 🙂 Carefully hold them together and pin through all three layers (paper, fabric, fabric). Turn over and unfold your pattern piece. Now stitch down the line that joins area 1 and 2. Stitch right on the line. Backstitch once at the beginning and end. FYI I’m using blue thread as I’d *hoped* it would come across a little easier to see. Now fold back the pattern again so it’s out of the way of your cutter, you don’t want to cut the pattern away at this point. Trim your seam down to 1/4 inch. Open up the pattern (and your two fabrics) and press the seam flat from the right side of the fabric. Now attach area 3 in the same way, and then continue until all your areas are covered. Don’t be tempted to skip the pressing of the seams. Once complete, it may look a tad messy – that’s fine! Place the block pattern side up so you can see the pattern. Use that to trim the block to the correct size (the outer most square). Now carefully pull out the template from the back. You’ll have better control over your seams pulling from the back. Because we used such small stitches, the template should be pretty well perforated, so will just pull out. If you’re left with any little pieces still in the stitches, carefully pull them out with a set of tweezers. Turn the block over and give it a good press.
And Voila! You just completed your first little foundation pieced block! There are so many options for these, maybe make up a small batch and sew them together to make a quilt? Use the block to accent a bag you’re making? Make a small cushion?