So we’ve created blocks, we’ve sewn them together to create columns, we’ve quilted them, and now we need to join them all together. For this tutorial, we’re creating and using sashing to bring the columns together. IMO, if you don’t mind the sashing, this is the easiest way. Note that measurements given are based on a total of 12 blocks (36 x 48 inches). 3 across and 4 down.
There are various ways to join quilted blocks, but sashing is the easiest method and comes together fairly quickly.
What you’ll Need
Your quilted columns (all neatly trimmed to the size of your smallest!)
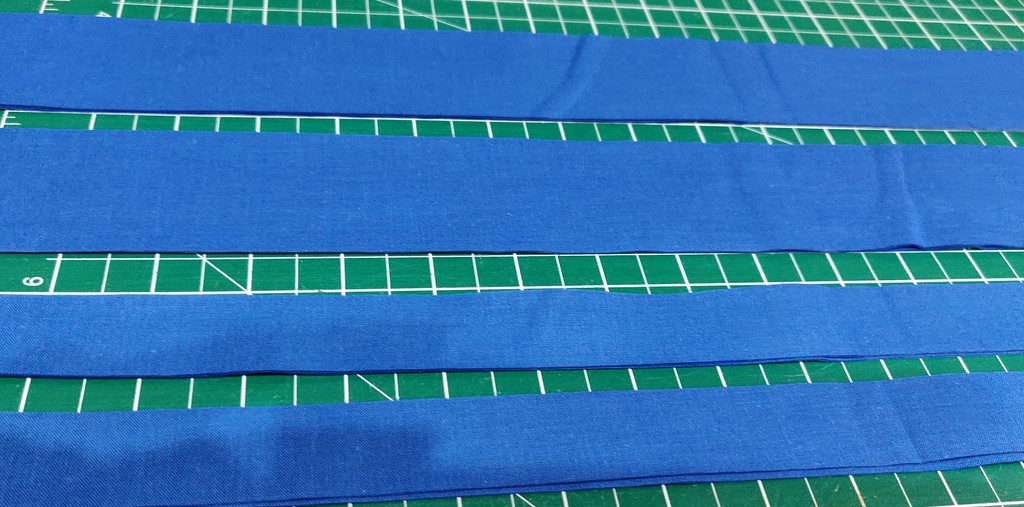
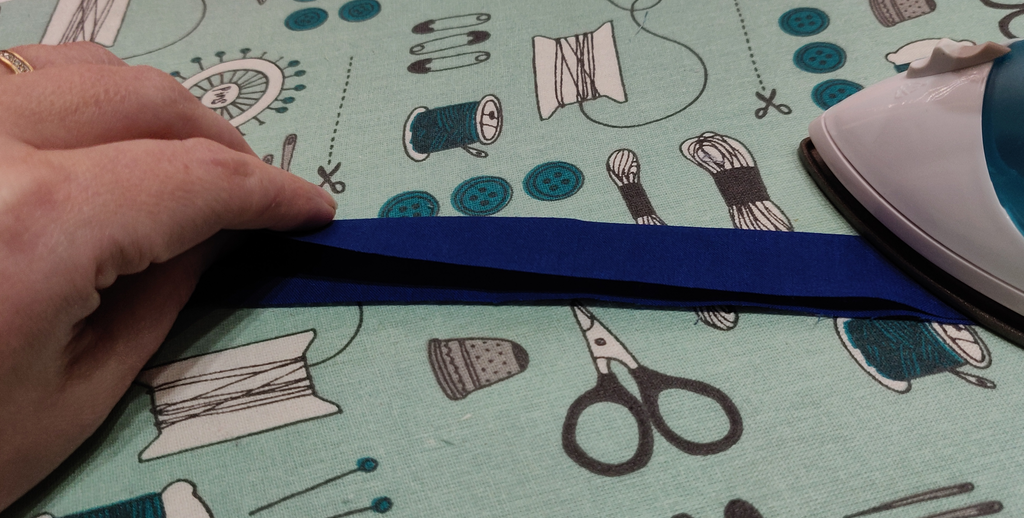
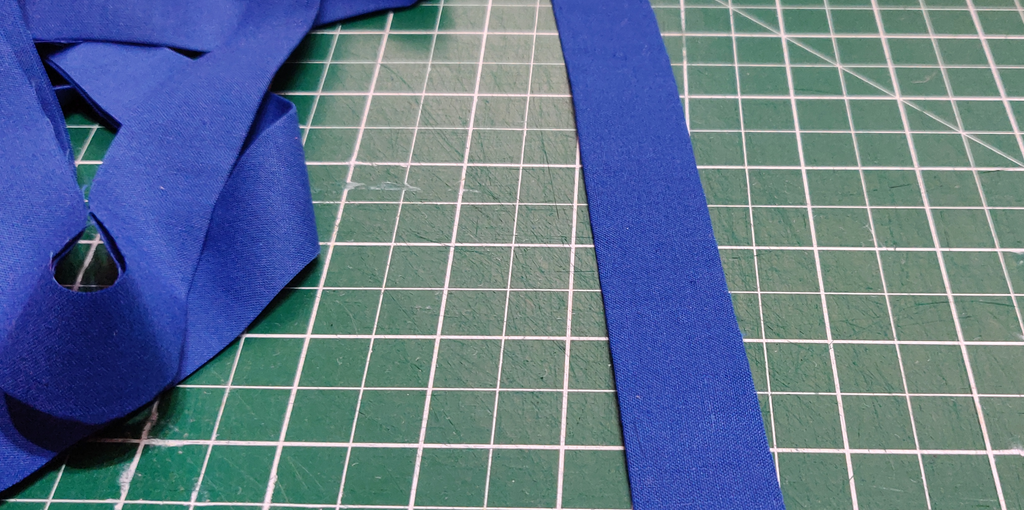
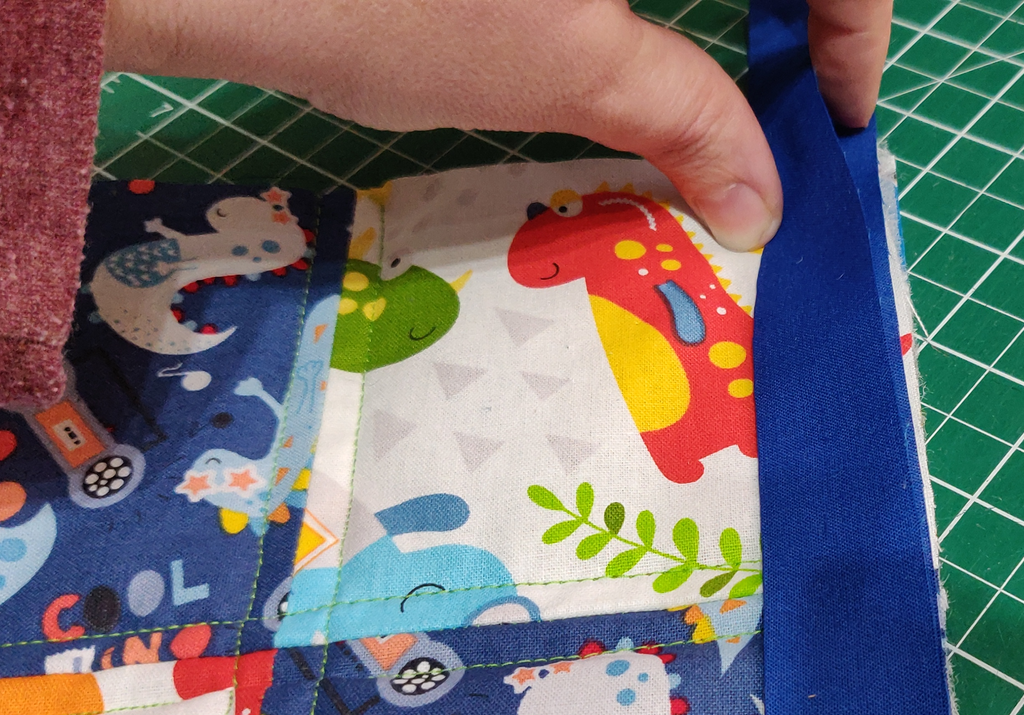
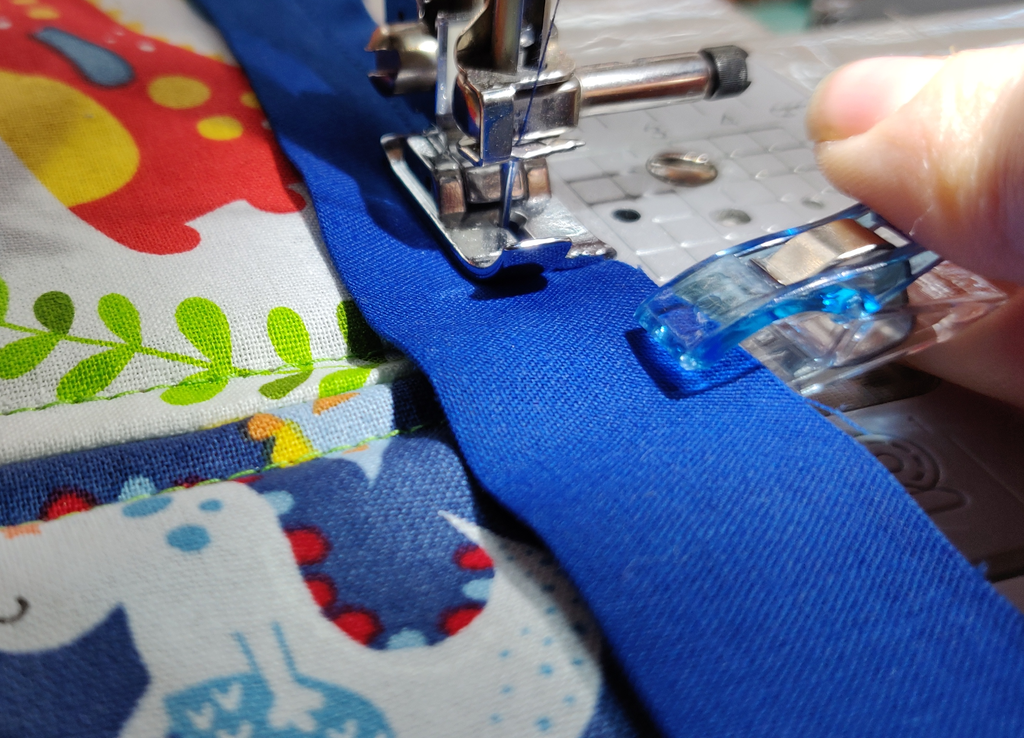
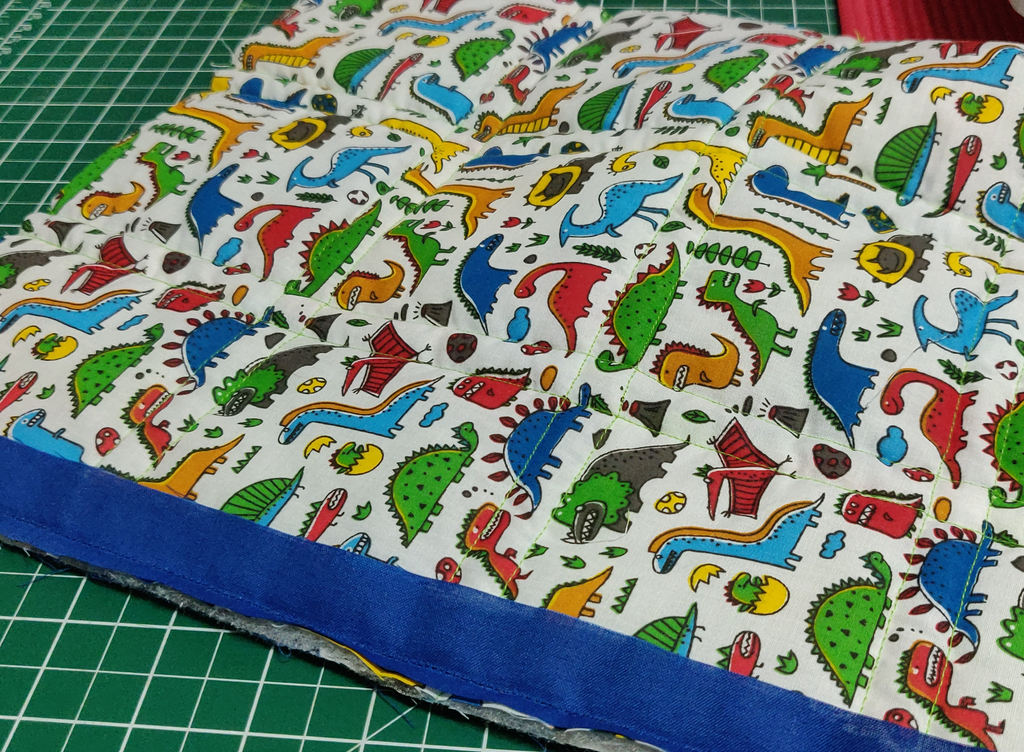
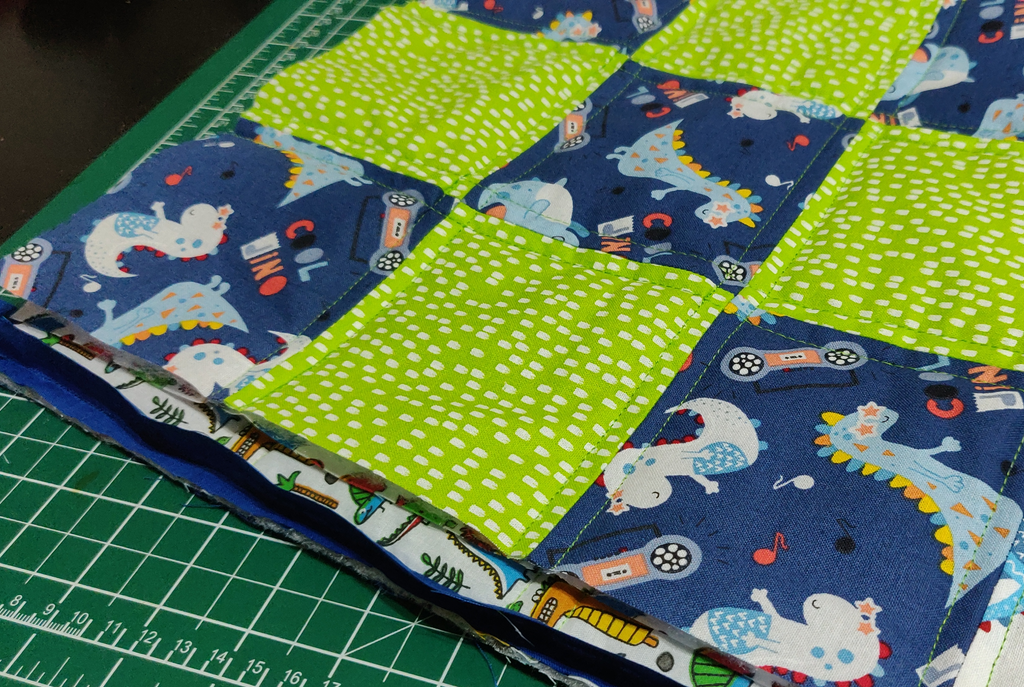
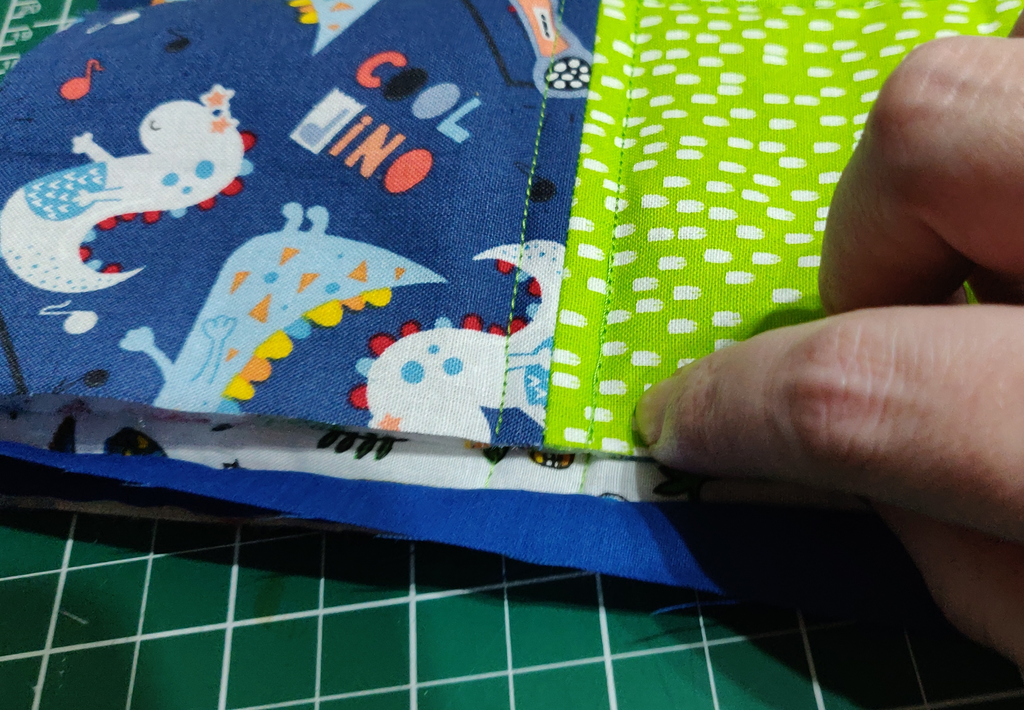
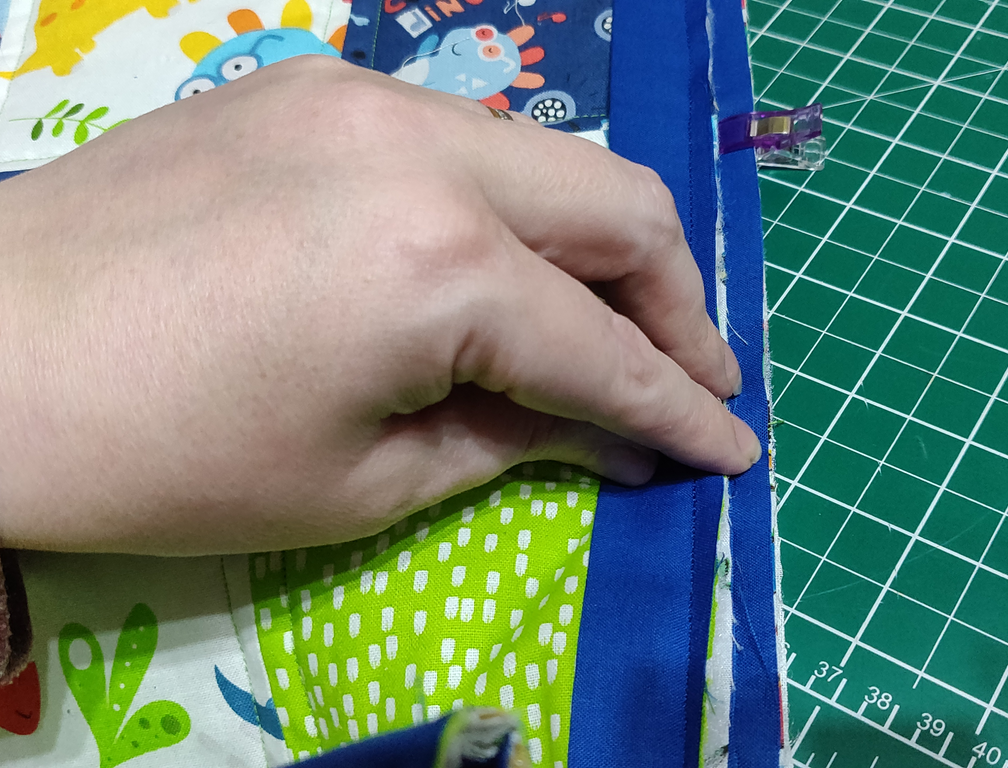
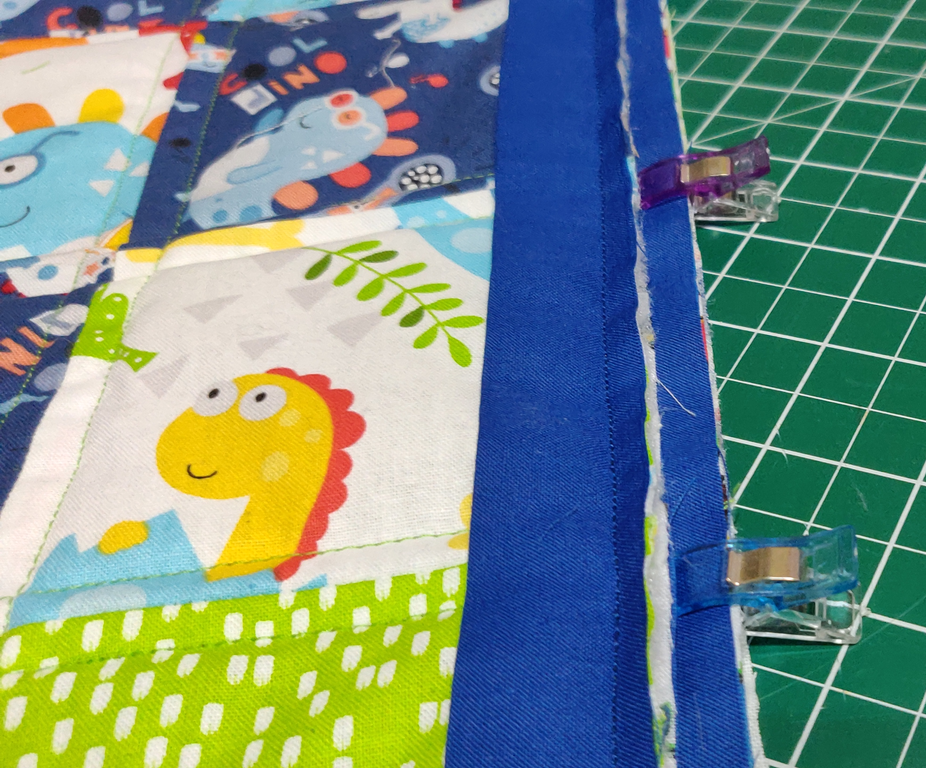
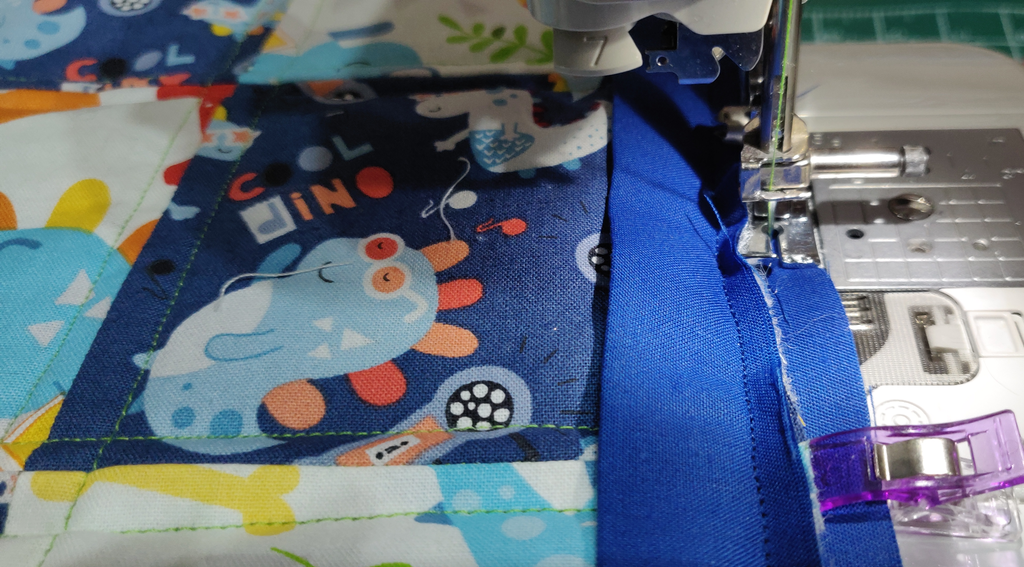
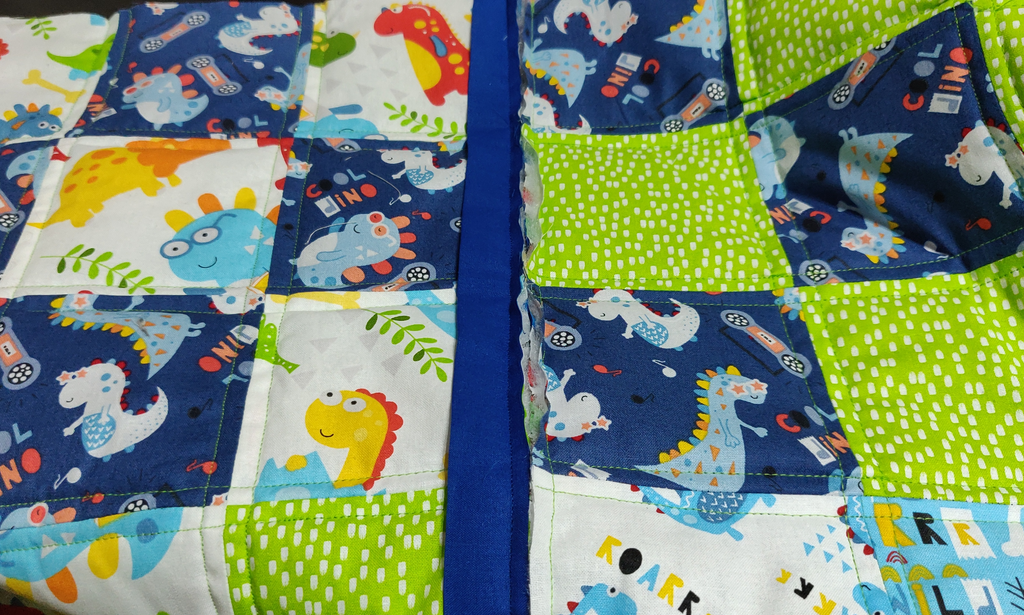
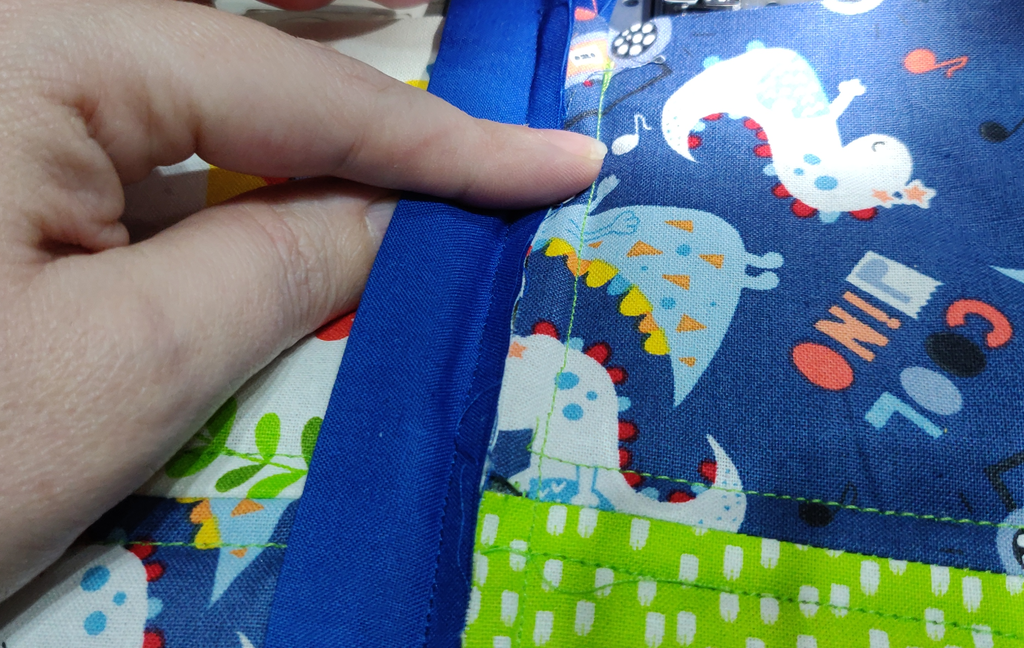
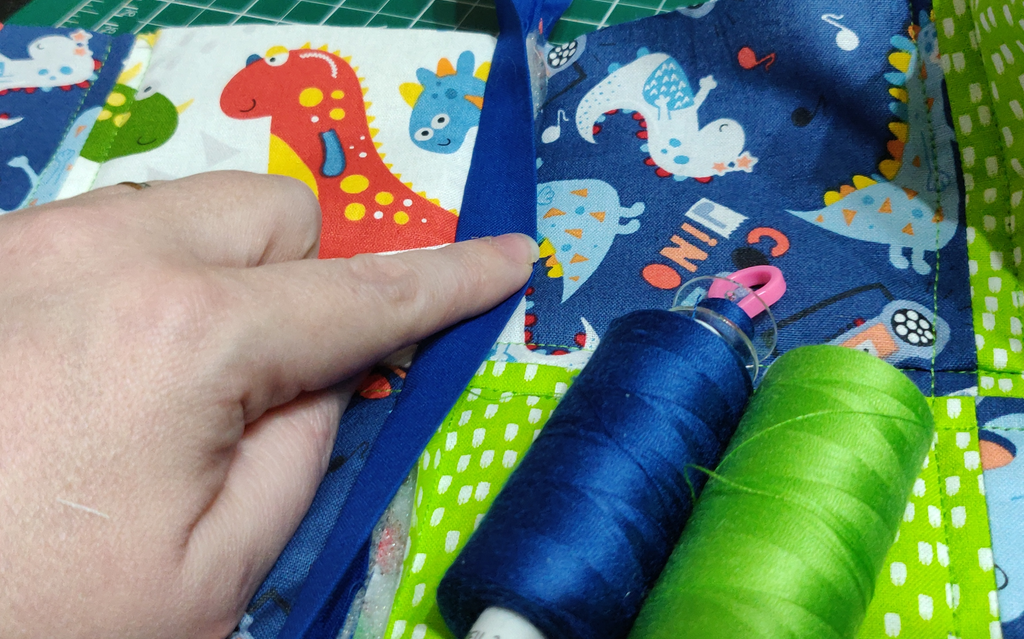
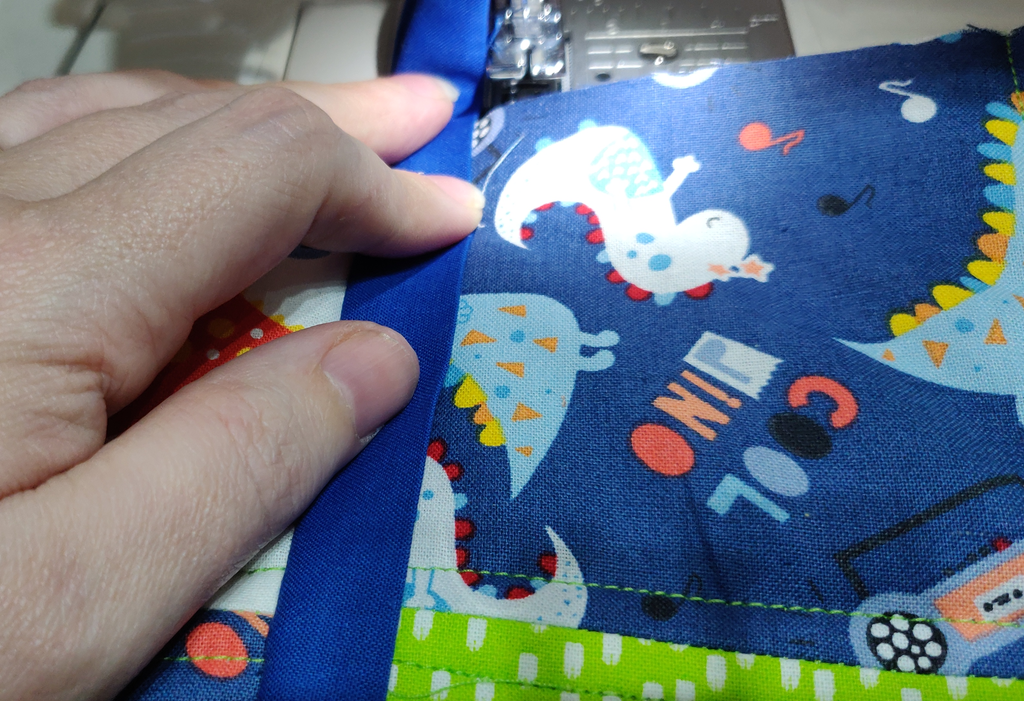
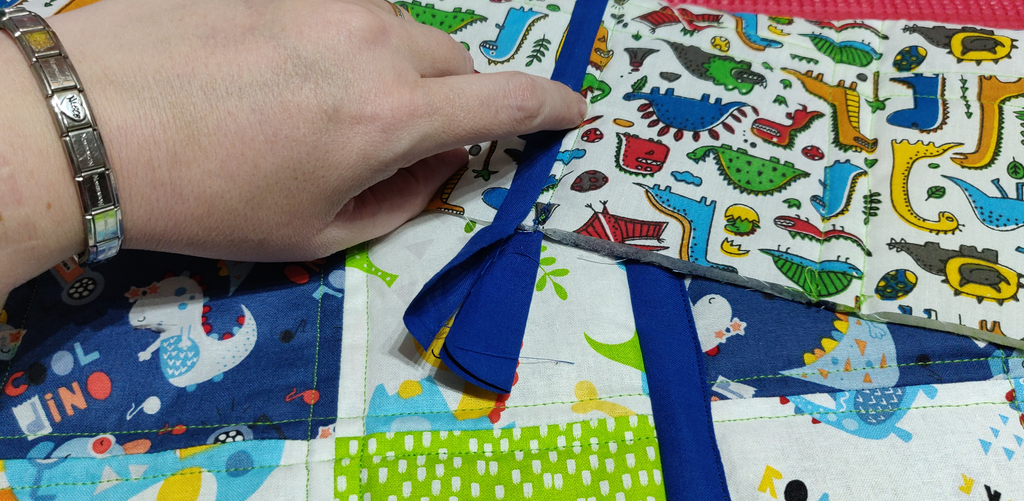
The first thing we need to do is cut our fabric into strips. For the front vertical sashing, we’ll need 2 strips measuring 50 x 2 inches. And for the back, 2 strips measuring 50 x 1 inch. We used sheeting fabric for the strips as it’s generally longer than standard fabrics. Now the fabric is cut, we’ll take the 2 inch strips, fold them in half and press them. This will give you a lovely sharp edge. Set the sashing aside. Lay your first column on a flat surface (I’ve currently got limited space, please excuse the cropped images!!). Take one of the 2″ strips that you folded and pressed and lay it raw edge to raw edge on your column (right hand side).Clip (or pin) the sashing in place.Flip the column over so you can work on the back. Slide one of your 1″ strips underneath each clip so it is also raw edge to raw edge with the column. Hold all layers together near each clip, unclip, slide the back sashing in place, and reclip.Sew down the entire sashing strip using a 1/4 inch seam allowance. Remove the clips or pins as you approach them.This image shows the sewn sashing, I’ve pulled away the back sashing to show you what it should look like.We’re going to work from the back for this next section. So flip your column over. The sashing piece you see here is what we’re now going to clip the second column to.Fold out that back sashing strip, and lay your next column on top (right side up).Here’s where (I believe) I ran into a little trouble. This is only being added to show you why cutting, measuring, trimming and seam allowances are all important. I lined up these quilt lines believing my SA was accurate – when I got to the end, the blocks didn’t match up! Hey Ho! I learn something new with each item I make, even years down the line, and this one’s for a little boy who won’t care… but it is frustrating! SO… if you’ve cut all your blocks accurately, line up your column, and give it a good check over for matching points before moving forward.Anyway! I digress! Slide the second column to the edge of your outturned back sashing strip and clip in place all the way down.In this image, the column has been flipped, this is to show you that you’re clipping the back sashing piece only, to the second column. If the seam allowance from joining the sashing pieces onto the first column gets in the way, just lift it away.voila… all clipped together.Sew down the back sashing using a 1/4 inch seam allowance.Now open up your two columns.The stitch line created by adding the back sashing to your second column should sit inside your front sashing by about 1/4 inch.Roll over the top sashing. It should sit away from your stitch line as stated above. If it does, fantastic… use the thread you used for quilting in your bobbin. If it doesn’t and you find it’s too close, swap it out for a bobbin thread that matches the sashing.I don’t generally pin when I don’t have to – it’s time consuming! But, if you feel you need to, go ahead and pin down the front sashing. Take it to your sewing machine and sew close to the right edge (the open edge). Sew all the way down, go slowly so you don’t drift off the edge.As you can see, the two columns are joined together and your front and back sashing are all done! Now repeat these steps to connect the last column.
NOTE: You can add the 1 inch sashing to the front and the 2 inch to the back. There are pros and cons. For me the biggest con is that the additional stich line would show on the front instead of the back. Annoyingly, the pro is that the sashing would be a perfect 1/2 inch across all sashing pieces. Decisions, decisions!
It’s now time to bind the quilt. Our next post will cover creating your own binding and attaching it, including the best way (IMO) to create mitred corners.
One thought on “Dino Quilt Part 3 – Joining QAYG Columns Using Sashing”


One thought on “Dino Quilt Part 3 – Joining QAYG Columns Using Sashing”