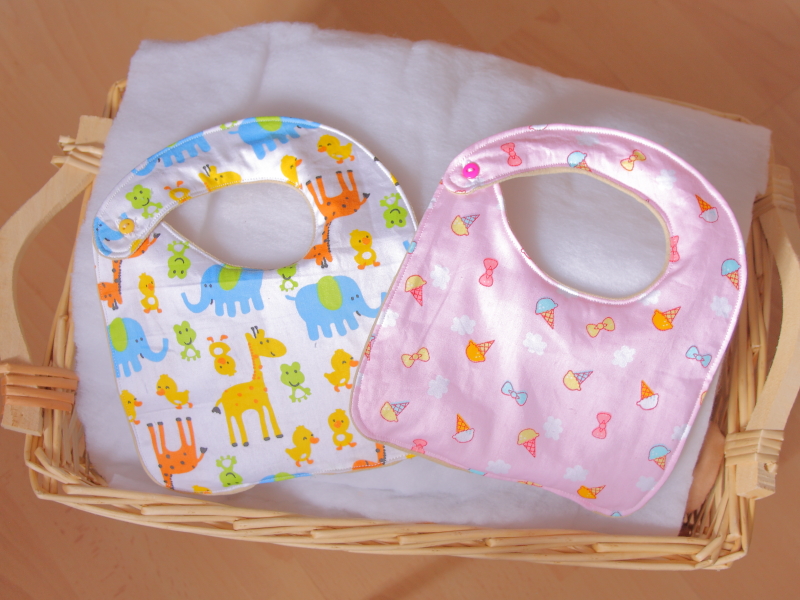
Having recently finished a blanket to be given as a gift, I was looking for something simple to make to add to it. I’ve created a PDF template for this project so it’s really simple to complete. Simply download the 20 Minute Bib Pattern and follow the instructions below. The ice-cream print was taken from the Summer Days Fat Quarter Bundle, and the animal print was taken from the Childhood Creations bundle. We’re in the process of adding all these fabrics to the website as one-off pieces so you’re not forced to buy a full bundle if you’re just after a specific print.
What You’ll Need
1/4 of a fat quarter (see links in description above for the ones I used)
First gather your materials. I couldn’t decide right off which fabric I wanted to use, hence there being 4 in the picture 😉Cut out the template and transfer it to the backing material using a soluble pen – Wrong side down. Cut it out.Repeat this for the main fabric (right side up) and the wadding so you’re left with three pieces.Stack them together. Lay the wadding on a flat surface and add the main fabric to this, right side up. No lay your backing fabric on top of these. Be careful to do this in the correct order so when the bib is turned out the correct way the fabric is correct. I used a plain piece for the backing, if you’re using a patterned piece, be sure it faces down.Pin the three layers together being sure all the edges match up as closely as possible.Now sew about a 1/4 inch in all around, leaving about a 3 inch gap across the bottom for turning. Also be sure to backstitch plenty at the beginning and end of the opening so you don’t accidentally pull out the stitches when turning.This is completely optional, but I like to cut the excess a little with pinking shears as it helps to reduce fraying. If you do this, don’t cut the fabric where you left the opening. You’ll need the excess there to turn it in at the end.Turn the bib right side out.Everyone has their own tried nd tested method for turning it fbric to close up openings. I find it easiest to place a finger on either side and give it a little pull. The fabric automatically wants to turn inwards so it makes it easier. Pin the opening closed.Now sew the entire bib about a 1/4 inch in all around. This closes up the opening and effectively self-binds the edges.Time to add the button hole. The hole should sit on the longer “arm” of the bib. The template shows where the hole and button should be (roughly).Take your button and place it into the back of the button hole presser foot. Gently push this back so the button is held in place and attach the presser foot to your machine. Pull down the button hole lever on your sewing machine and be sure to select a button hole from the stitch selection on your machine.Place the fabric underneath the foot and sew. Your machine should know when to stop so don’t panic.You should now be left with a perfect button hole.Take a seam ripper and push it through the bottom of the button hole (within the end stitches) and slowly slide it up to create your hole. Avoid catching the stitches on either.To align your button for the hole you just created, hold the button hole over the fabric where the button is to be place and pop a pin through.Now sew a button in place where the pin ended up and it should be sat perfectly aligned with the button hole.Easy 🙂Voila! I made two using different fabrics from the same range, but the entire fat quarter bundle would make tons of these (four per FQ!). And once you get the hang of it, these can be whipped up in no time. On another note, I used buttons I had to hand at the time, but larger buttons may be better, or you could even use velcro or poppers.