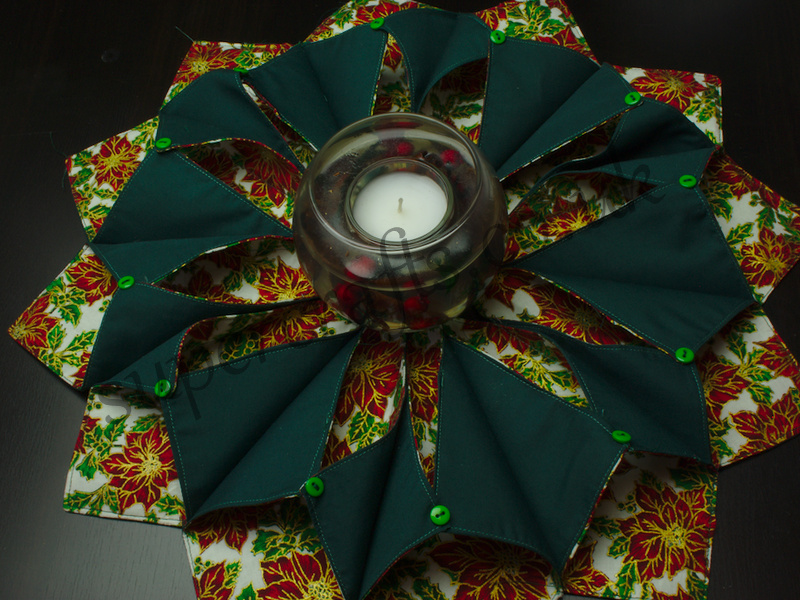
I saw one of these a few years ago and although I loved it, I didn’t have the time to make it. I also falsly believed it would be too difficult to make! I’ve seen a few tutorials for this kind of mat, but decided instead to create my own template (which I’m sharing with you for free) and make it from the ground up.
I’m so, so happy with the finished mat. It took a little while to get things just right, but I believe I’ve ironed out all the wrinkles.
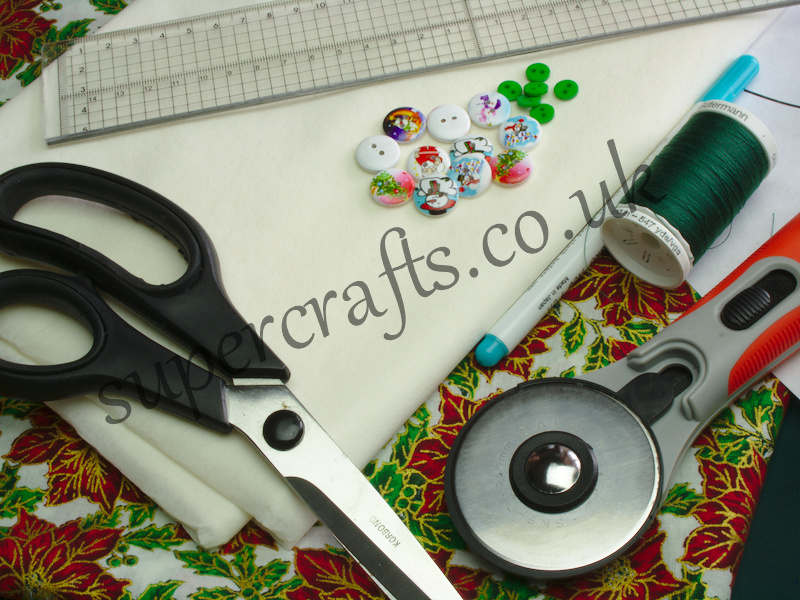
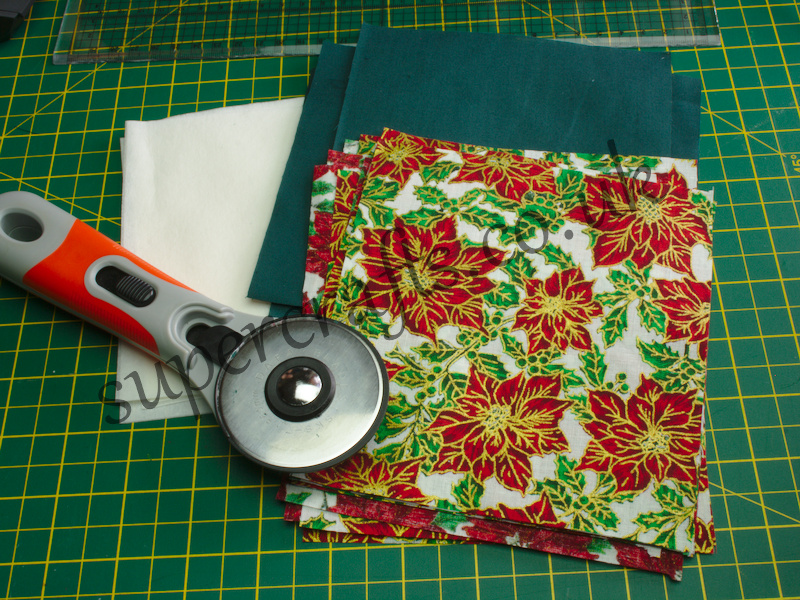
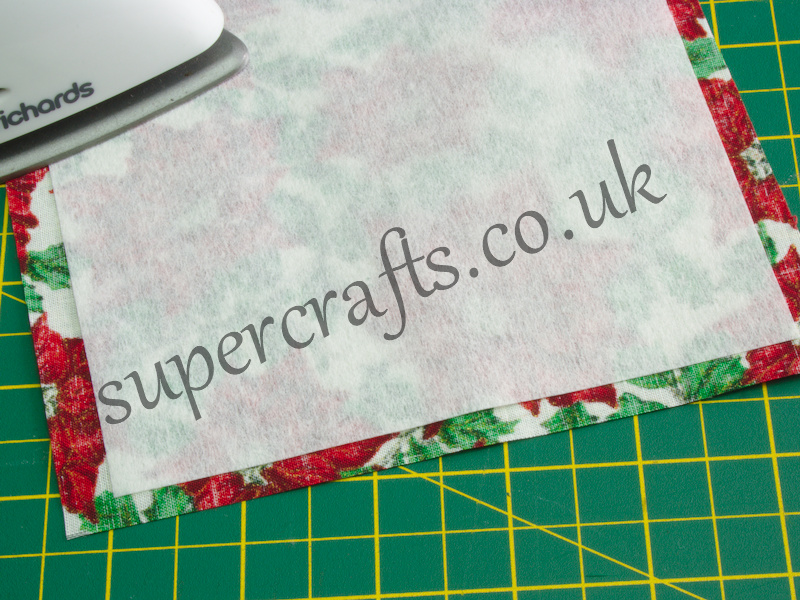
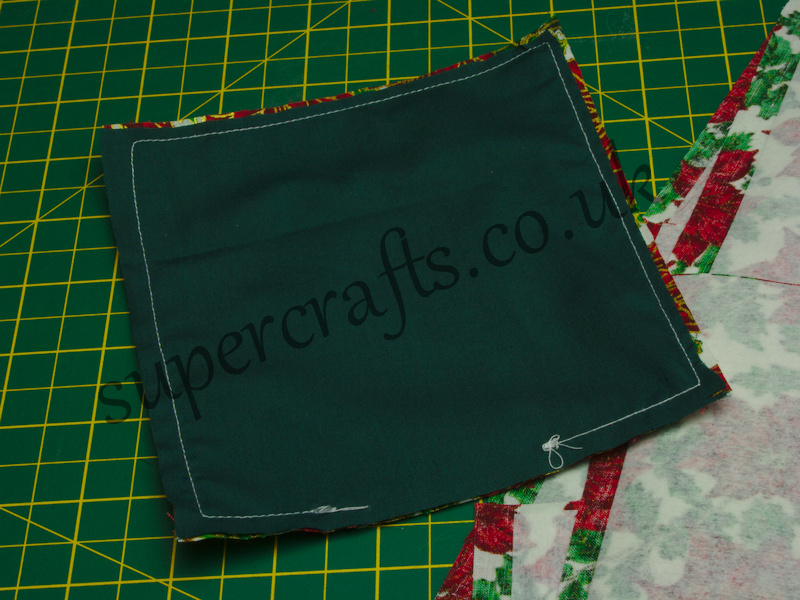
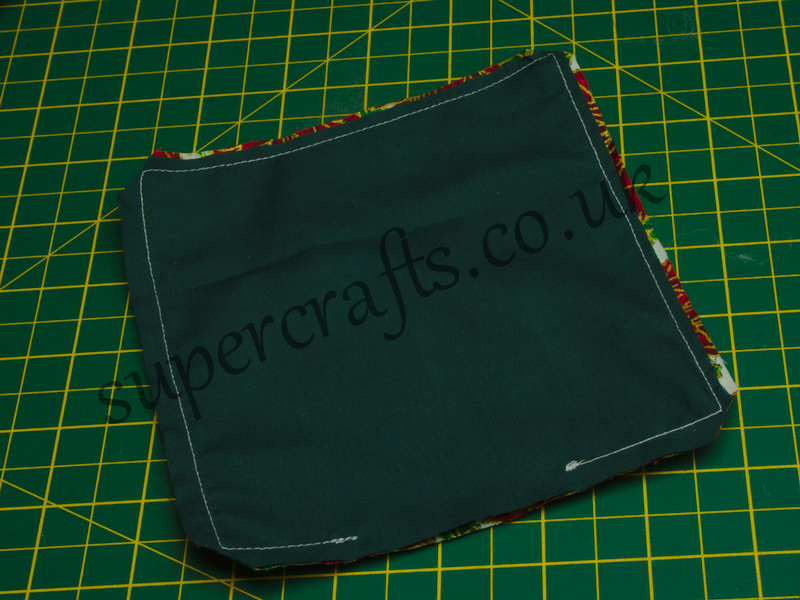
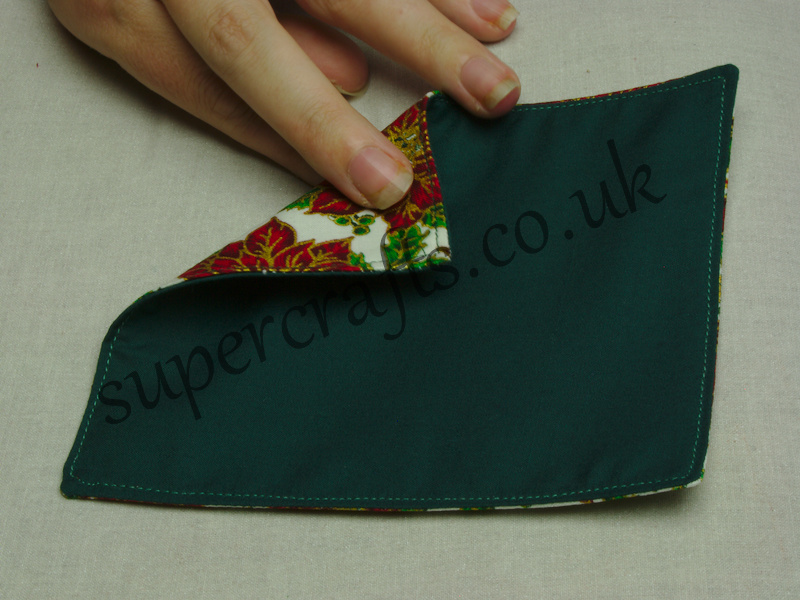
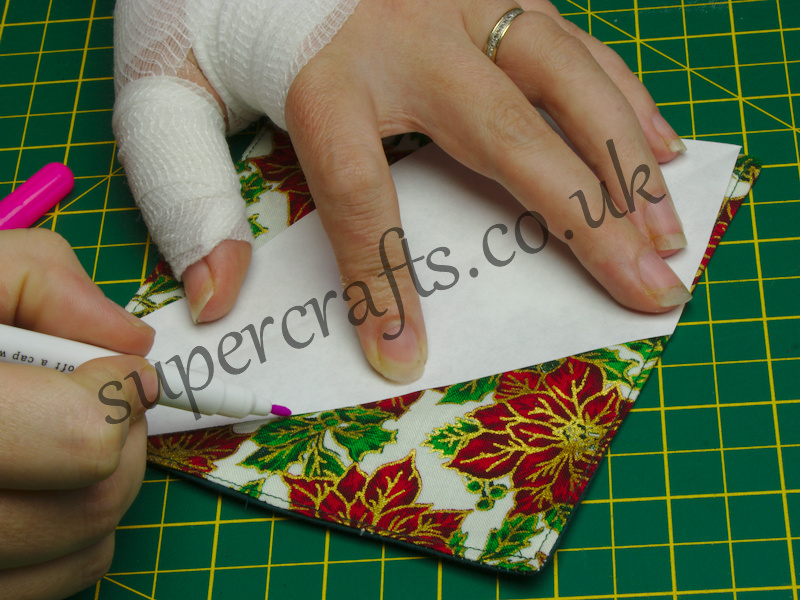
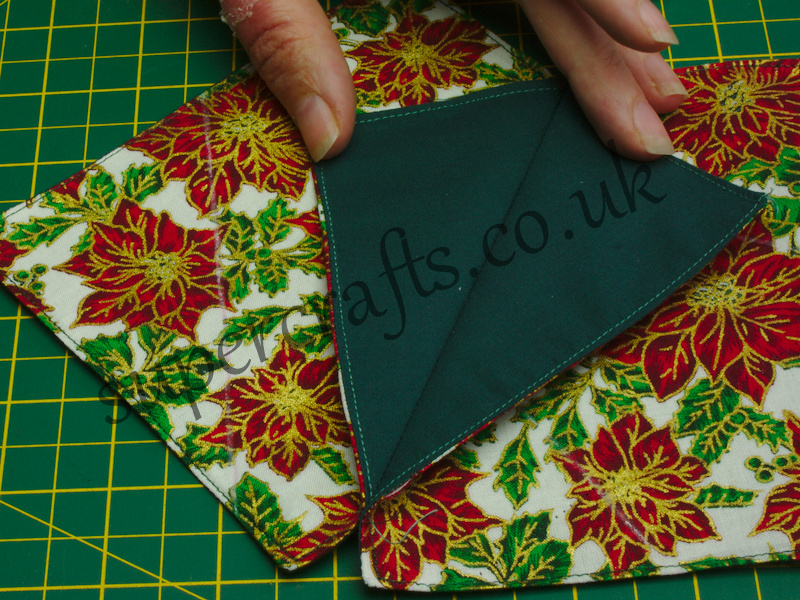
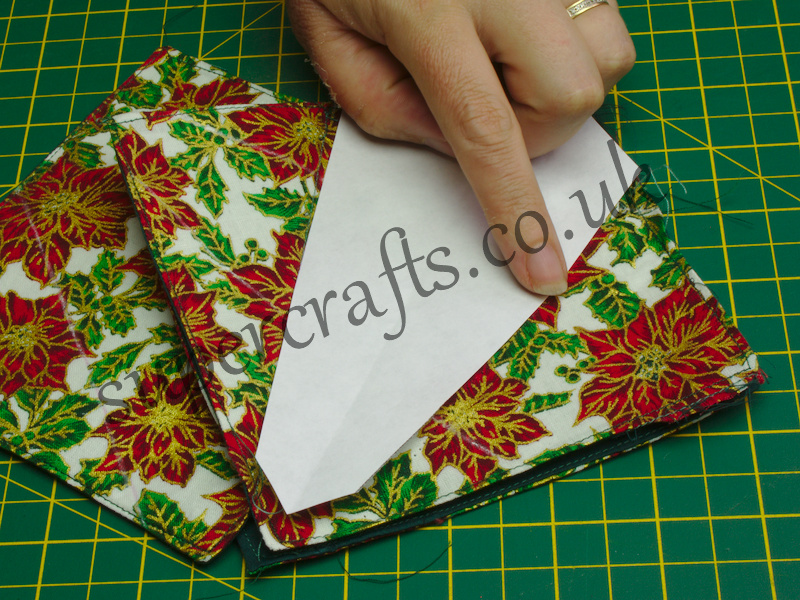
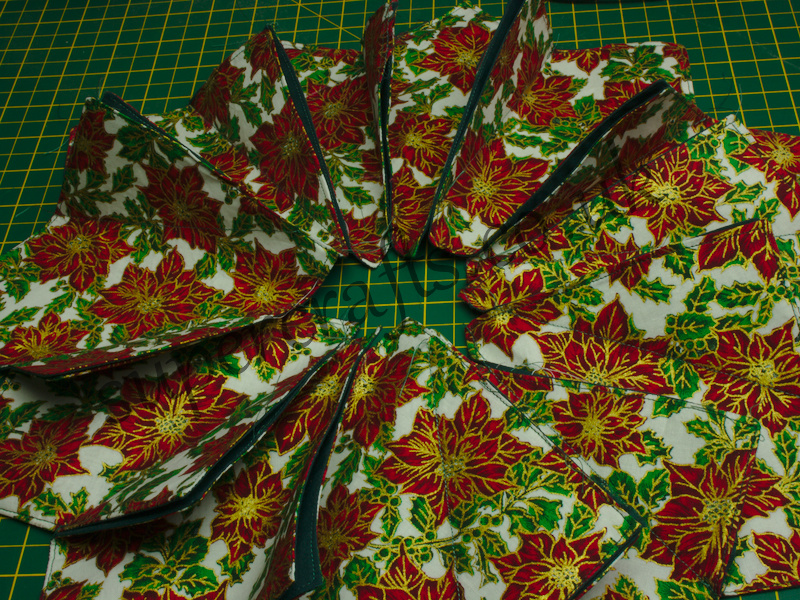
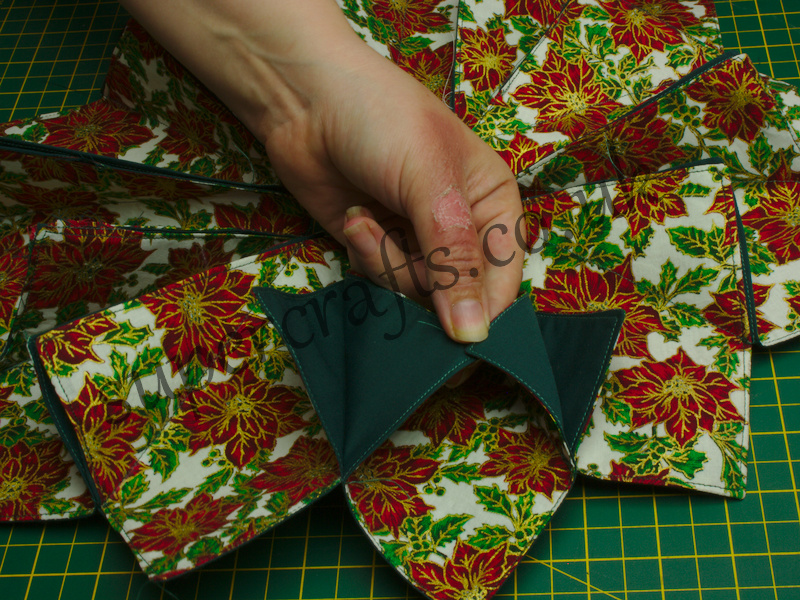
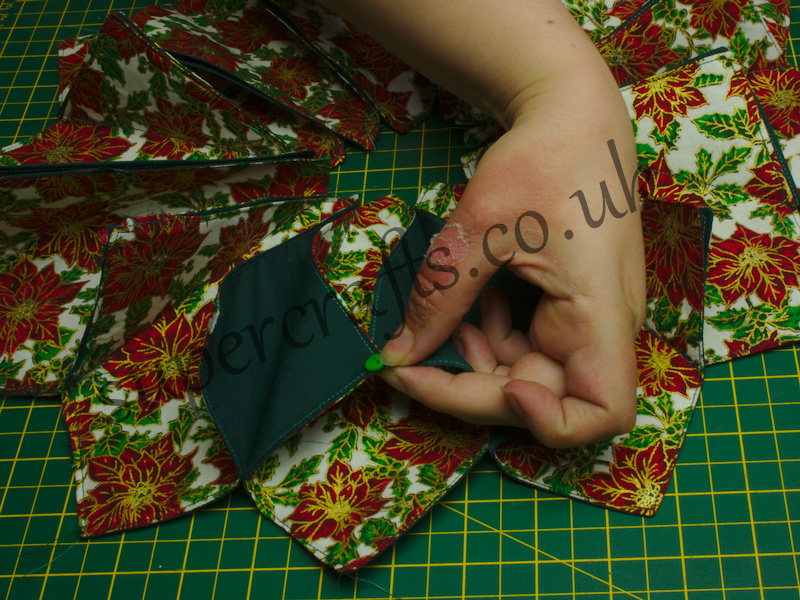
Gather all your materials. There are two different types of button pictured as I hadn’t made up my mind at this point which to use!Cut your squares. As in the above list, you need 12 6 x 6 inch squares from one fabric, and 12 6 x 6 inch squares from the second fabric. At this point you may as well cut out the fusible interfacing too as we’ll need that for the next step. The interfacing should be cut to 5.5 inches and you’ll need 12 pieces.Now you have everything cut out, it’s time to start applying the interfacing. Each piece needs to be ironed to the wrong side of fabric one.Now take all your pieces to the sewing machine. Pair up fabrics one and two. Place each set, right sides facing, on a flat surface and if you need to, pin them together. These are fairly small, so I didn’t bother pinning as it was easy enough to simply line them up and pop them under the sewing machine. Anyway! Sew around all four sides (using a 1/4 inch allowance), leaving a 2 inch gap to turn the fabric right side out. Backstitch at the beginning and end to reinforce the opening.Clip all four corners and remove any loose threads.Turn the squares right side out and press flat. Be sure to push out the corners so they’re nice and crisp! It makes all the difference.To close up the gap, slightly tug either side of it so that the fabric folds in. Once it’s in, top-stitch around the entire square. This closes up the opening and also adds a little something to the overall design.Cut out the template we provide at the top of this page. Using the template, mark each square. The lines you draw now will be used as stitch lines. And no, I didn’t hurt my hand cutting this out! Ha! I’m a clumsy oaf and managed to burn by hand getting a pan off the hob. All fixed now, thankfully!Place two of the fabric squares together (same fabrics facing) and sew down one of the lines you marked.Open up and ly flat, then add another and continue sewing these together until they’re all connected.The final line of sewing will close up the mat and form a circle.Once this is done, we need to join the petals to create little pockets. To do this, bring two petals together and hand sew a button through both layers. Repeat this for the other 11 petals. Pop a candle (or your choice of ornament) in the centre and we’re all done! One of my lovely sister-in-laws gave me this candle a few years ago at Christmas and it smells lush! I love the smell of cinnamon at Christmas.
One thought on “Stunning Christmas Candle Mat Tutorial (with free template)”
What thickness fusible interfacing does this use?
Thank you


What thickness fusible interfacing does this use?
Thank you