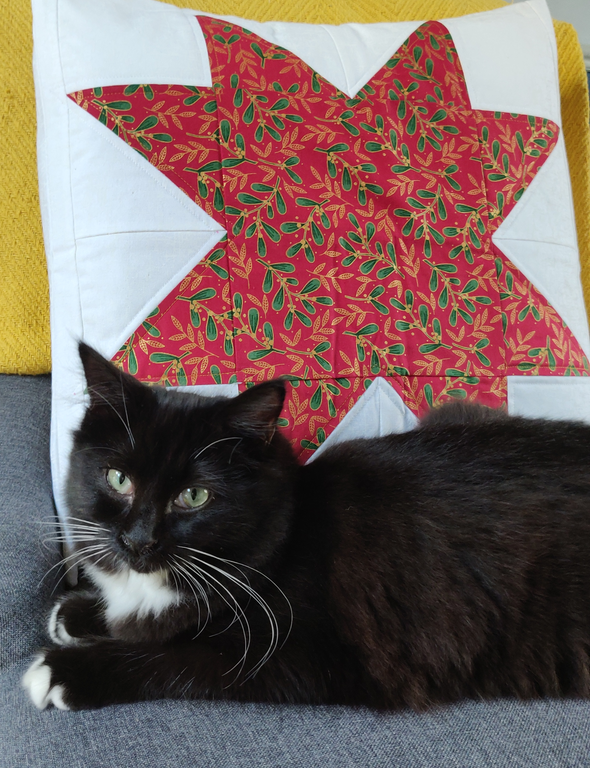
Our first small batch of Christmas fabrics arrive a little while ago now, however I’ve been puttin gall my efforts into our new book. While we have oodles of work at the moment, I couldn’t resist starting the Christmas blog posts. Here’s a tutorial for this wonderful cushion cover, for which I used the glorious 2021 Traditional Holly Metallic Christmas range from Craft Cotton Co. They always have the best Christmas fabrics! I used the white textured blender for the “plain” parts of the cover.
What You’ll Need
Fabric — Christmas Print: I used the Traditional Holly Christmas Fat Quarter Bundle by Craft Cotton Co (you only need one FQ!)
Four 5″ x 5″
One 9.5 x 9.5″
Fabric — White Fabric: I used the Textured Blender in White – Also by Craft Cotton Co. I love both stocking and using their fabrics!
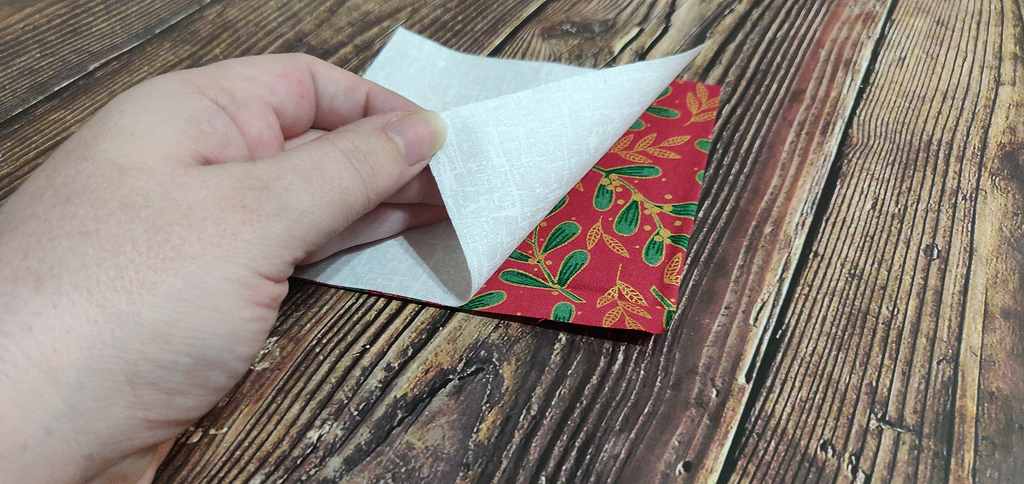
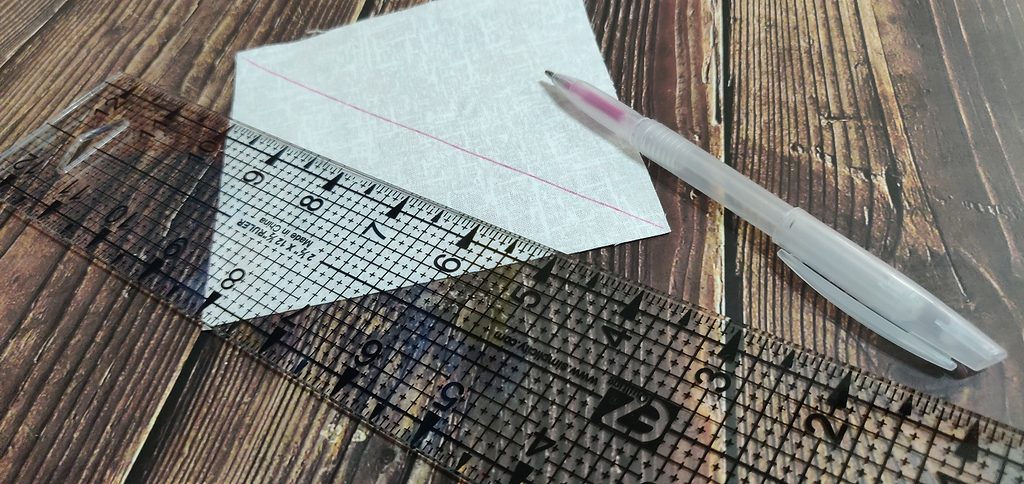
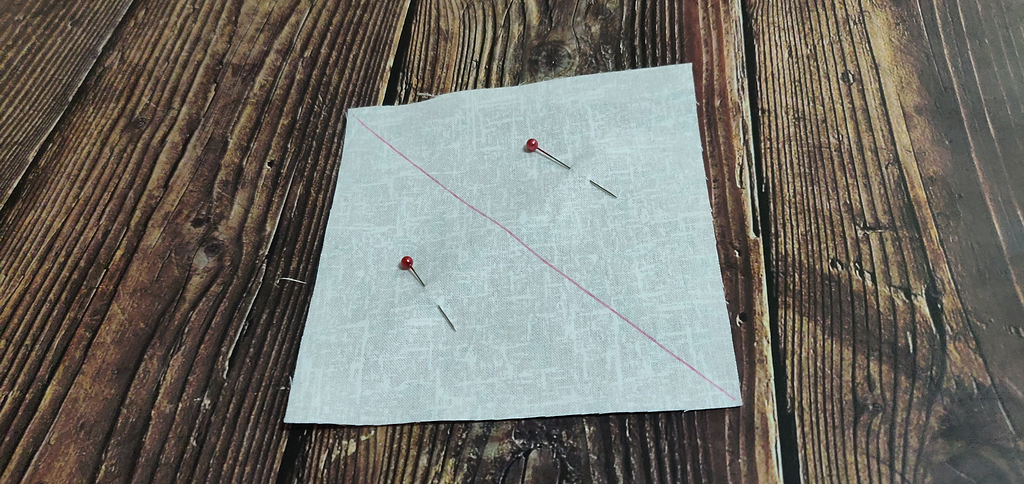
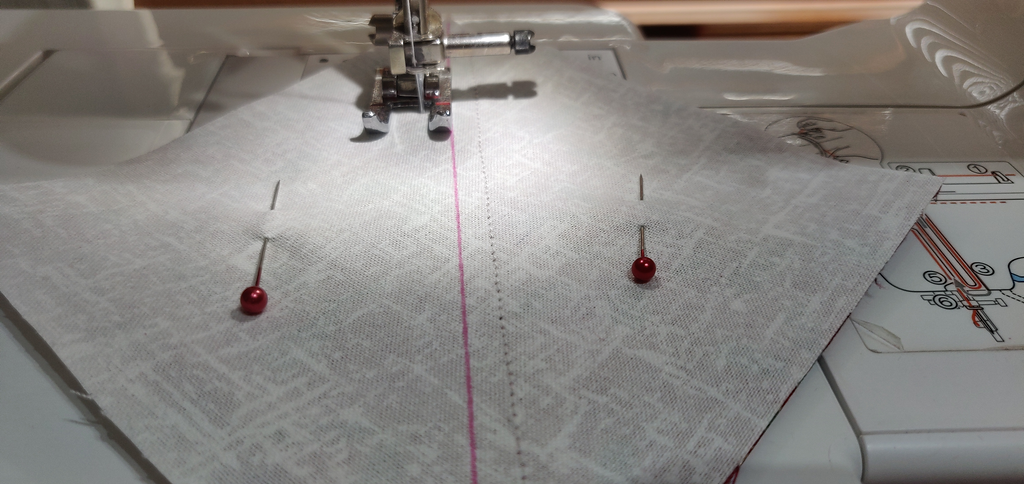
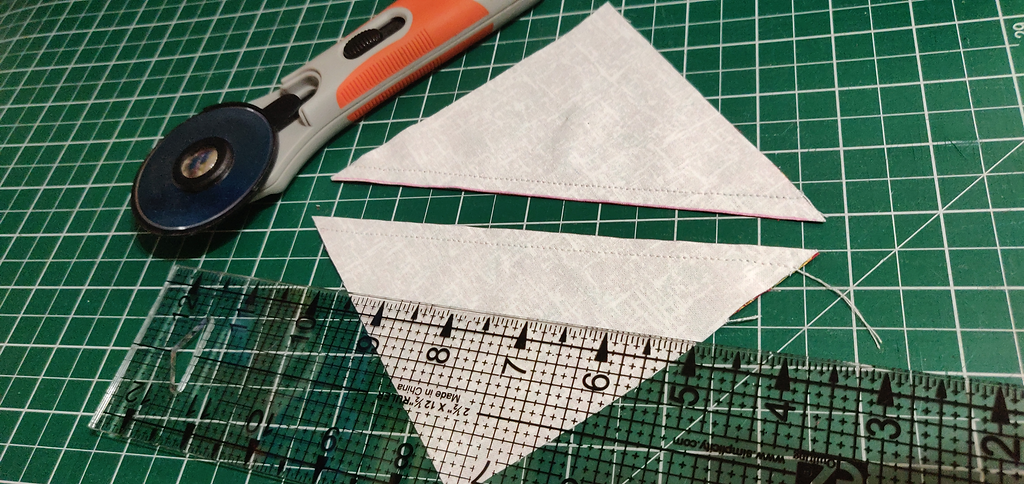
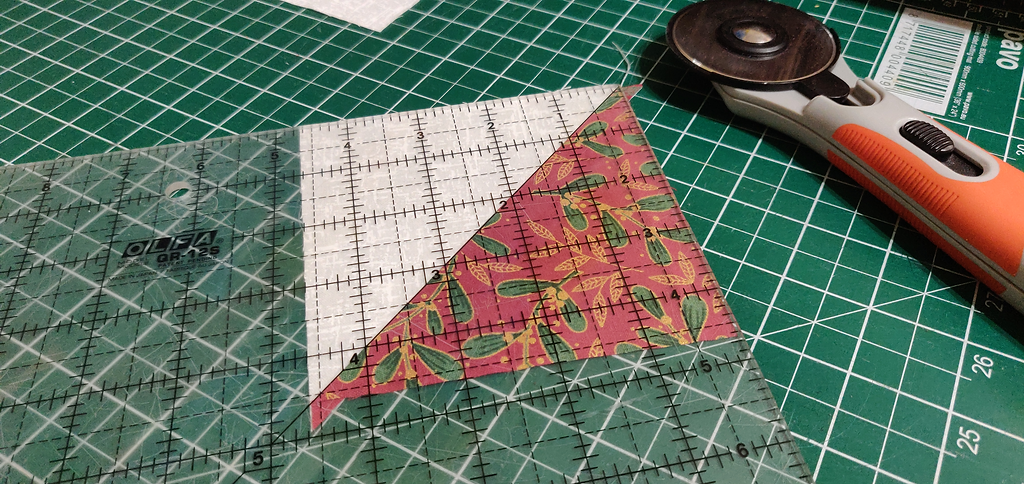
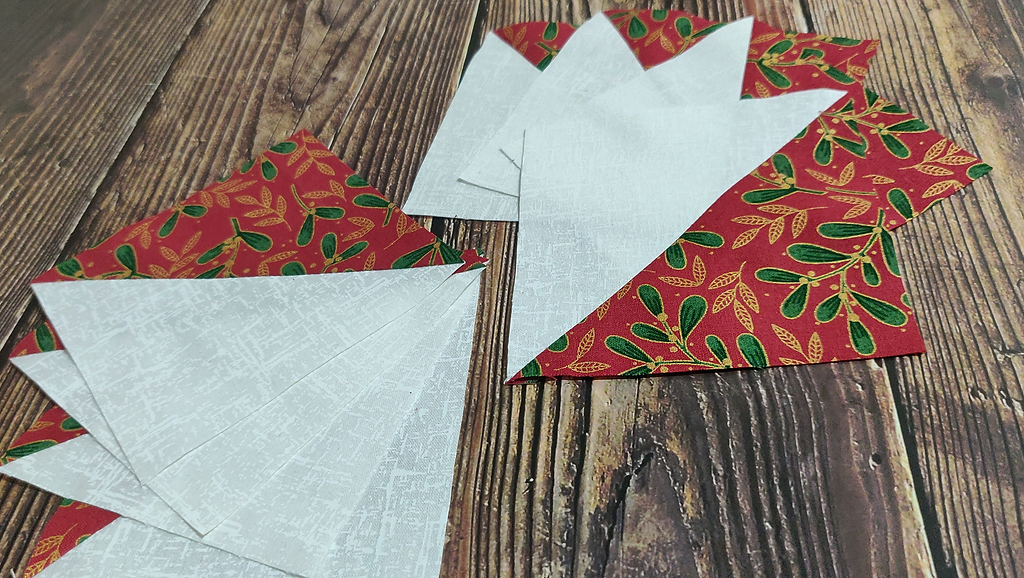
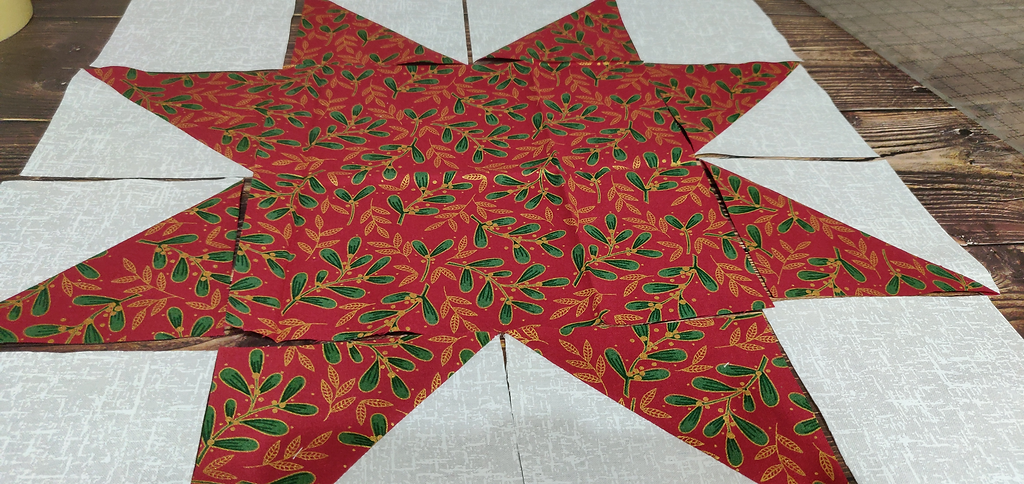
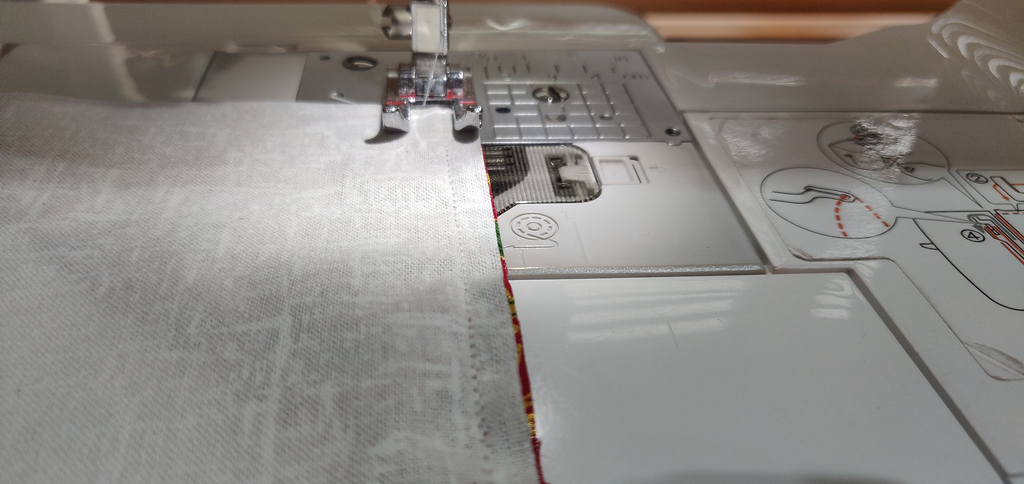
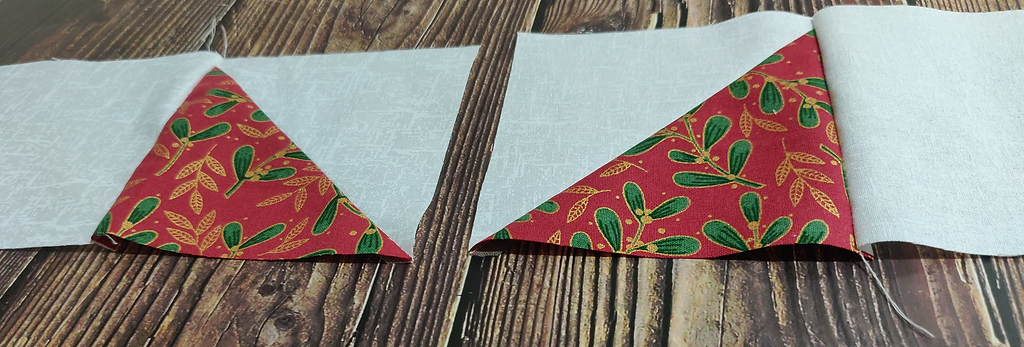
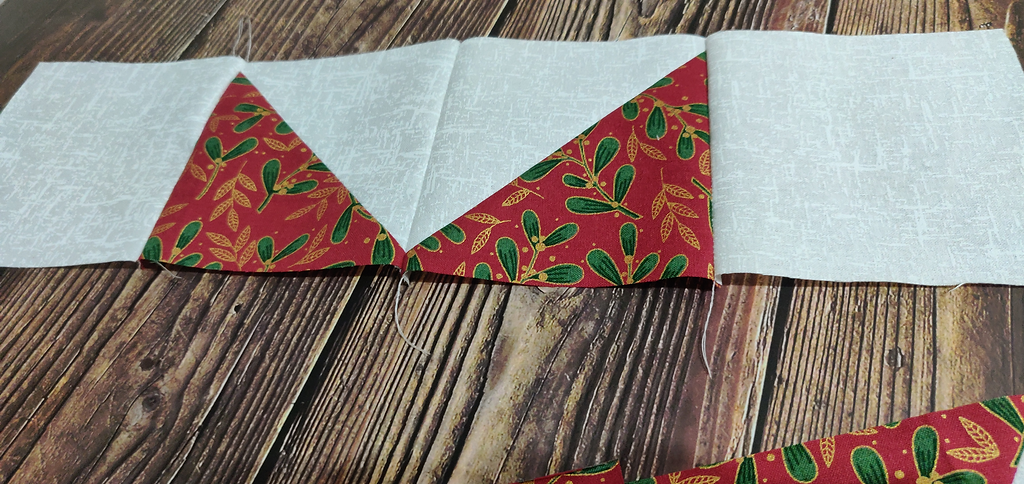
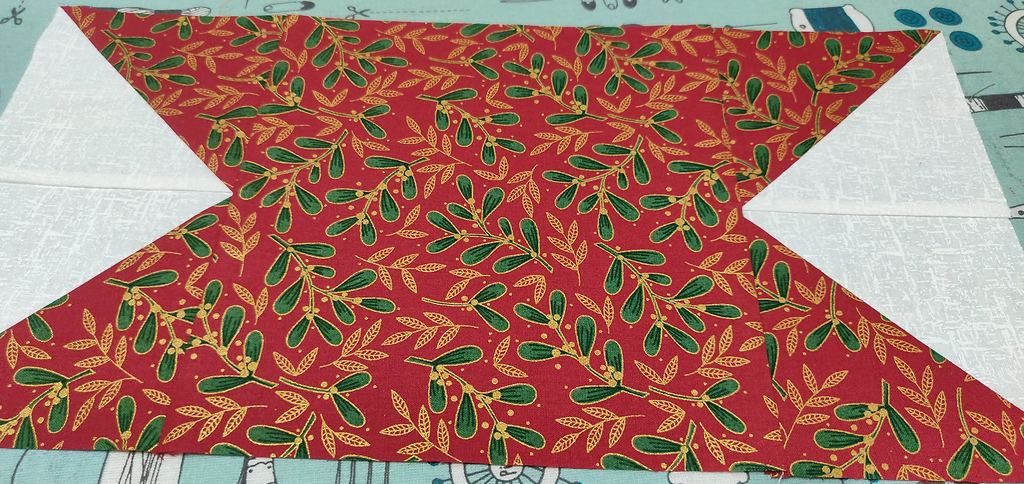
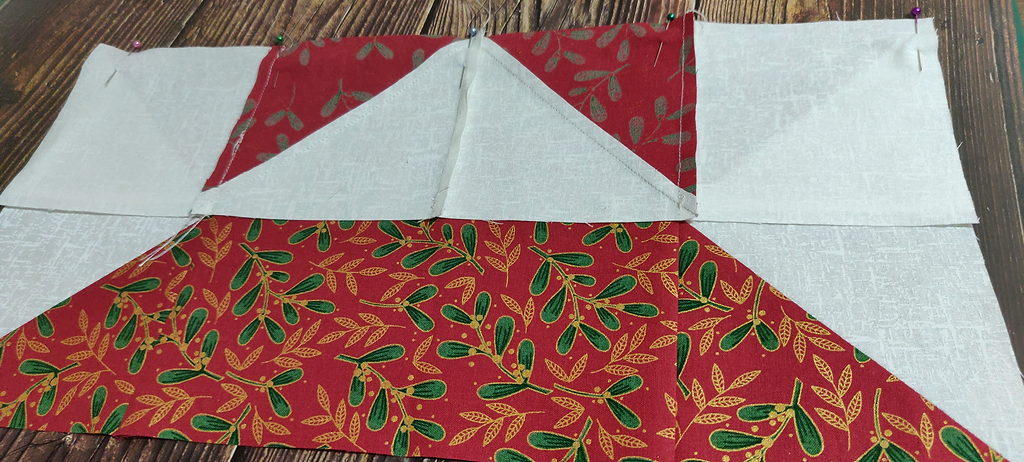
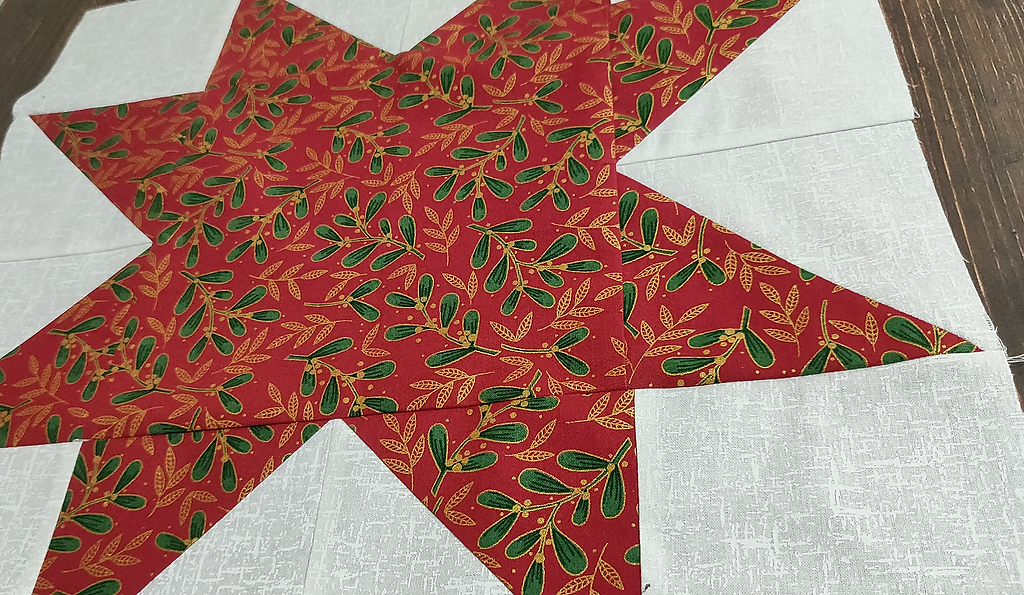
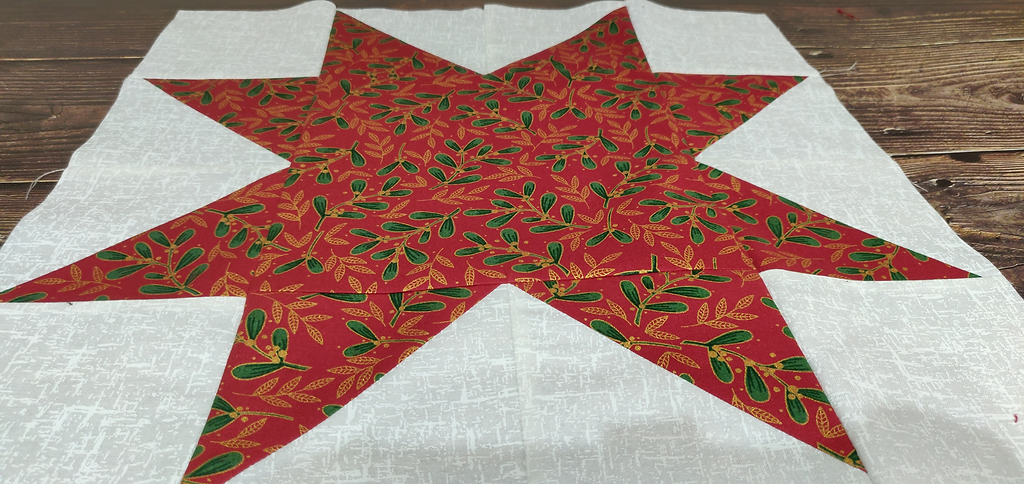
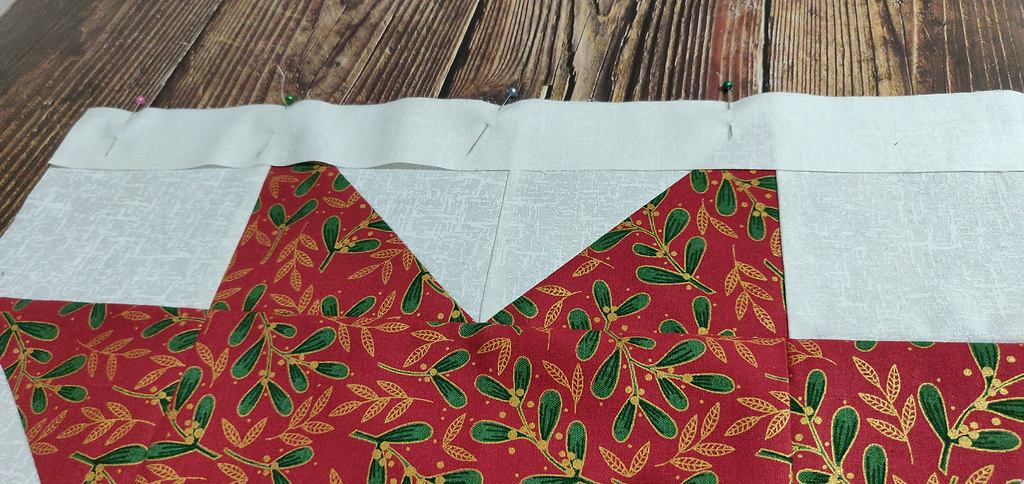
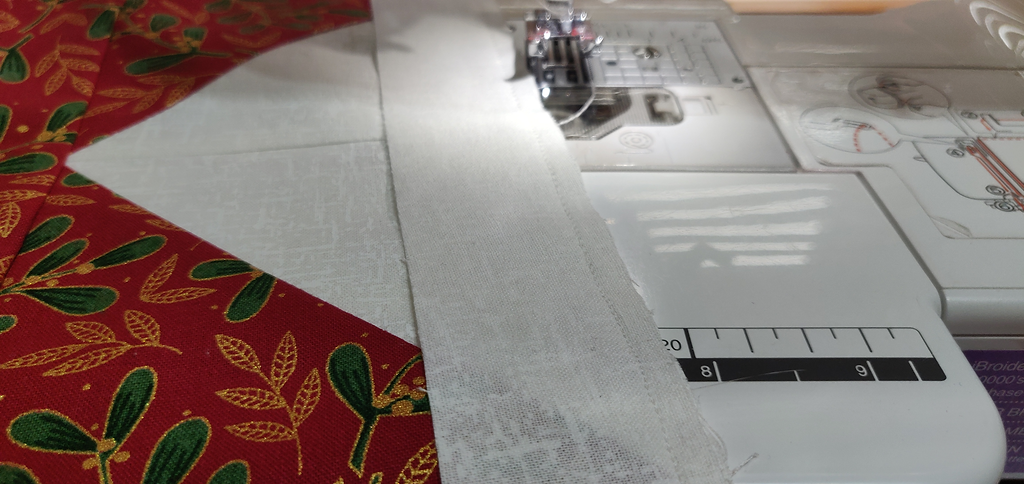
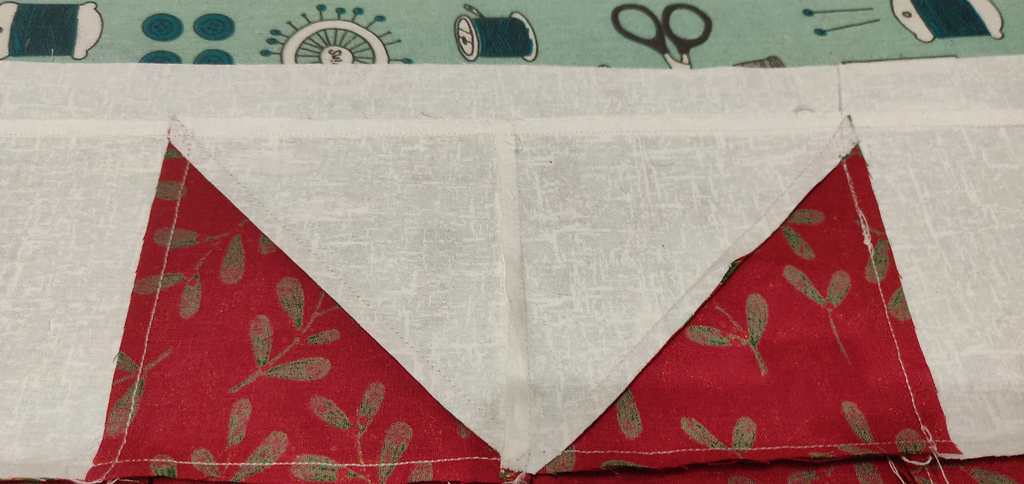
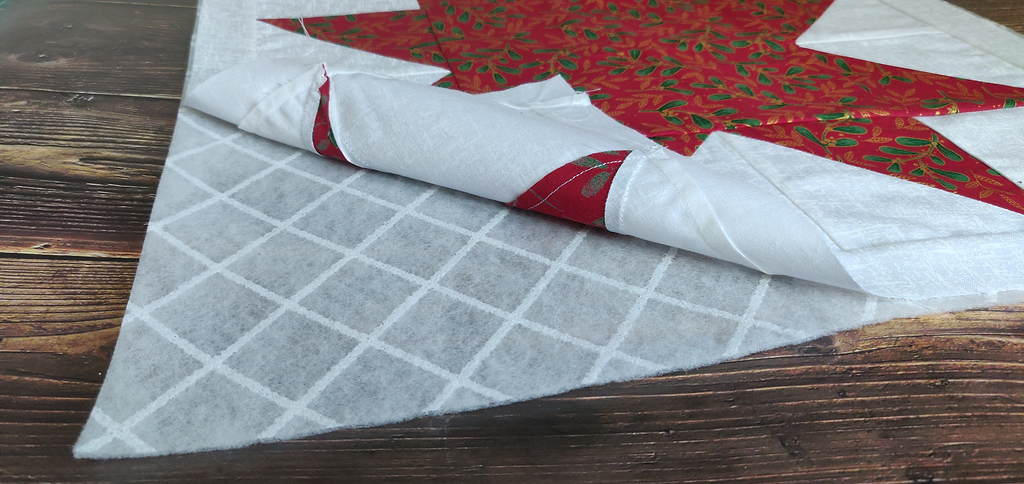
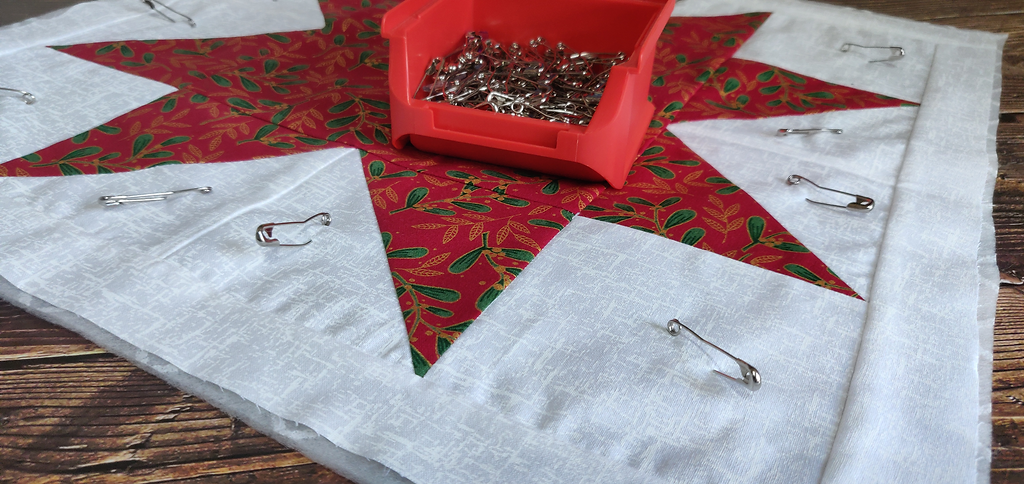
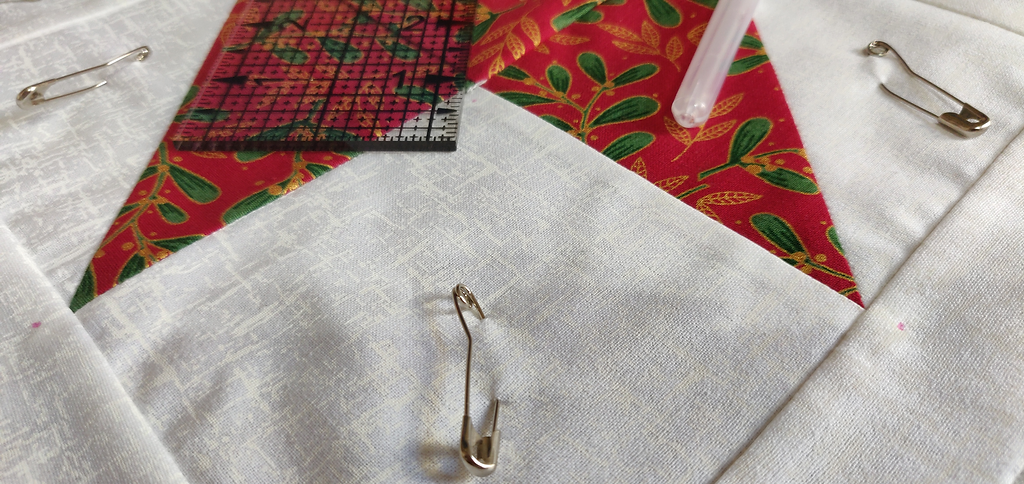
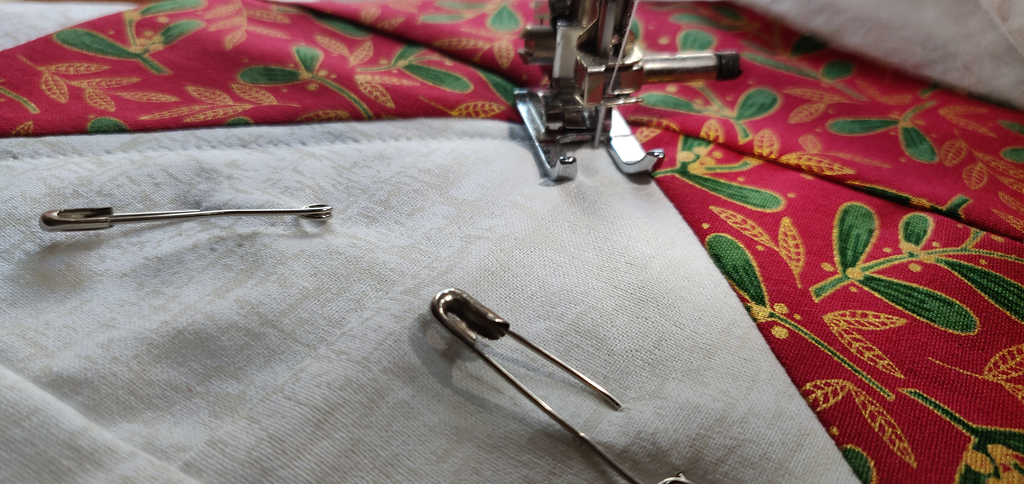
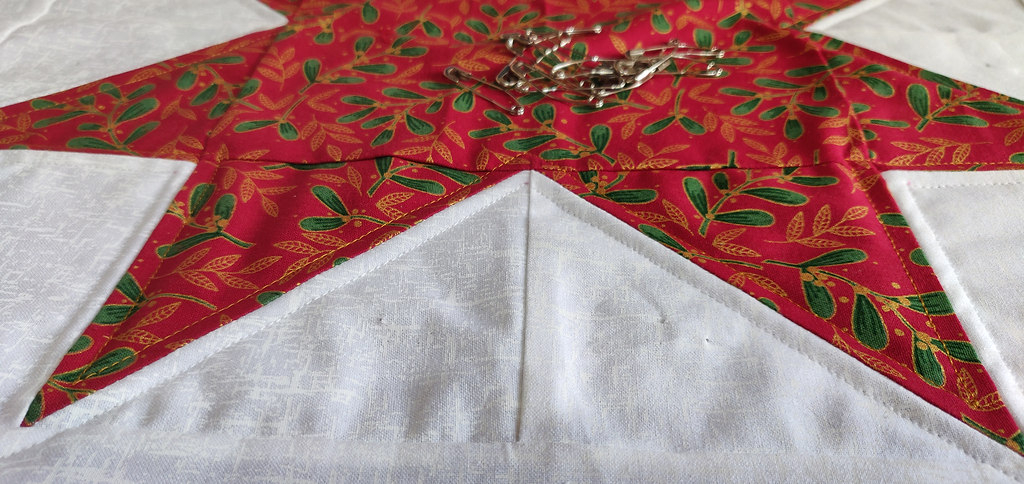
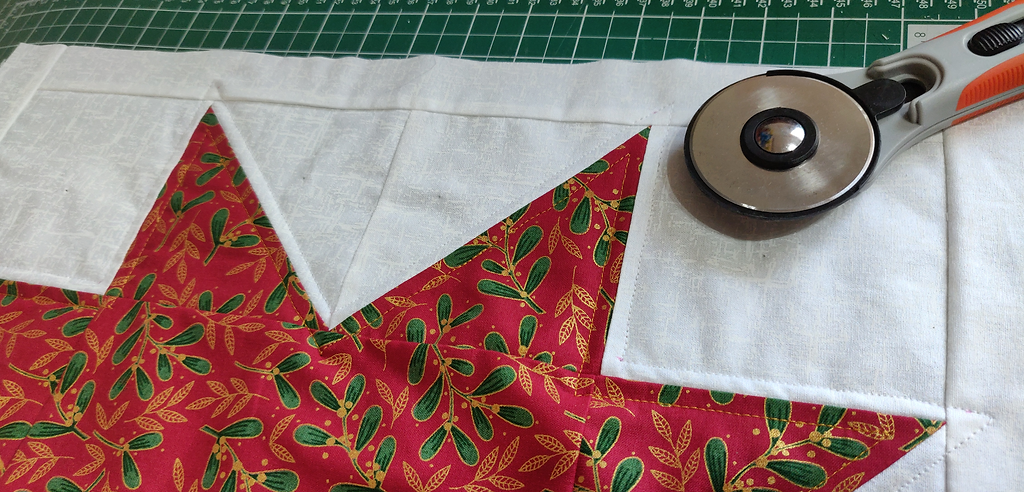
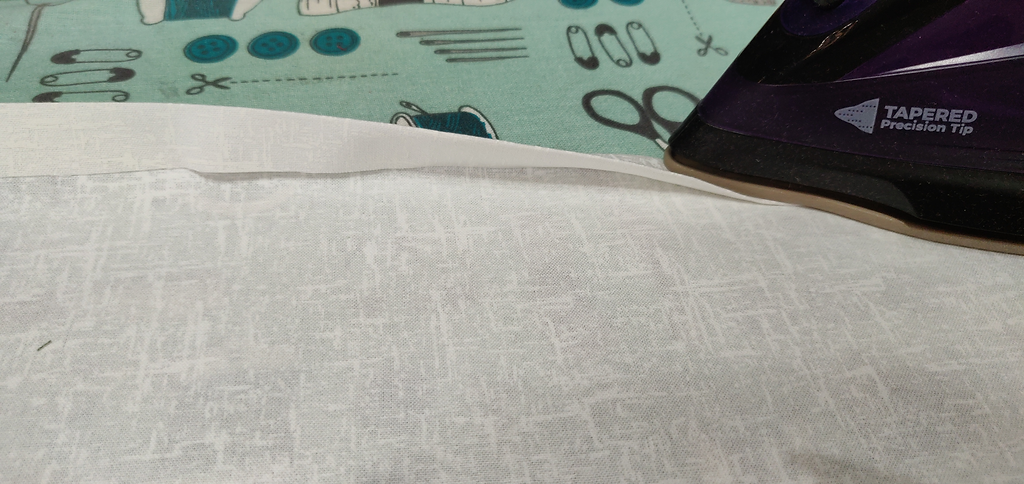
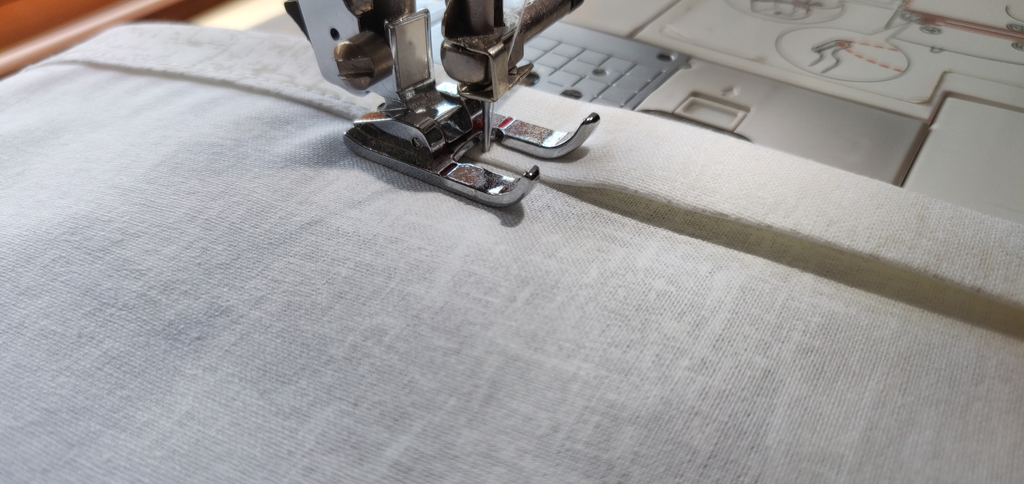
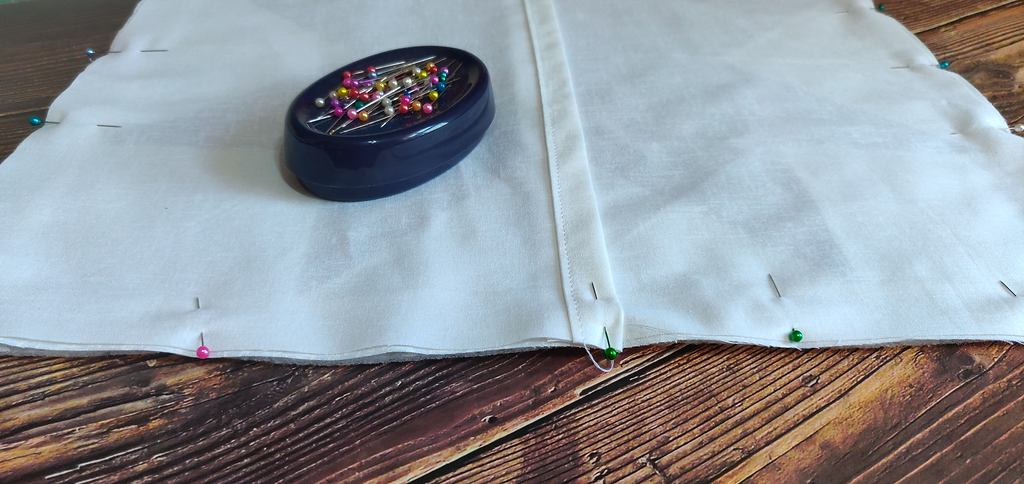
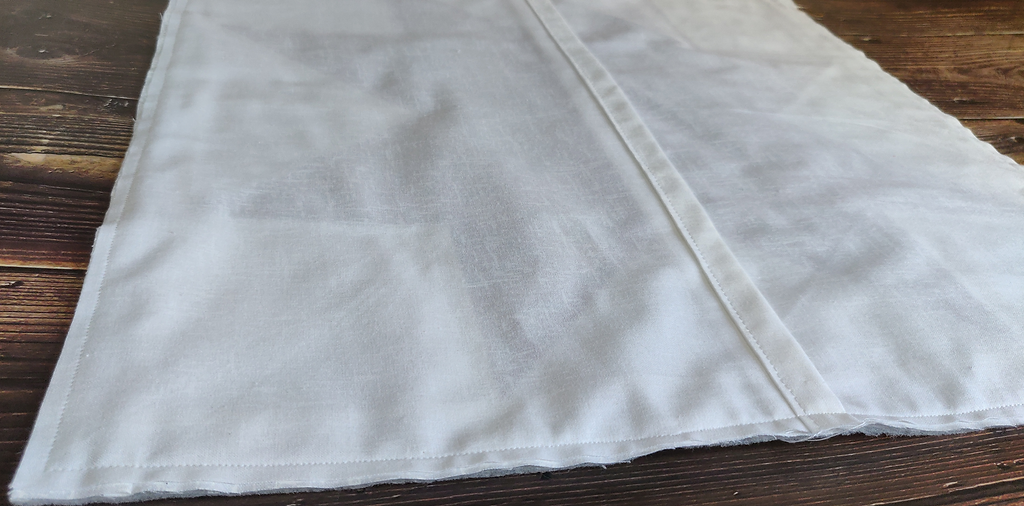
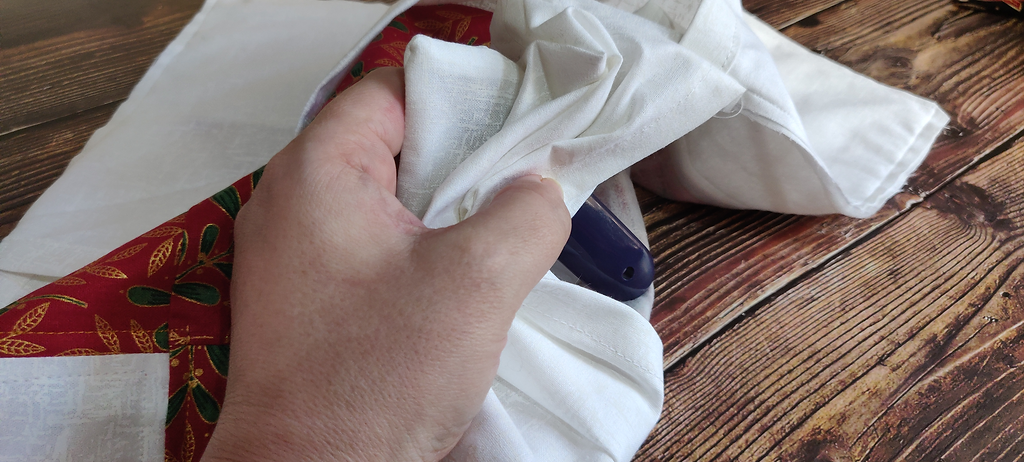
With your fabrics already cut to the above sizes, take one white 5 x 5″ square, and one christmas print 5 x 5″ square and lay them RTS (Right Sides together). Using a heat erasable pen (or your favourite marking tool), draw a line from the top left to the bottom right corner. Pop a pin in either side if you find it easier. Now sew 1/4″ down either side of that marked line. Take your rotary cutter and ruler, and cut down the marked line to separate the two. Then press to set the seam and press that seam towards the darker fabric (your Christmas print). I usually press all my seams open; however, as you’re using a white backing, the print will show through, so in this instance, press to the dark side. Turn over and press from the top. Now place your ruler on top of the block and trim it to 4.5″ x 4.5″ Use the 45 degree diagonal line on your ruler if it has one. Line that up with the seam you created and trim the entire block to an accurate 4.5 x 4.5″ Repeat these steps another three times. You may want to consider stitching everything in advance, and taking it all to your ironing board together. LAYOUT: Lay out your blocks as shown above so that you can see the order in which they need to be stitched together. Take a white 4.5 x 4.5″ block and place it right sides together with one of your completed HSTs. The Christmas print should be bottom left. Pin together, then stitch using a 1/4″ seam allowance. Press to set the seam, then press the seam to the dark side. Now repeat this with a Christmas print bottom right… then another 4.5 x 4.5″ white square. With your first row complete, using the same method, go ahead and stitch the bottom row together in the orientation shown in the layout image. Remember the pressing process. Sew each set together using a 1/4″ seam allowance. I love this fabric, so wanted to retain the print whole in the middle. This means we need to construct the sides of the centre first. Take two HSTs and sew them together in this orientation for the left side. Press to set the seam… bored of reading this yet? It’s really important to always press your seams, and you’ll be left with a much better end product if you do this. Repeat in this orientation for the right side, then sew the left and right sides to that 9.5″ x 9.5″ piece of glorious poinsettia! Line up the left and right seams of the top row with the left and right seams of your centre. Pin. Stitch using a 1/4″ seam. Repeat to add the bottom row. Once your last seam is pressed, turn the fabric over and press from the top. See how flat that is! Take one of your 1.5 x 16.5″ strips and place it right sides together against the top edge of your completed panel. Pin. Stitch, again using a 1/4″ seam allowance. Repeat this on the bottom of the panel. Now add your 1.5 x 18.5″ strips to the left and right in the same way. As there seams are all white, go ahead and press to set the seam, then press that seam OPEN to reduce bulk. Turn the cushion front over and press from the top. Place the panel right side up on top of your wadding. Pin through the two layers.Using the heat erasable marker, measure 1/4″ out from each inside point, and 1/2″ out from each outer point. These are the points you’ll quilt to.Start at an inner point and stitch around the entire star.I then changed my thread to one that would look nice on the star itself and repeated the process. Once that’s done, go ahead and remove all your pins.Trim down the entire panel to 18.5″ then set aside. Just to note, I was making this for a 20″ pillow form. I prefer to make the cushion cover a couple of inches smaller as it makes the finished cushion a little more plump. If you prefer it the other way, just insert an 18″ pillow form. Now let’s add the back! We’re making an envelope back (because I detest adding zips!) Take each of your 18.5 x 13″ pieces of white fabric and fold over one of the longer edges by half an inch. Press, then fold over another half inch and press again. From the underside (so you can see the edge) stitch close to the inside edge. Repeat on the other piece. Now lay your front panel right side up and place the two backing pieces right side down on top of it. They will overlap in the centre. The eagle eyed amongst you will probably see that mine doesn’t overlap by much. I calculated the measurements wrong but the ones listed above and in these instructions are correct. It will overlap by a few inches. This is needed to stop the back of the cushion ballooning open when the cushion is inserted. Pin all the way around to keep all the layers in place. Now sew a 1/4″ seam all the way around the project, remembering to backstitch at the beginning and end. Clip the corners to reduce bulk Turn the cushion cover right side out and poke out the corners (carefully!)