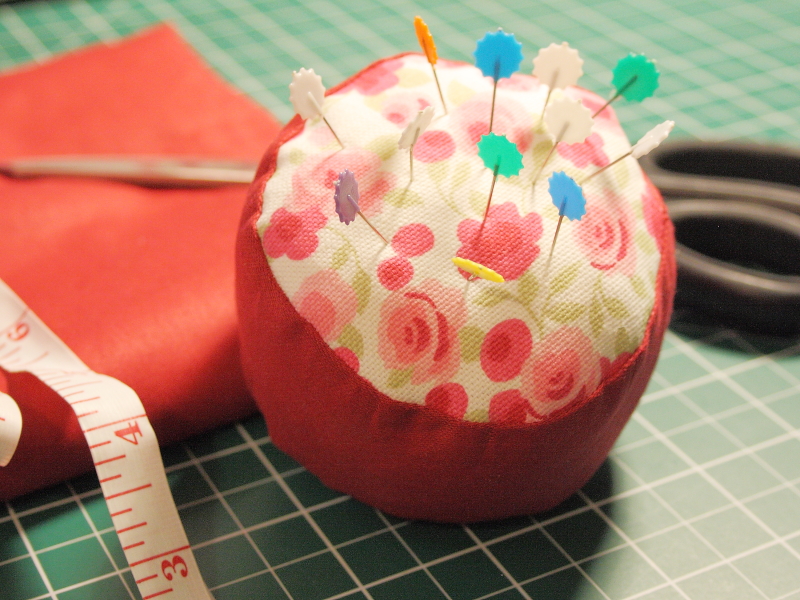
We’ve been creating a few projects to add to the newly introduced Sew Hobby Components Blog. The first of which is this lovely little (simple) pin cushion. Very little fabric is used in this project, so you can use up some scraps you have laying around.
Happy Sewing!
What You’ll Need
Fabric (we used three different fabrics, hence the name!)
First, either download the 3-colour-pincushion-printable-pattern or work out how big you need to cut the pieces. To work out how long to make the strip, you’ll need to times the diameter of your circle (in cm) by pi (3.14159).
Gather together all the supplies listed above.Cut out the pattern pieces and then either use an air soluble marker to draw the pieces onto the chosen fabric, or pin them in place and cut one strip and two circles.With right sides together, pin one of the circles to the band.You should be left with a slight overhang. This is normal and we’ll cover that shortly.Sew about 1/2cm from the edge all the way around and always remember to back-stitch your first and last stitches. This adds stability.Where you had the overhang, simply fold over the fabric by about 1cm so that what will be the visible side of your pincushion forms a neat line. In the image, it’s the inside piece of fabric that needs folding towards you. This forms three layers, which you can now pin together to keep it in place.As with the first circle, now pin the second to the other end of the band, again, right sides together.Sew this in place about 1/2cm away from the edge all the way around.You should be left with something like the image above. You can now remove the pin and turn the fabric out the correct way. Be careful not to pull too hard. That being said, if you back-stitched all your first and last stitches, it should be fairly robust, but better safe than sorry.Almost there, honest! Now stuff your cushion with a much stuffing as you can fit in there. If you can fit more, it needs more!Last step! Using any stitch you like, sew up the opening you just used to turn out the cushion and stuff it. This is best done by hand (in our opinion!).Voila! Your handmade pin cushion is ready to use!