Hello, lovely readers. I’m finally getting around to quilt block 10 in the series. Everything keeps getting in the way of this, but lesson learned; in future, create the entire series of content before releasing! We have work going on here at the moment so I’m trying to create content in the quiet moments, but bare with me.
Let’s get to this then.
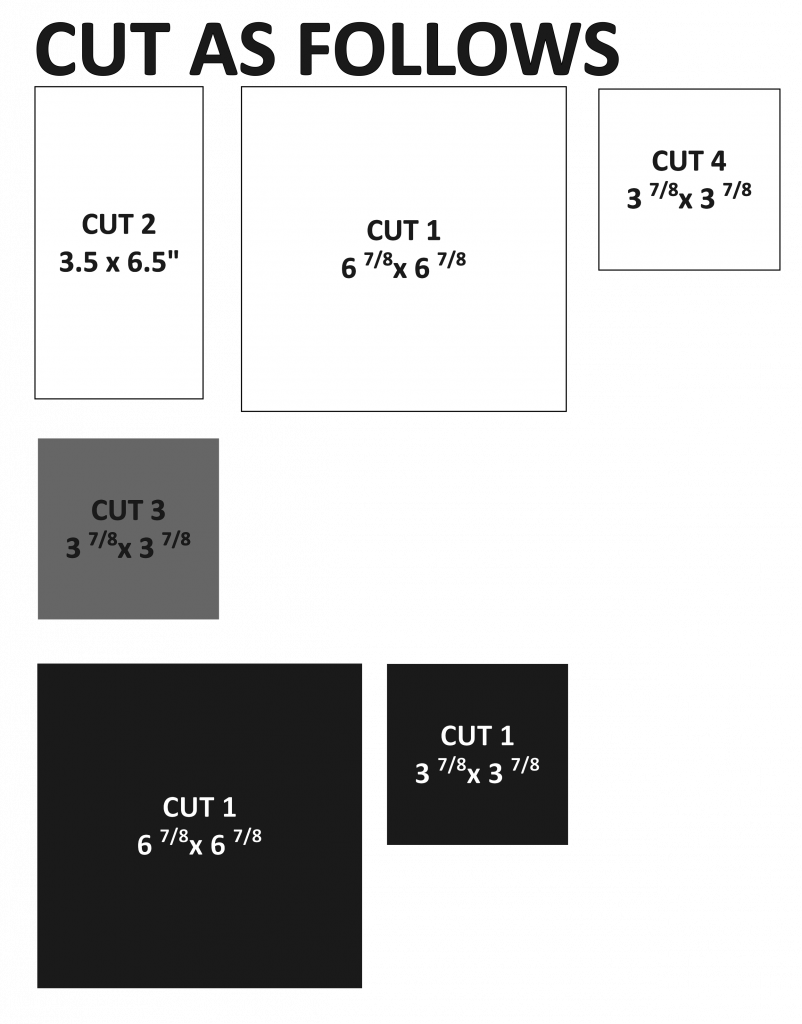
As promised, here’s an image showing the fabric cuts. This will hopefully point out anything where I wasn’t too clear in the video.
So, with that out of the way – sit back and enjoy the video on Youtube (linked at the bottom of this page) and if you have any questions, please feel free to ask. I am posting the Youtube transcript below incase someone from another country wishes to translate.
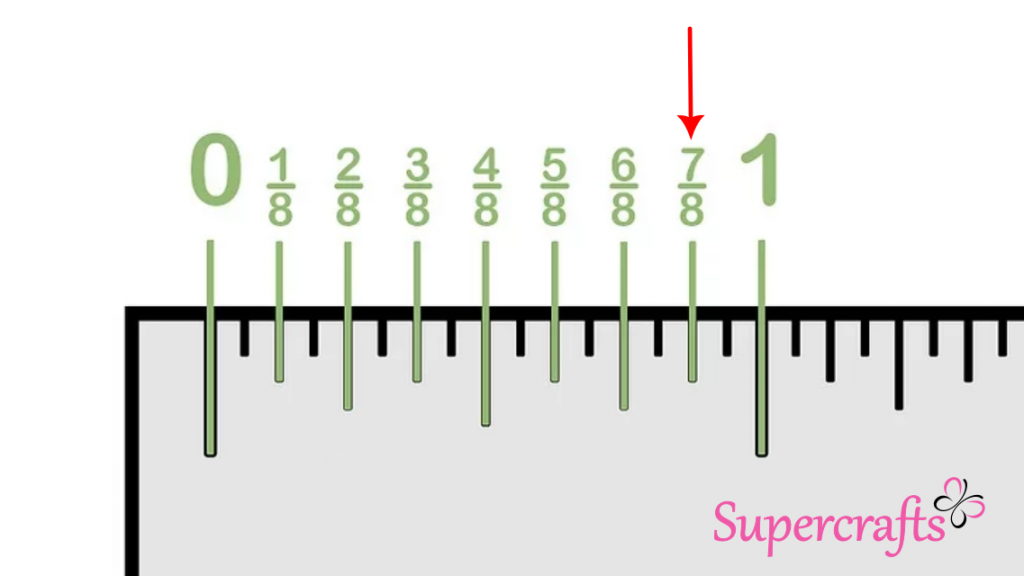
Oh! One more thing as it seems to trip some people up… working out 7/8ths on a ruler! Here’s a quick image that should explain it properly.
Youtube Transcript
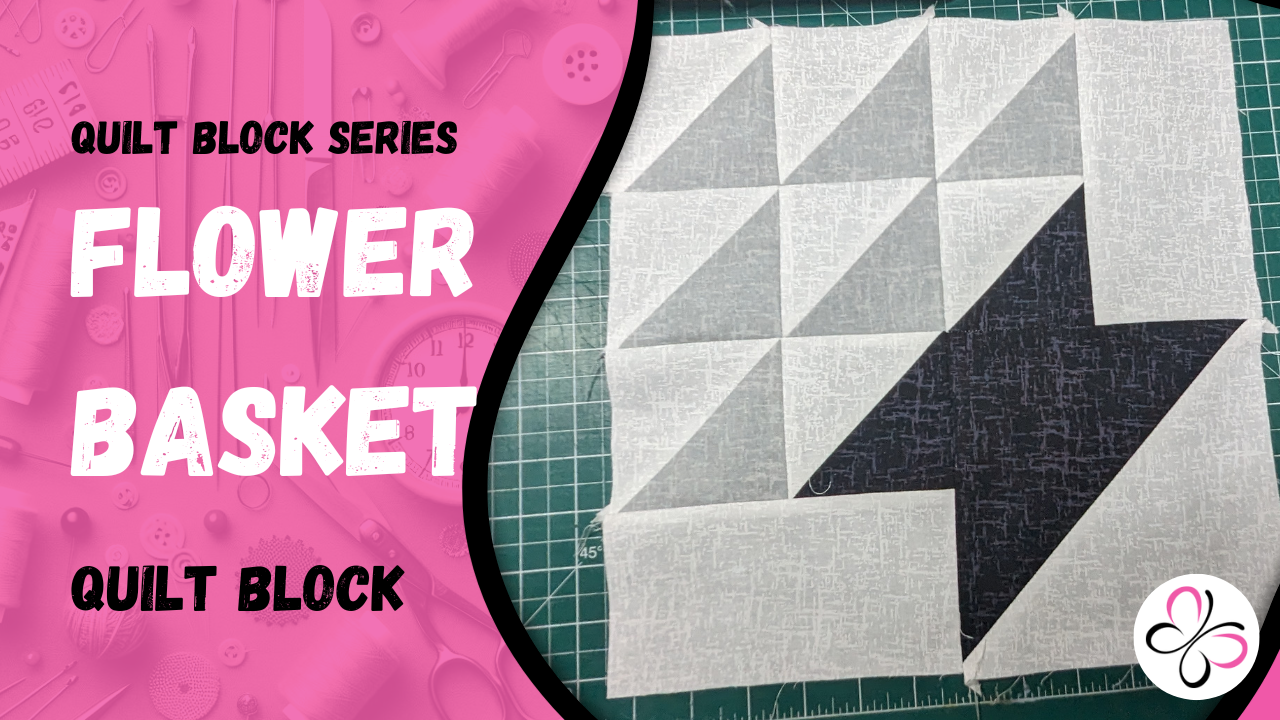
Hi everyone! This week we’re going to be sewing up a lovely flower basket block as part of the series. This one is much simpler than it looks and it actually incorporates a few things you’ve learnt on this sew-a-long journey.
You can use as little as three fabrics in this one, just as I have, or you can swap out each of the flower sections, which are all grey on mine, for different colours.
If you’re using just the three, the cuts you need to make are, from the white, two 3.5 by 6.5 inch rectangles. One 6 and 7/8th of an inch square, this one needs to be cut on the bias. So just pop a ruler on it from one corner to the other and cut down it. You’ll also need four 3 and 7/8th of an inch squares, and all of those also need to be cut on the bias. So just repeat the process.
From the grey you need three 3 and 7/8th of an inch squares, ad again, these all need to be cut on the bias.
And finally, from the black, you need one 3 and 7/8th of an inch square, cut on the bias, and a 6 and 7/8th of an inch square, also cut on the bias.
I’ll add a link to our blog, where I’ll put an image showing the cuts to make it a little easier if I’ve not been clear enough.
So let’s now lay all these pieces out in the order they’re going to be sewn together. I’ve the information on a little post-it, but feel free to print off the image from the blog, or just have it handy nearby. As you lay these out, it will look like they’re not going to go together properly, but bare in mind there is a seam allowance included here, so once they’re actually sewn up, anything that looks like excess fabric will disappear and it should come together nicely.
As with the other blocks, assume the seams are all pressed open. This is my preference, but it’s up to you how you want to do that. I’ll be sewing using a ¼ inch seam as usual.
There will be two triangles left over from this. Save them. They can be stitched together to form a smaller block, and if you enjoy making this one and go on to make more, you can put together a second smaller quilt.
We’re going to start with the bottom right corner. Let me just move this up so you can see. We’ll flip the white patch over on top of the black one, so that their right sides are facing. Let me move the camera up a second… sew down that edge.
Let’s slide these over and bring in the ironing mat. This thing is great for small projects like this. Hopefully you can see this… Press with a warm iron to set the seam…….. Then open that up and carefully open up the seam and run the iron up it. Be really careful, especially if you have sensitive finger tips. Flip that over, and give it a run over from the correct side with the iron.
We can now move on to the top right area. Slide the rectangle out of the way. Flip the black triangle over on top of the white triangle… and sew as before across that long edge.
Press the seam open again, then run the iron over the top.
Repeat with the grey and white patch.
Now, to reduce the time and the stopping and starting, you can chain stitch the triangles together.
Just flip the correct ones on top of one another and stitch a little further than you need off the edge, lift the foot and pop in another until all your triangles are stitched up.
You’ll be left with a long chain of triangles.
Just snip the thread that’s between them to separate them.
Now you can batch press those seams. Again, just be careful of your fingers. If they are sensitive, you can always press to set then pile them up and flip over the stack before pressing them open so they’ve cooled a little. Or simply leave them to cool before you press open.
You should end up with two black and white patches and…. six white and grey patches.
So getting back to the top right section, you’ll need that rectangle and the two smaller squares. Lay them out in the correct orientation. Always double check the orientation with the image provided, or with your own sketch to ensure you’re sewing the patches together properly.
Now flip the bottom one on top of the other.
You need to sew across that bottom seam.
Press.
Again, orient that correctly. Now flip the white rectangle on top, with right sides together and sew down that side where they join.
Press again…
Then press from the top, and that’s the top right section complete.
You can now see how those two sections will come together to form the entire right side.
In fact, let’s connect them. So check the orientation then flip the bottom one on top of the other with right sides facing again, and sew across that bottom.
Press.
Brilliant. Now we can move on to the left side.
Lay down the bottom left rectangle, and orient the two adjoining patches correctly above it.
Flip the black and white patch over onto the other one, right sides together, and sew down that right hand side.
Then press.
Reorient.
Then flip the bottom rectangle up onto the top section and sew across the bottom.
Do the pressy thing again.
So that’s the bottom left sorted. Set that aside and we’ll finish up the top left.
Orient the patches.
Flip and stitch…
Repeat with the others.
Press both.
Orient again.
Flip the bottom over onto the top section and sew across the bottom. The middle seams on both need to be matched up. Pop in a pin if you need to.
Orient both left patches.
Flip the bottom onto the top.
Sew across that bottom edge.
Press. There’s been a lot of pressing today hasn’t there!! Promise, we’re nearly done.
Finally, orient the left and right sides in front of you, flip the right on top of the left, and sew down the right hand side. Again, where any of the seams join, they need to be matched up, so just pop in some pins on the seam line to stop them shifting.
Sew.
And press.
Run your iron over the right side of the block and there we have it!
As you may or may not know, depending on if you’ve seen the other blocks, I’m trying to stick to a few simple colours for this series. However, can you image making a lot of these blocks up using a simple background, browns for the basket and lots of pretty colours for the flowers? I may have to revisit this at some point in the future. If it’s something you’d like to see, please do let me know in the comments.
Thanks for watching and if you haven’t already, please consider liking the video and subscribing to our channel. It would be much appreciated, and let’s me know what kind of videos you lovely people are after.
Until next time, Happy Sewing!
Youtube Video